The Corner Cottage: How We Reworked the Floor Plan & The Master Suite


About this time last year we were putting the finishing touches on the Corner Cottage. If you’re not familiar with this historic renovation, read about the history and view the gallery here and then head to the blog to read about the exterior changes. One of the first steps in this project was to rework the floor plan of the first story to include a private master suite.

Reworking the Floor Plan
Before – No Master Suite
Before we started work on the house, I knew three things.
- The laundry had to be brought out of the basement and into the house.
- I wanted to rebuild the original wall between the living room and dining room that had been removed by the previous homeowners.
- It was essential to create a private master suite on the first floor, which meant I would also need to create a new powder room for guests.
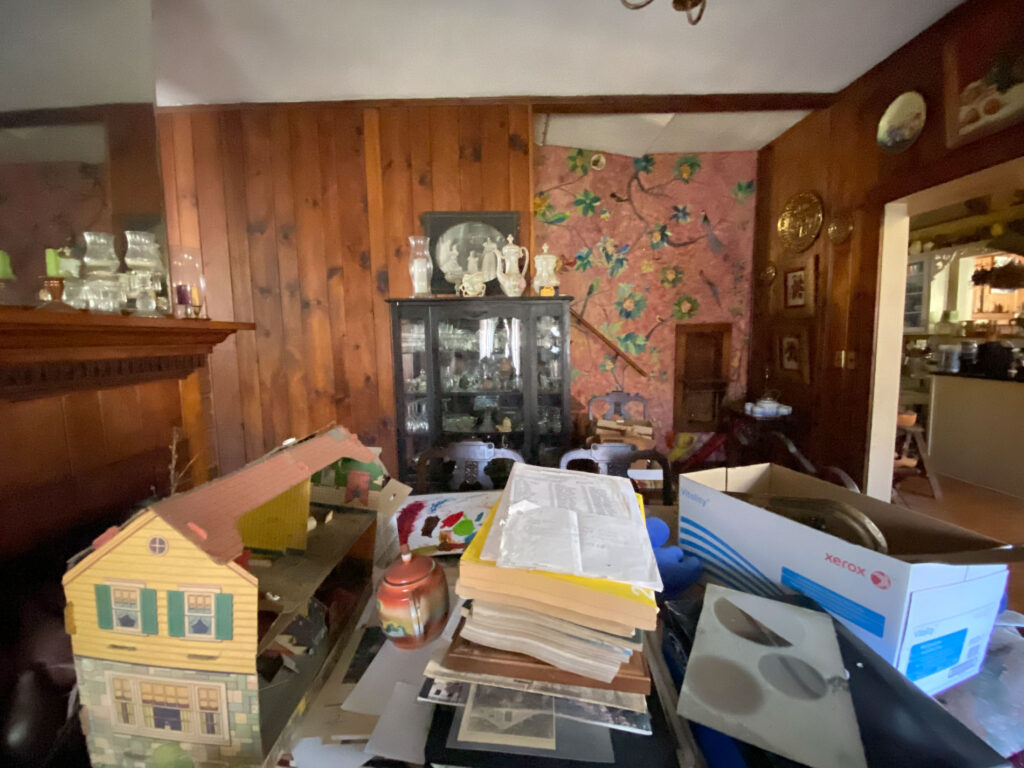
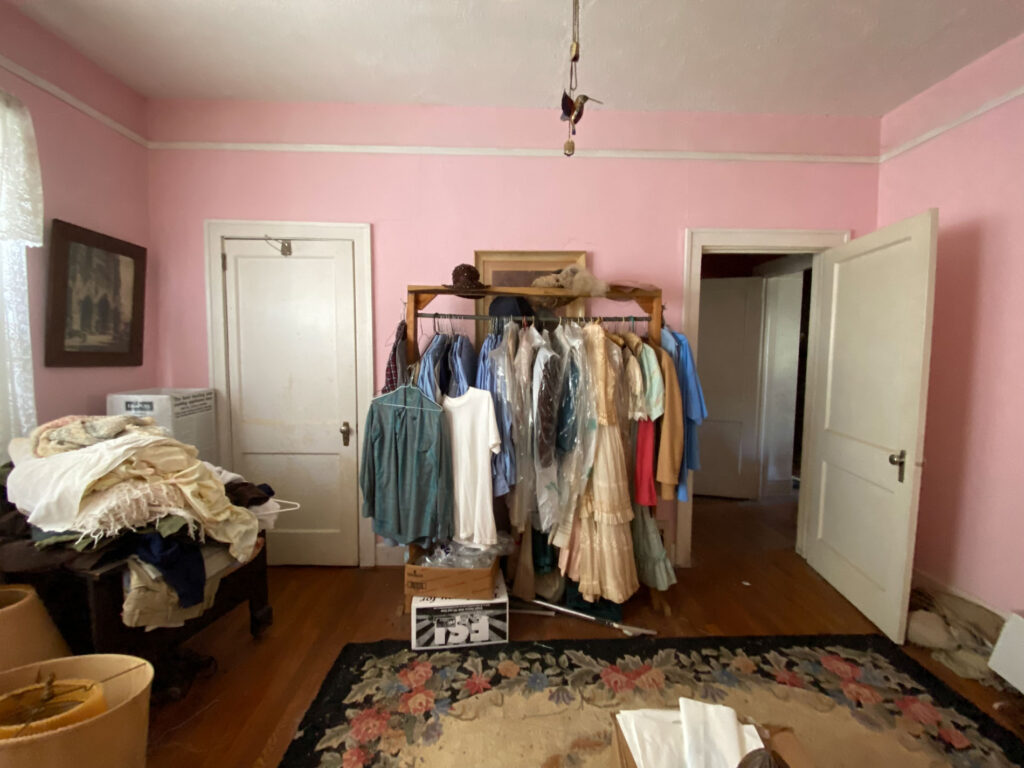
The Before
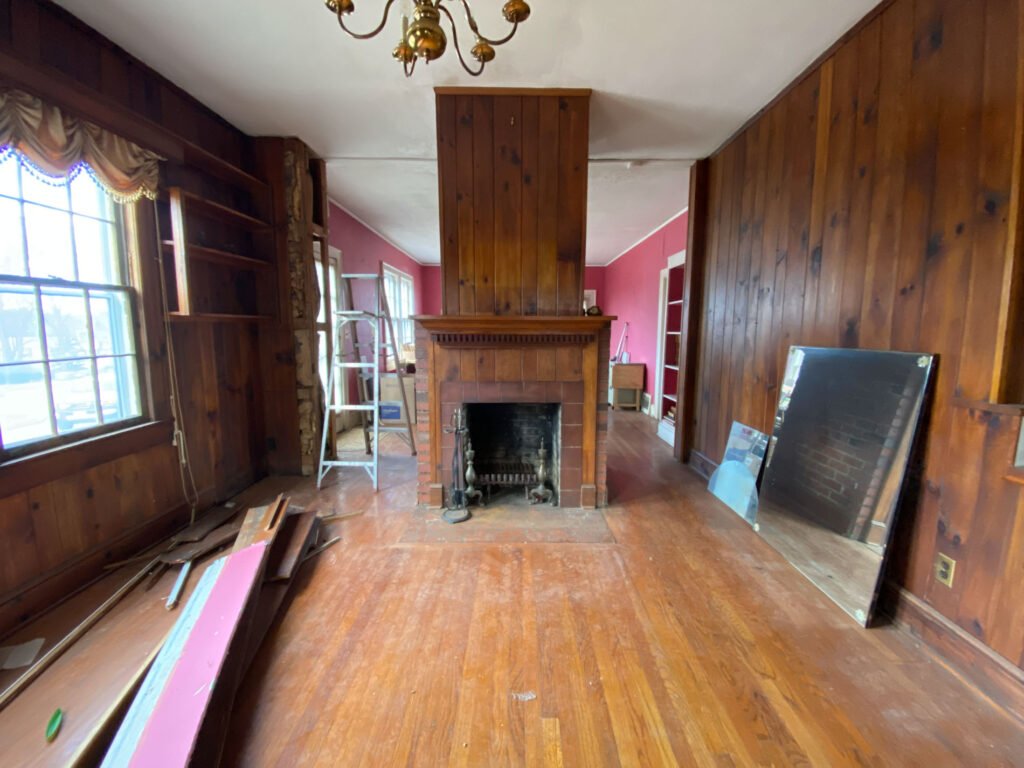
The before layout was typical of an old house with a small bathroom off a hallway in between two bedrooms. As best I could tell, no real changes had been made over the years to this area with the exception of closing off a doorway to the right bedroom. I assume this was closed off when the upstairs attic was converted to living space.
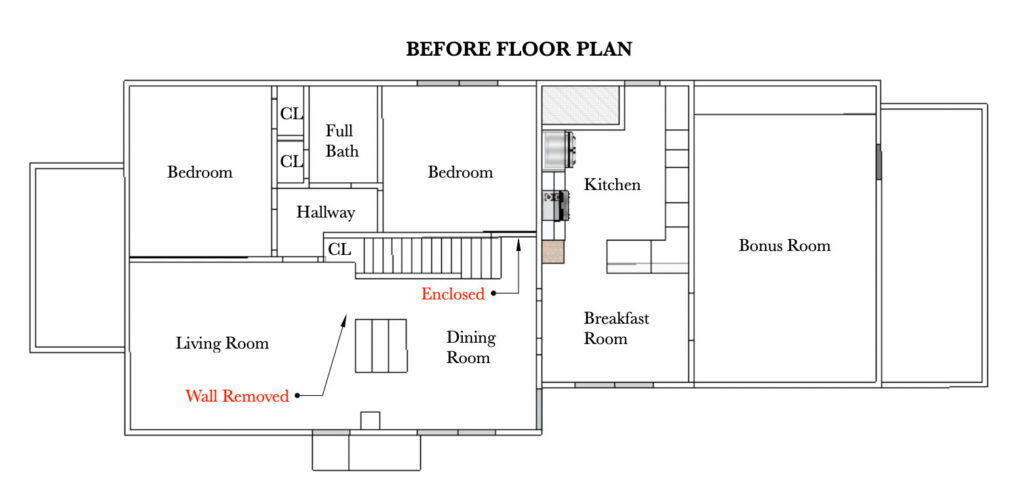
The one obvious change that had been made was the removal of the wall between the living room and dining room. While I understand some people love open concept, I just felt it wasn’t working here and knew immediately I wanted it restored.
The After
With those items in mind, I got to work on the new floor plan. The majority of the rooms on the first floor stayed in place including the living room, dining room, left bedroom, kitchen, and bonus room. And of course, I added the wall back between the living room and dining room.
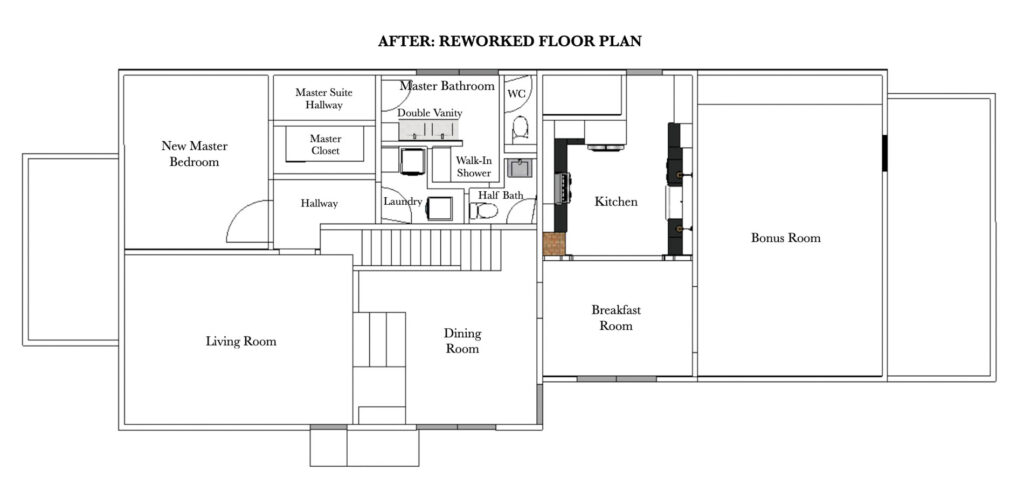
However, the right bedroom, bathroom, and their closets all changed. While not always ideal, I chose to sacrifice one of the downstairs bedrooms to create the new half bath, laundry room, and master bathroom. By splitting up this space, we were able to reconfigure existing square footage in a better way. Now the layout is more suited to today’s standard of living.
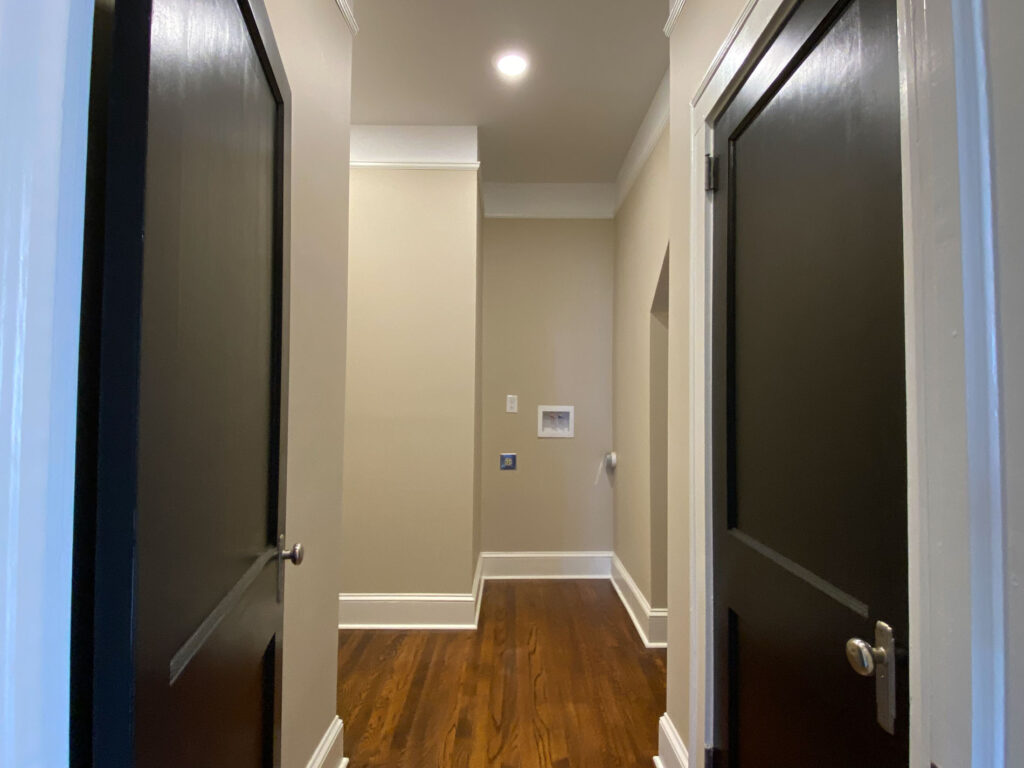
I then took the bathroom, along with the linen closet and adjacent bedroom closet, and reworked those spaces. I was able to create a large walk-in master closet with a hallway between the new master bedroom and bathroom.
The Results
While I’m certainly biased, I think the changes were definitely worth it.
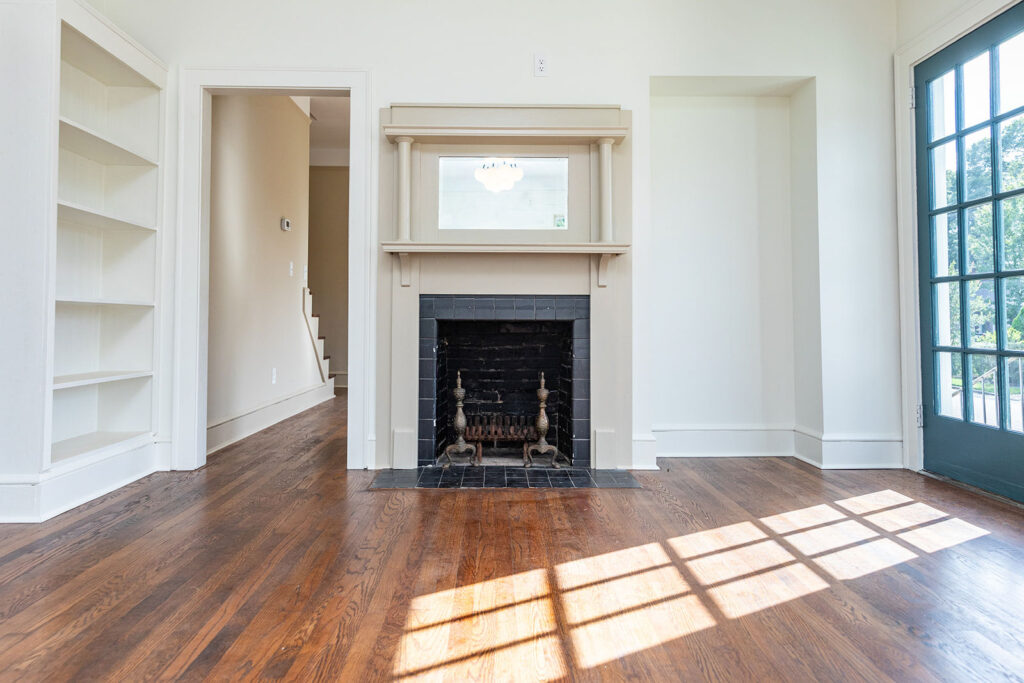
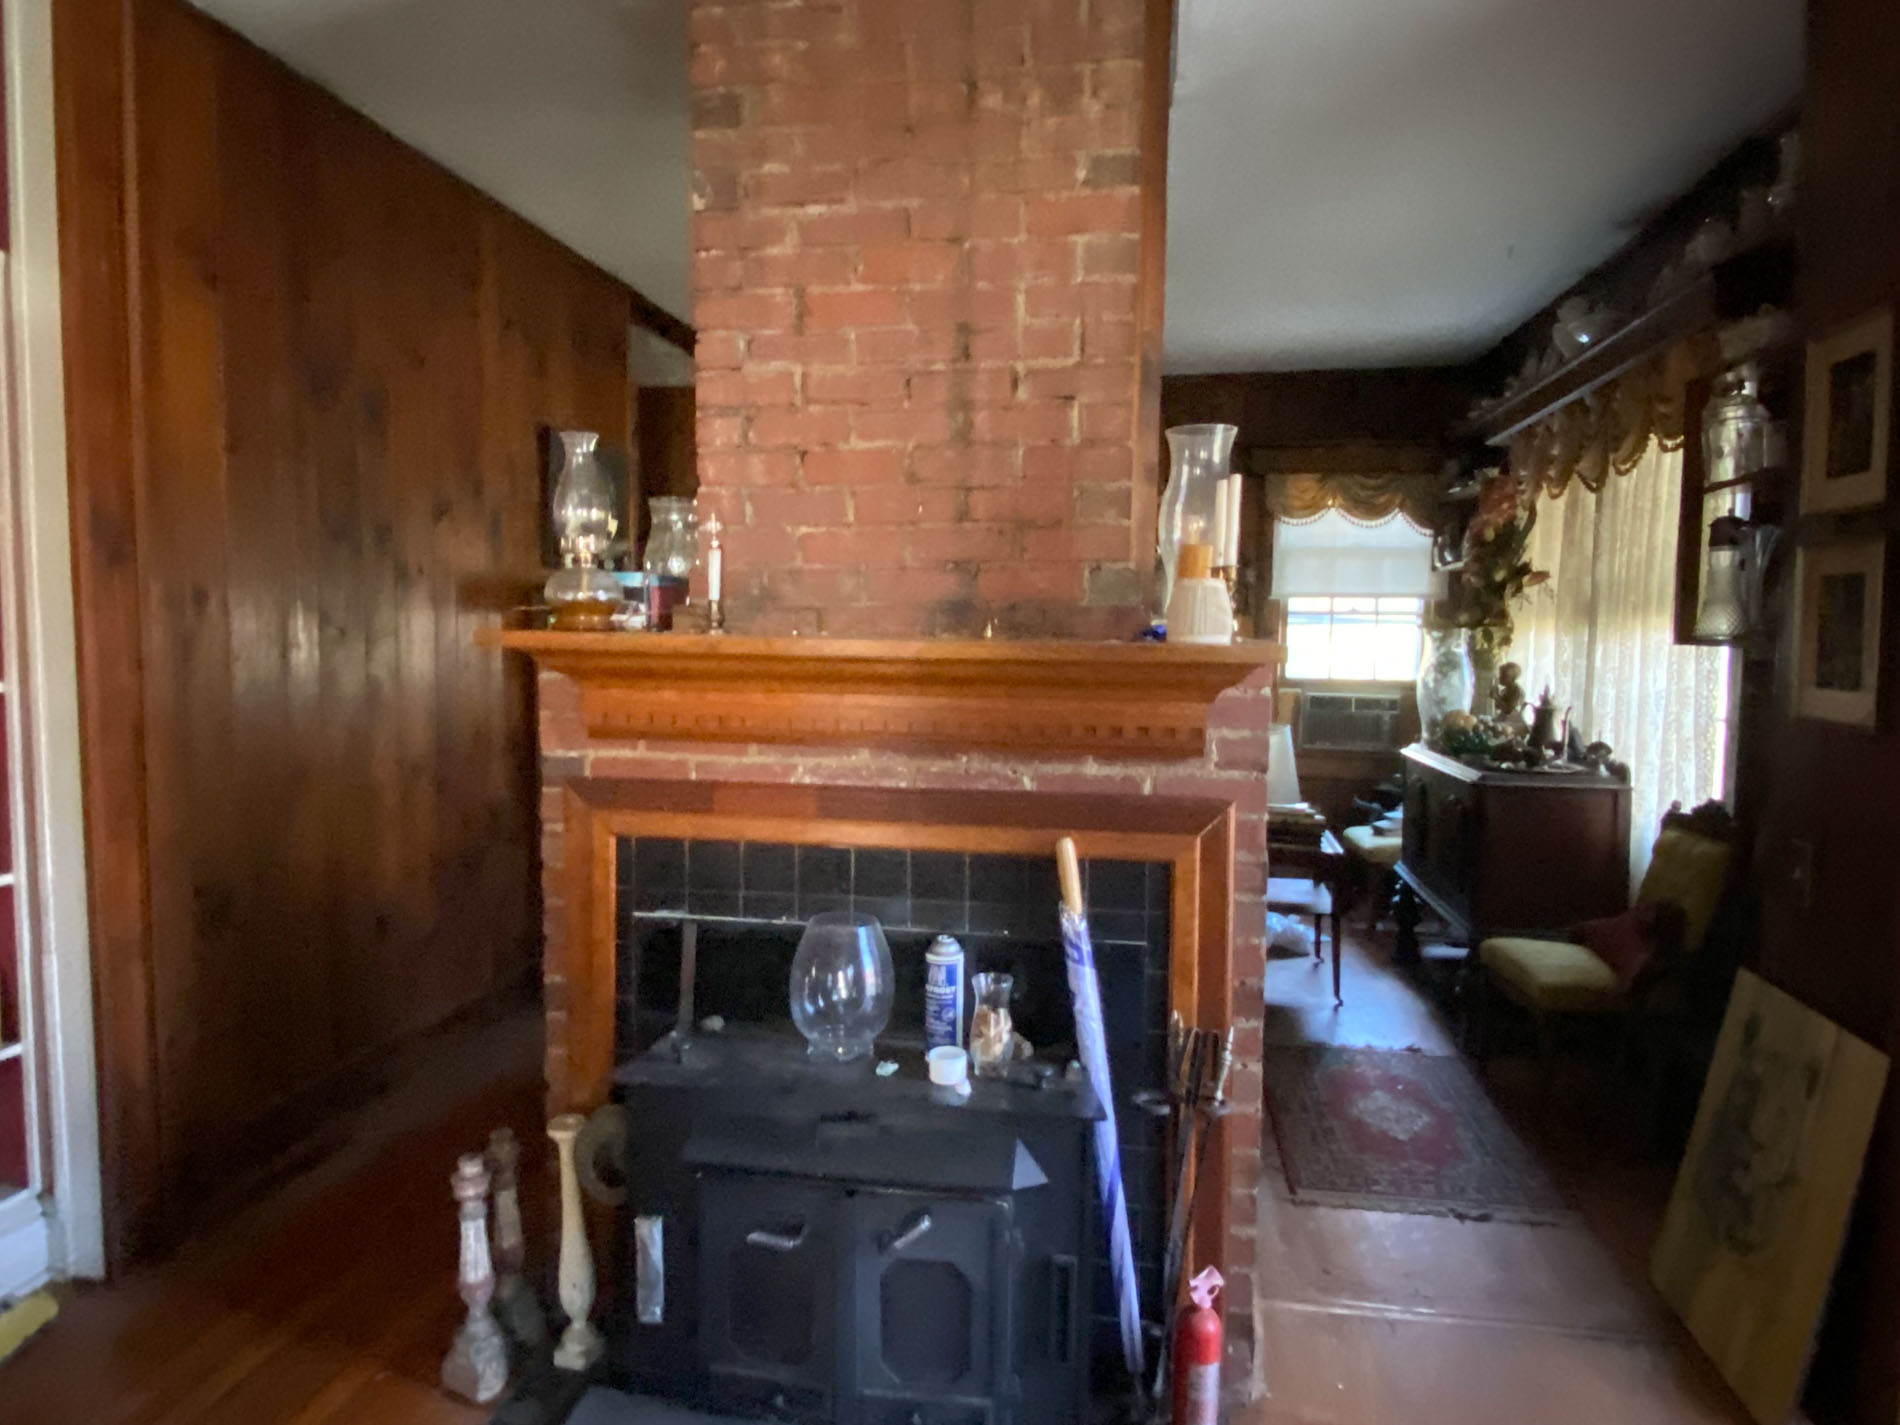
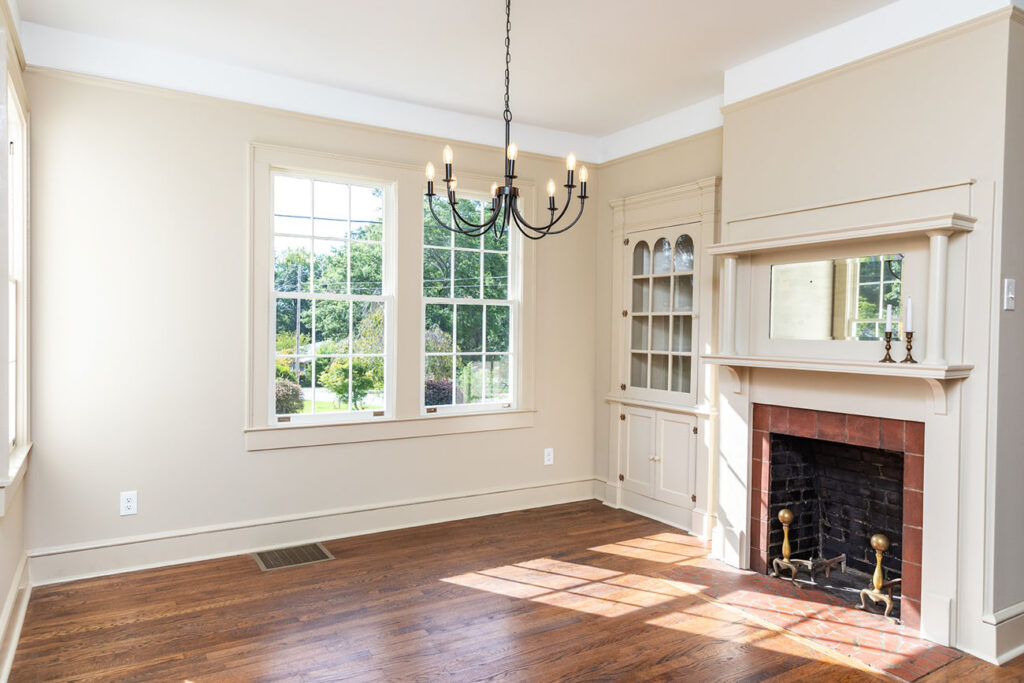
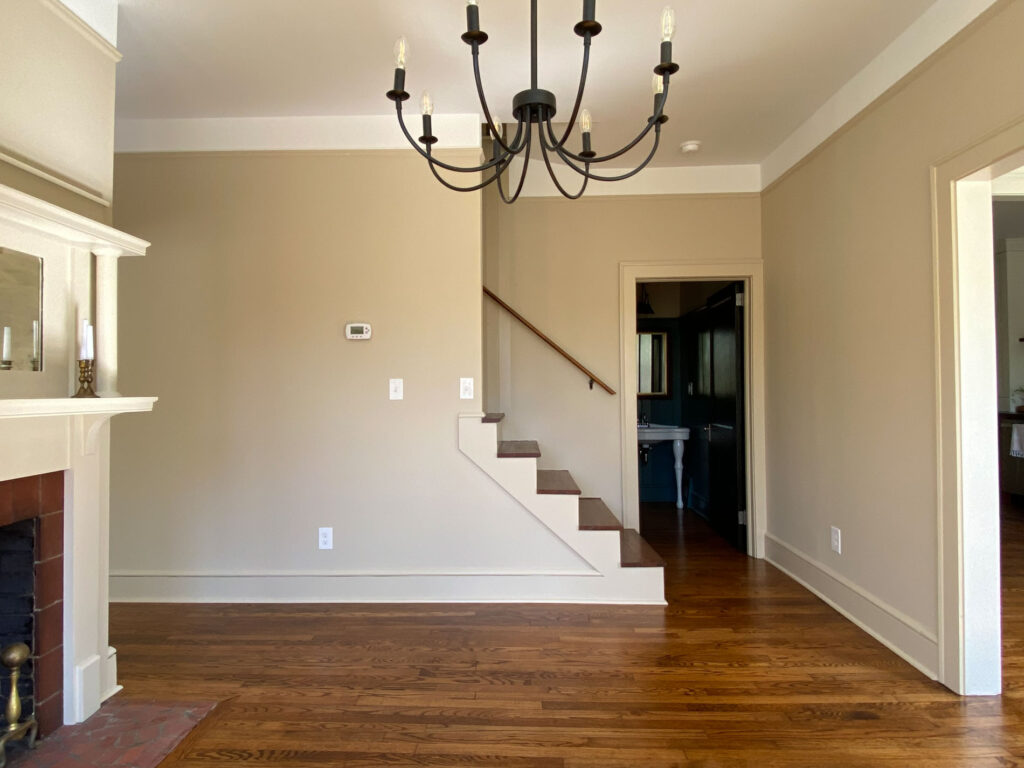
The Restored Wall
The restored wall between the living room and dining room was the easiest change to implement. We simply followed the evidence left behind to add back the wall in the same location. We then added repurposed baseboards and trim to make it look original and relocated the corner hutch from the kitchen in the dining room wall.
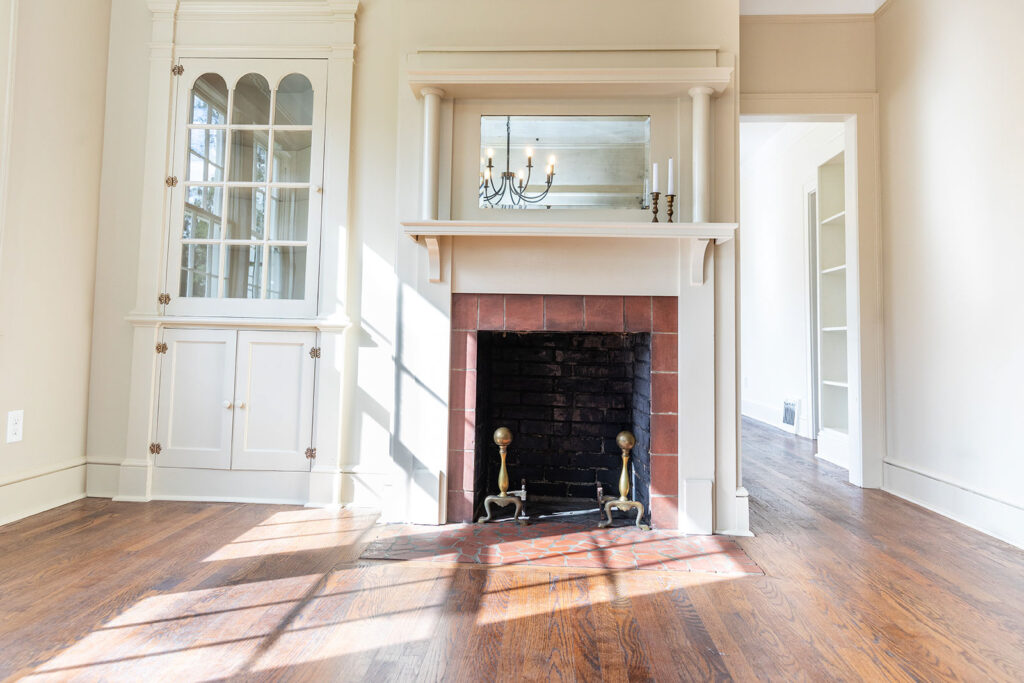
The best find were the early 1900’s mantles I found on Facebook Marketplace. I found two matching mantles, one for each side of the wall, and they look as if they could have been original to the house.
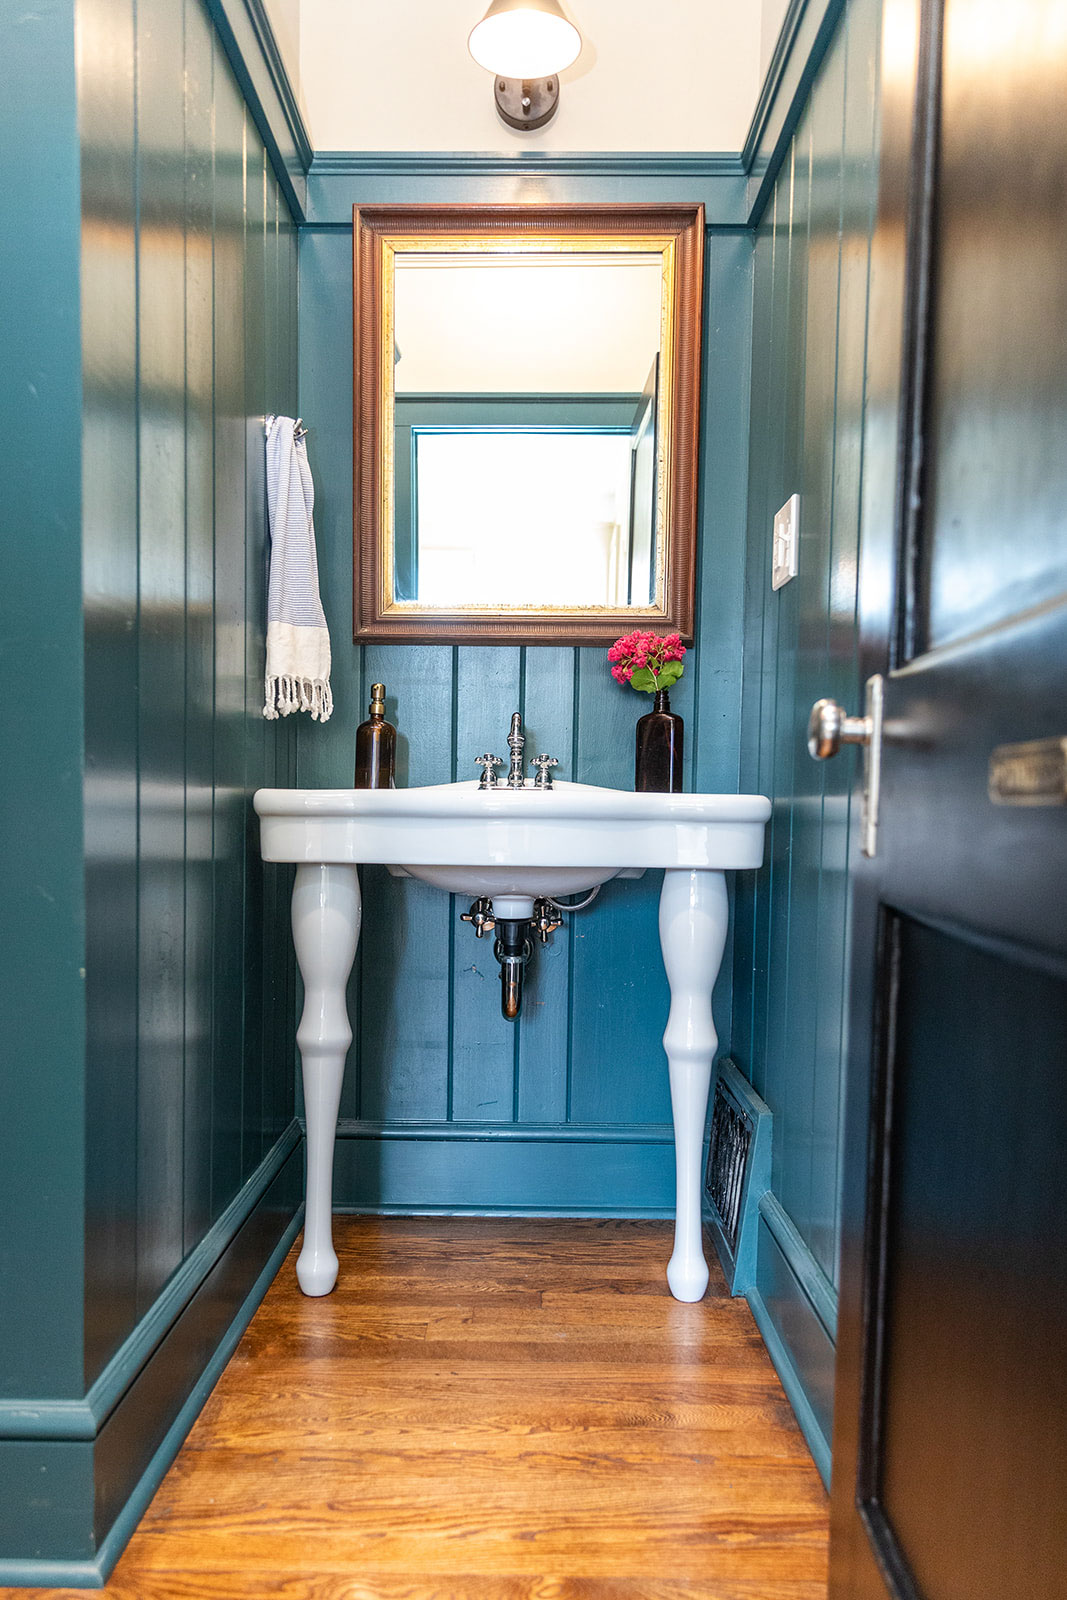
The New Powder Room
The new powder room is one of my favorite spaces in the house. With the blue-green paint on both the paneled walls and trim it has a timeless feel to it. Here’s why I love painting the walls and trim the same color and the beautiful vintage sink up against the dark walls really make it pop. What makes this room special is that we repurposed the paneling from the dining room. We used it as wainscoting as a nod to that era of the house. And since we restored the original doorway, guests can now access the powder room from the dining room when visiting.
Relocated Laundry
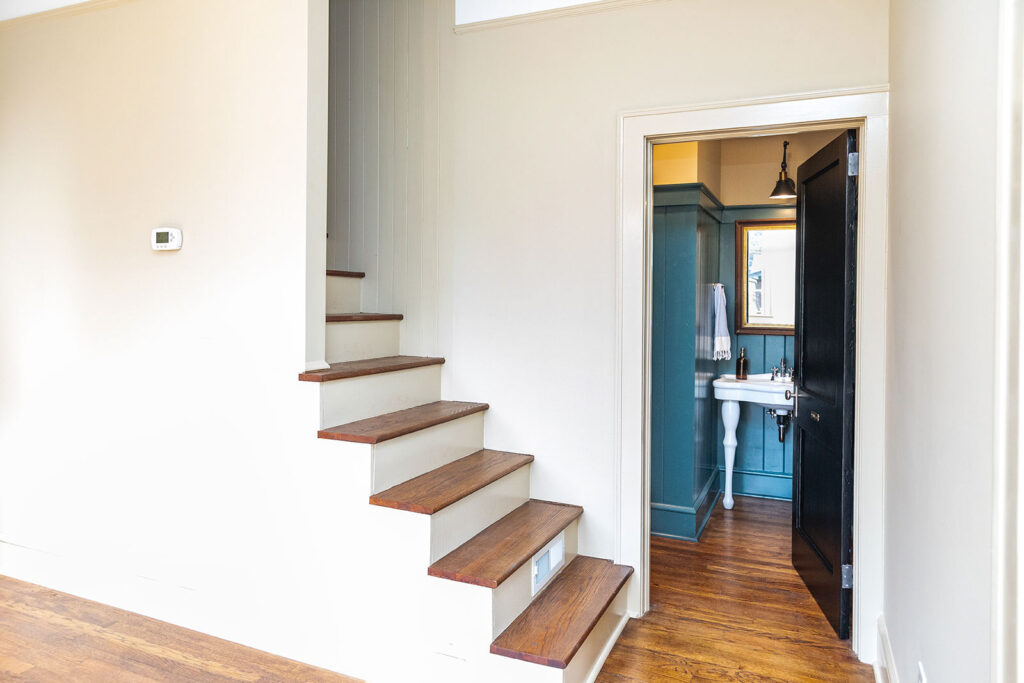
The laundry room took the uncommon shape of an L. So to give the new homeowners options, it can handle a dryer on the right and washer on the left, or a stackable washer/dryer. There’s also plenty of room for additional cabinetry if needed and more storage in the alcove under the steps. Most importantly, it’s now on the first floor and out of the basement.
And last but not least, we now have a private mater suite.
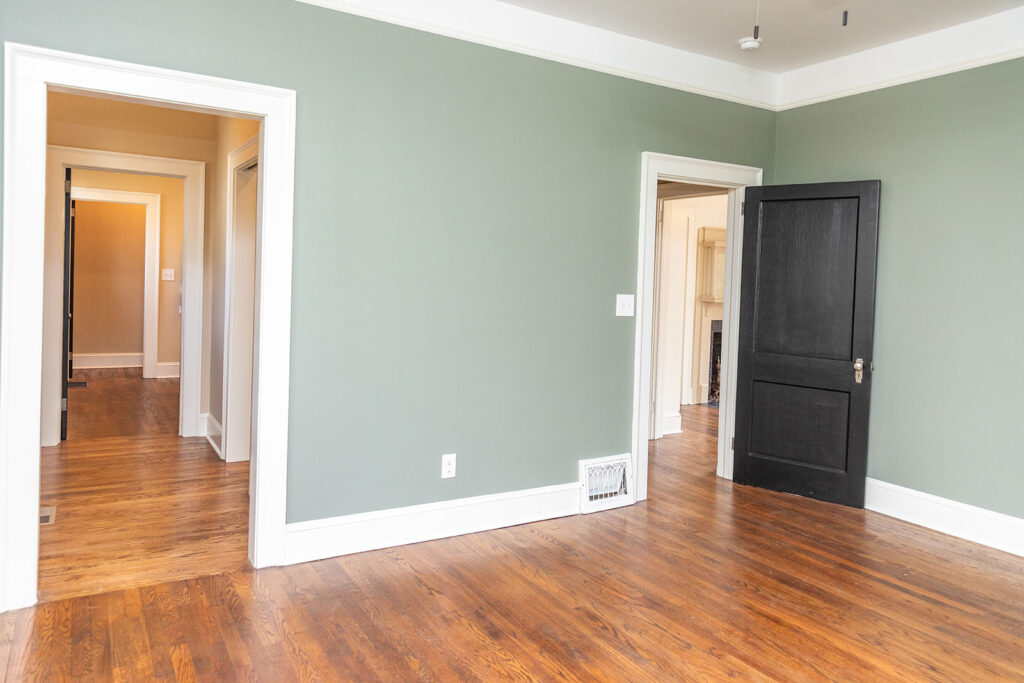
The Master Suite
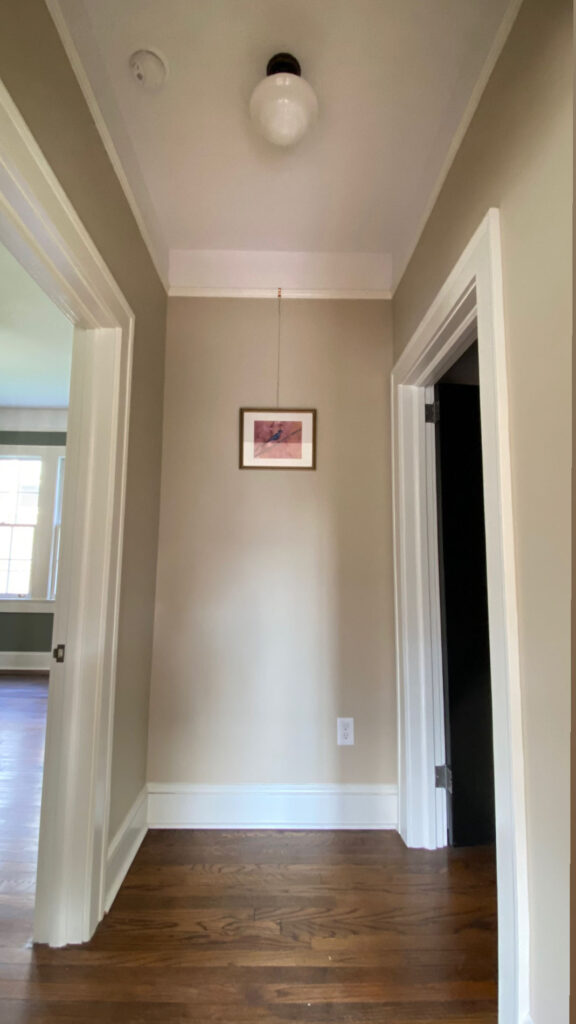
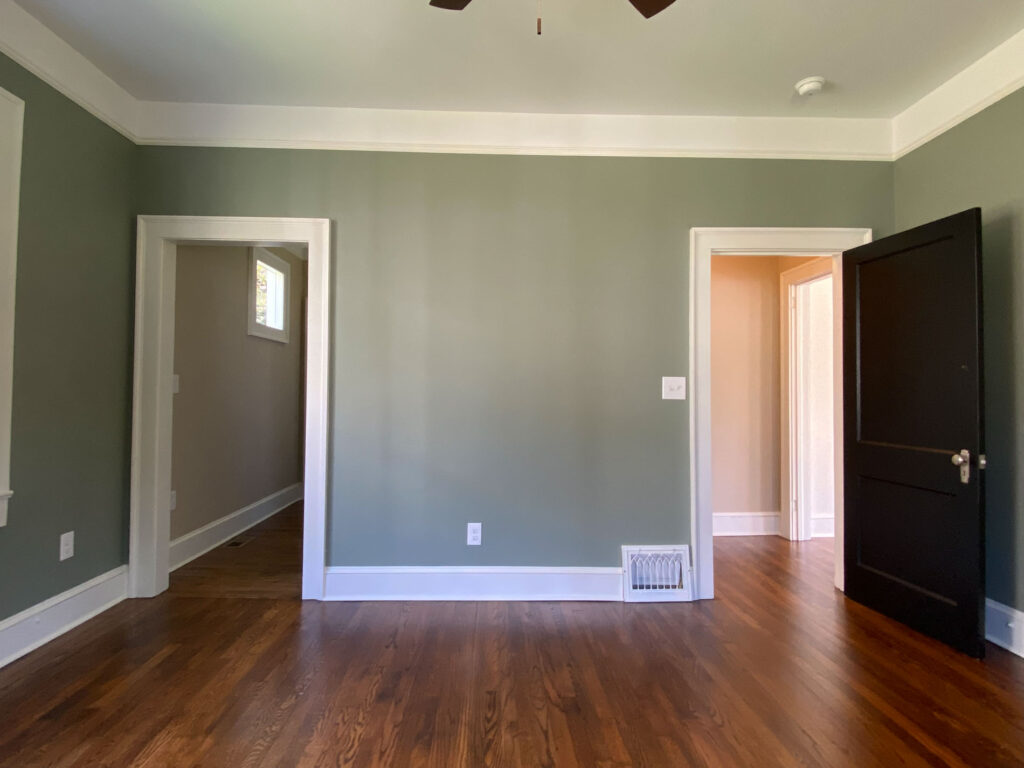
The left front bedroom, now the master, is painted a beautiful shade of green in Sherwin Williams Evergreen Fog. Where the old closet door was previously located is now a cased opening that leads to a small hallway. On the right is a large walk-in closet and to save space, we used a pocket door. At the end of the hallway is the new master bathroom.
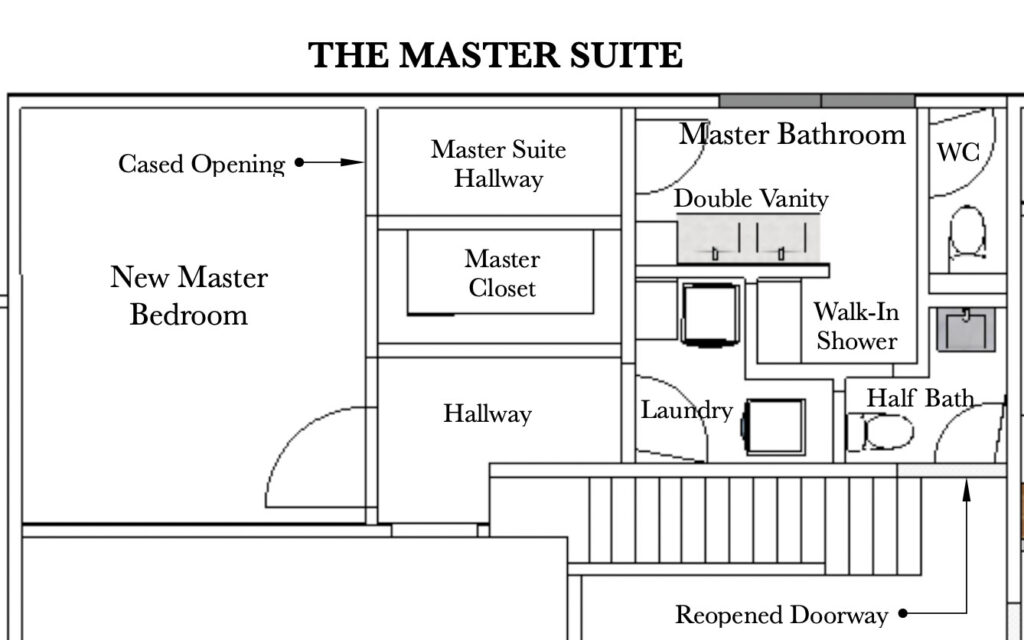
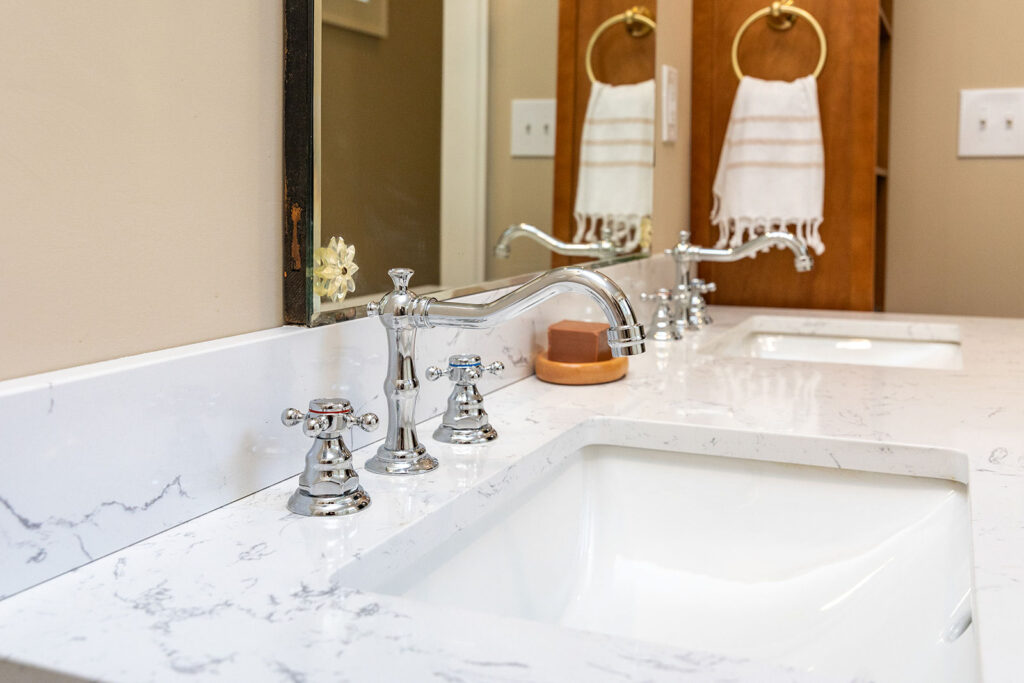
The Master Suite Bathroom
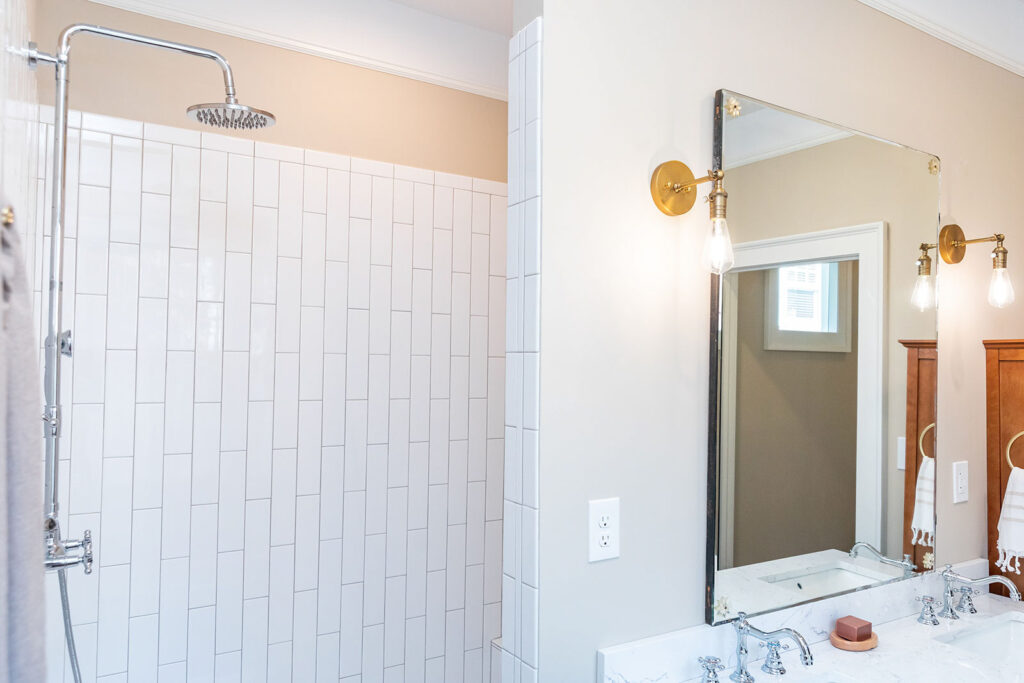
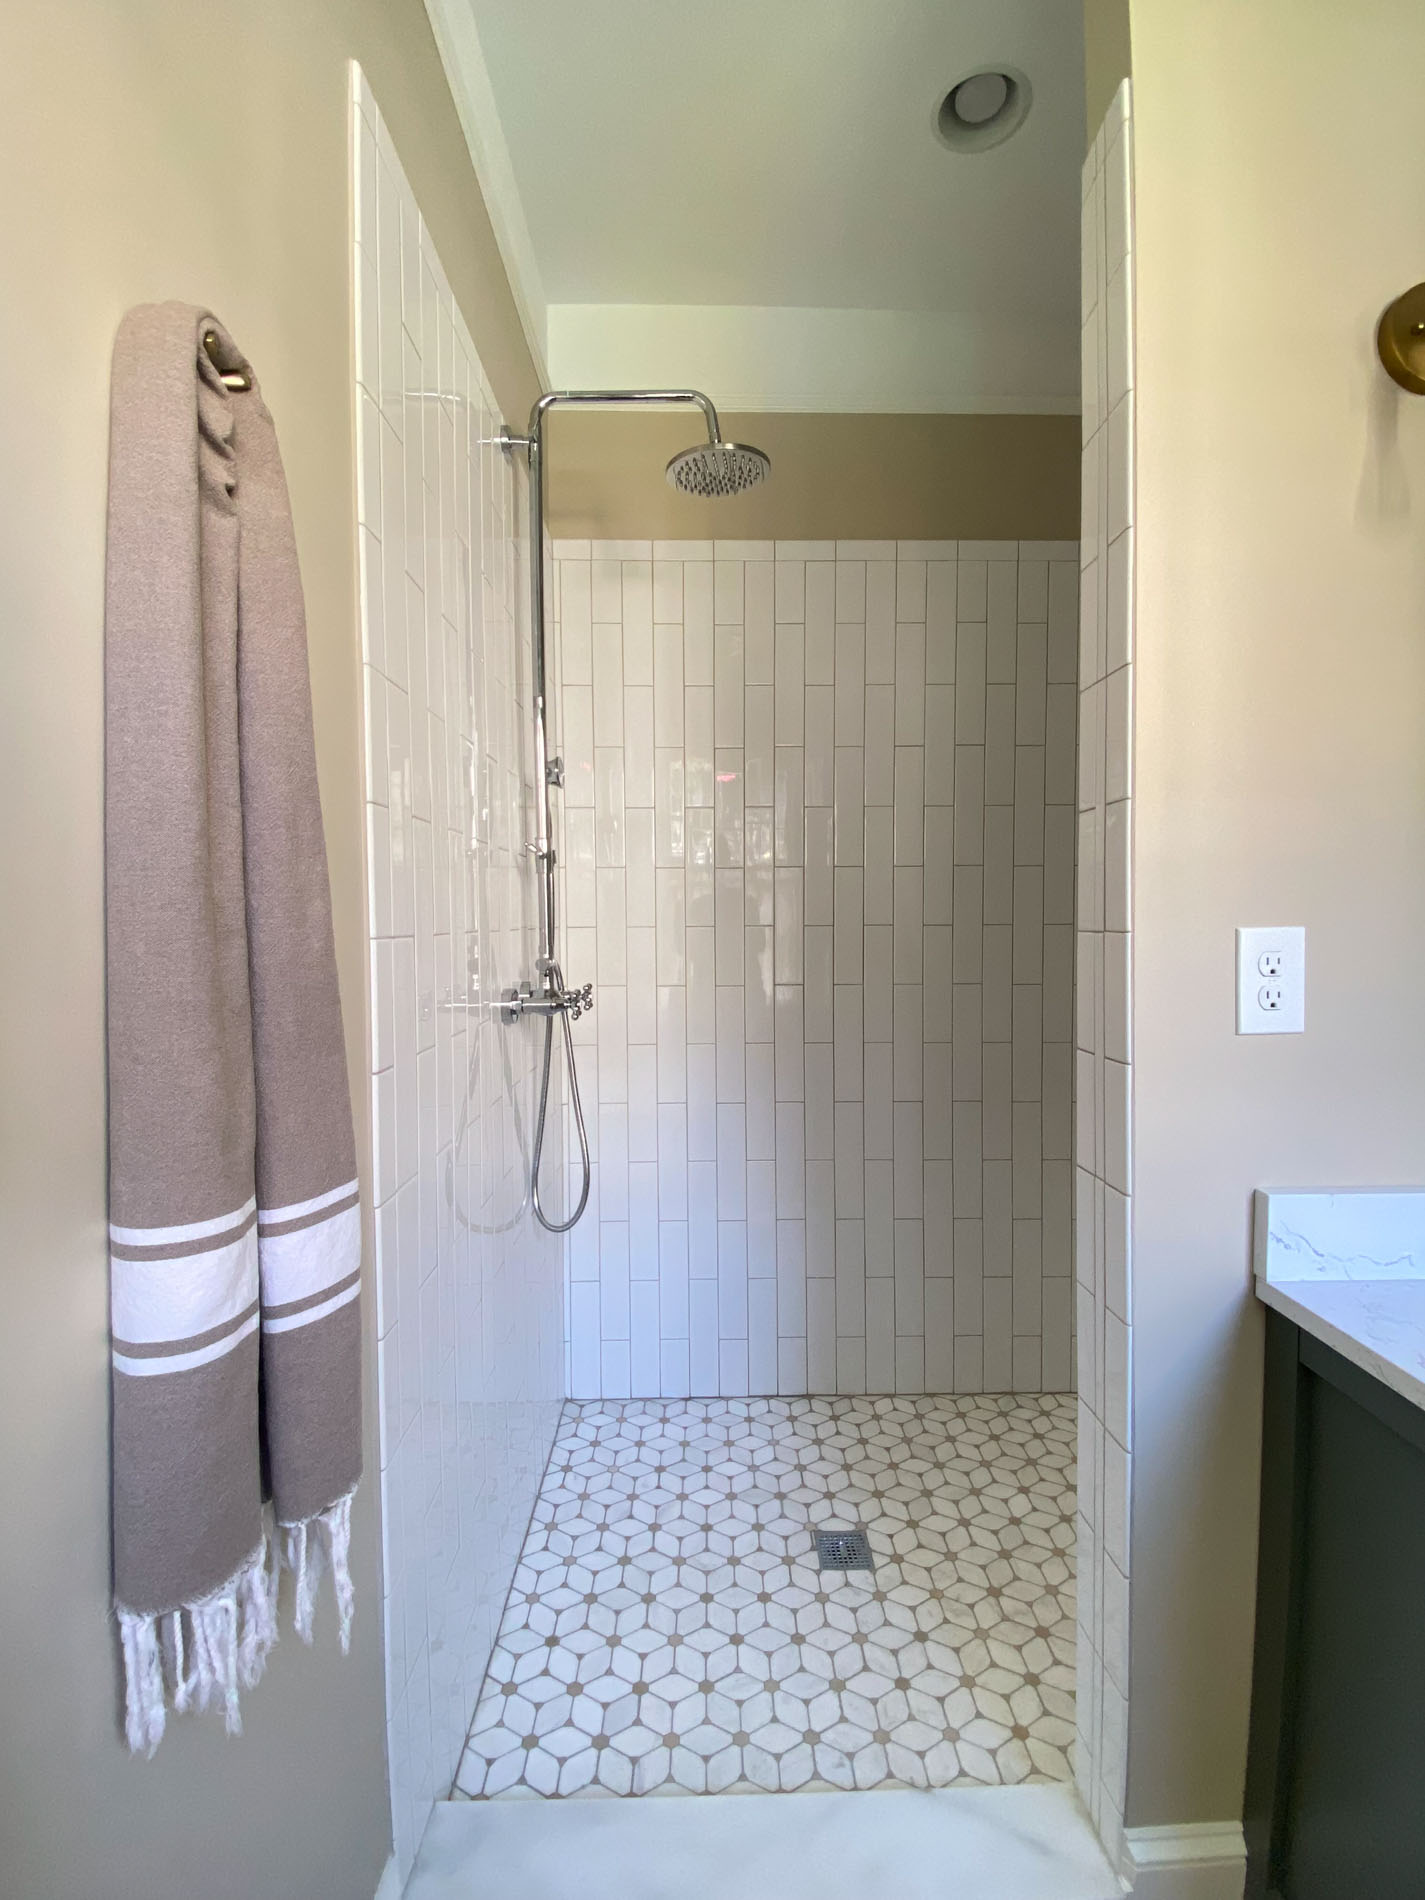
The bathroom is now accessed through a new doorway at the end of the hallway. As you enter the bathroom you’ll find a beautiful green double vanity on the right. Above the vanity is a vintage mirror from the home and brass wall sconces on each side.

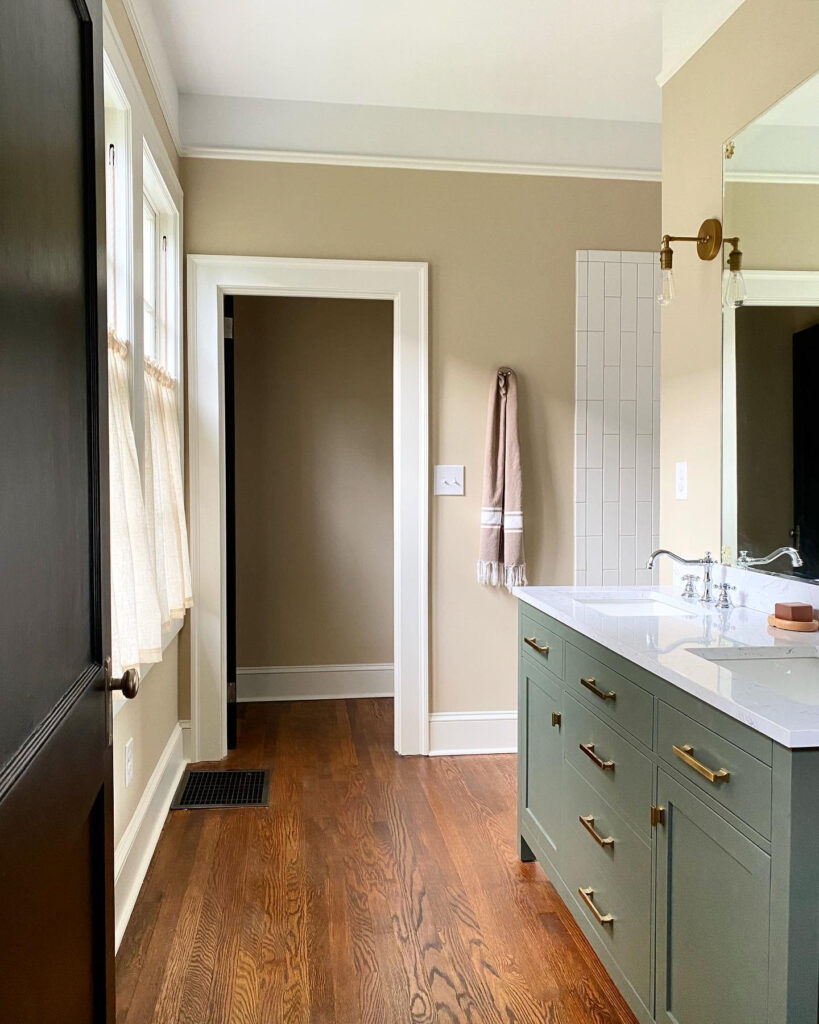

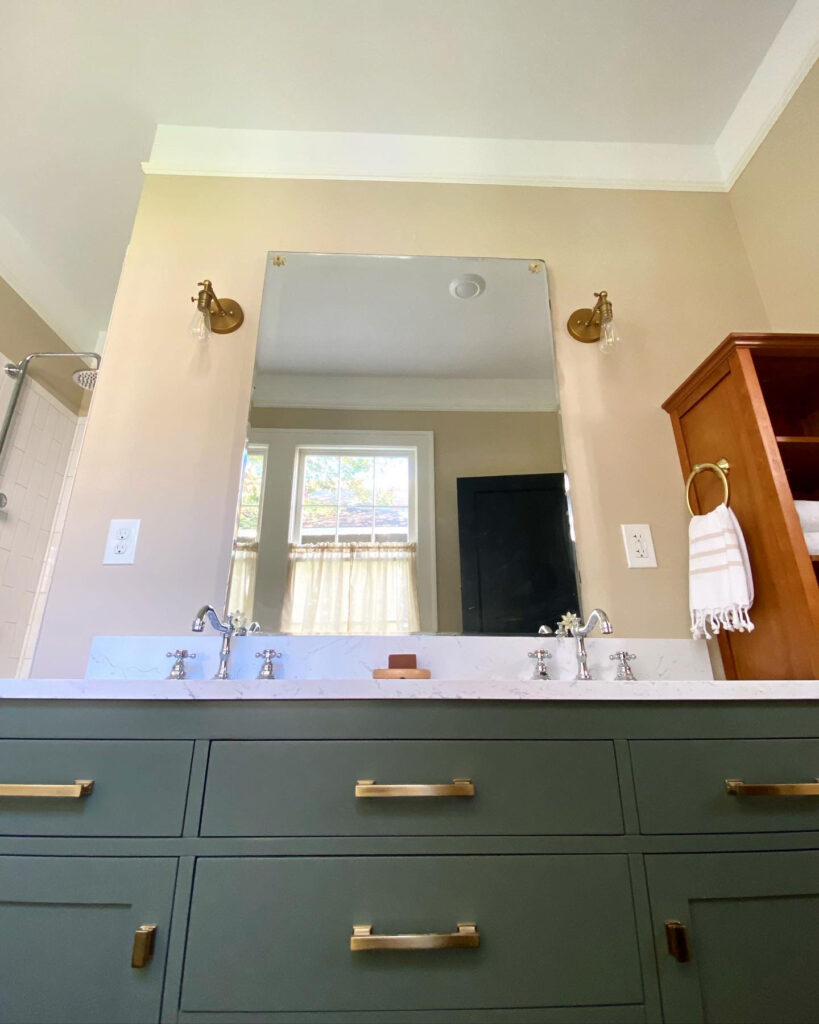
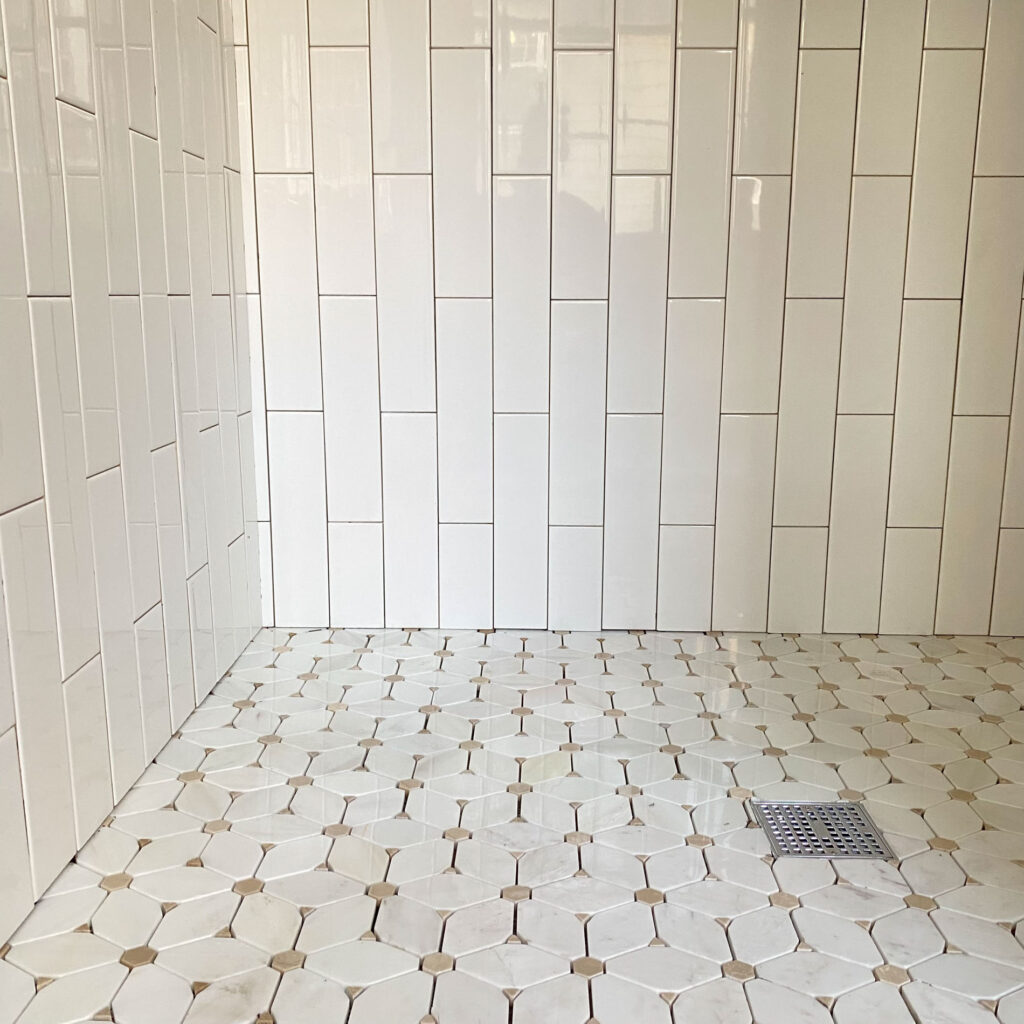
Behind the vanity wall is a spacious walk-in shower with custom tile in a vertical pattern for something different. We also used a unique mosaic pattern for the floor tile which ties all of the neutral tones together. And last but not least, to the left of the vanity is a water closet for privacy.
These reworked spaces now offer a private master suite, dedicated laundry room, and a new powder room on the first floor. If you need help reworking your floor plan, I’d love to help! Be sure to view my Design Services and then reach out.


shop
favorites
All of our favorite shoppable links and sources in one place! We love to share our projects with you and hope these resources help you as you design your own home.

+ Show / Hide Comments
Share to: