Restoring Original Siding: Cedar Shake Shingles + Sourcing Wood Siding


If you’ve been here for a while, you know I absolutely love cedar shake shingles. Three out of my four personal historic homes have had cedar shakes, and one had them hidden under aluminum siding. Oh and I always recommend removing any type of siding that’s hiding the original underneath. If you haven’t already, read through Part One and Part Two of this Restoring Original Series series to find out why.

So now I would like to walk you through how to repair and source cedar shake shingles and wood siding. This can be helpful to you for any exterior repairs of your historic home and your restoration efforts.
My Favorite: Cedar Shakes
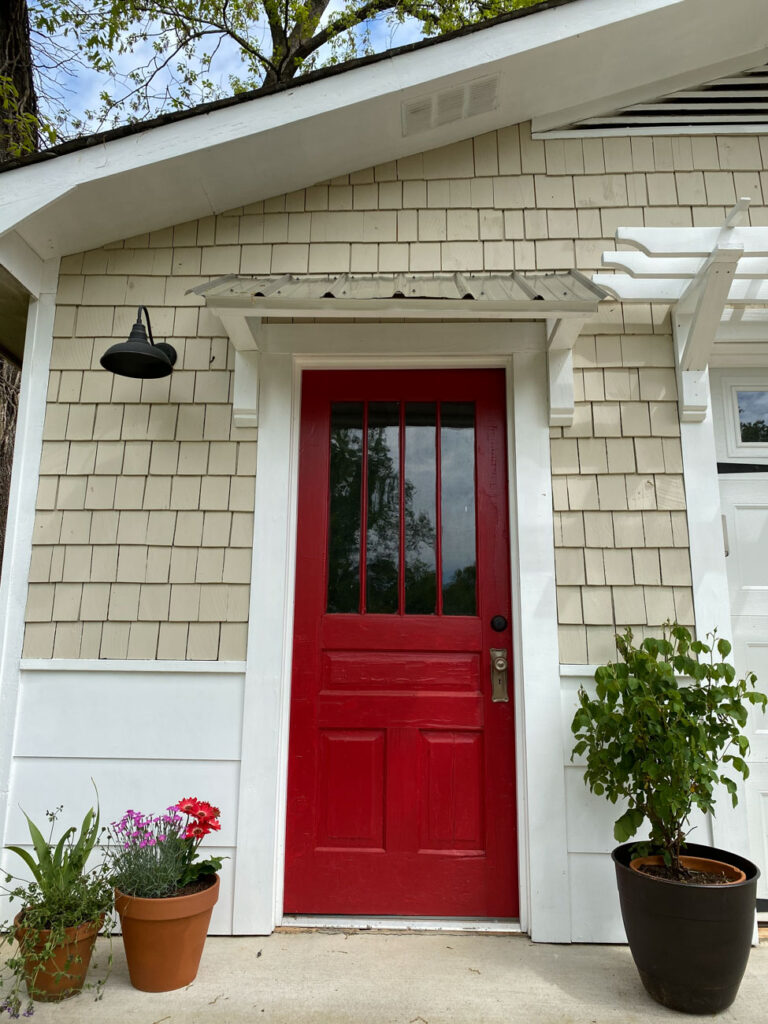
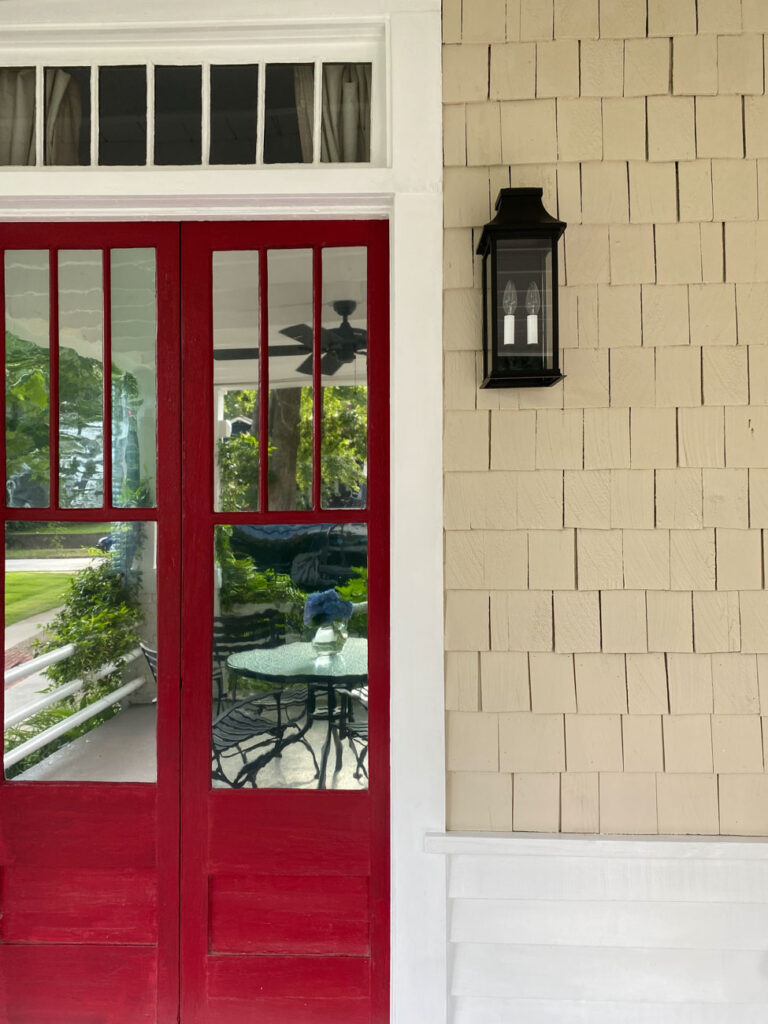
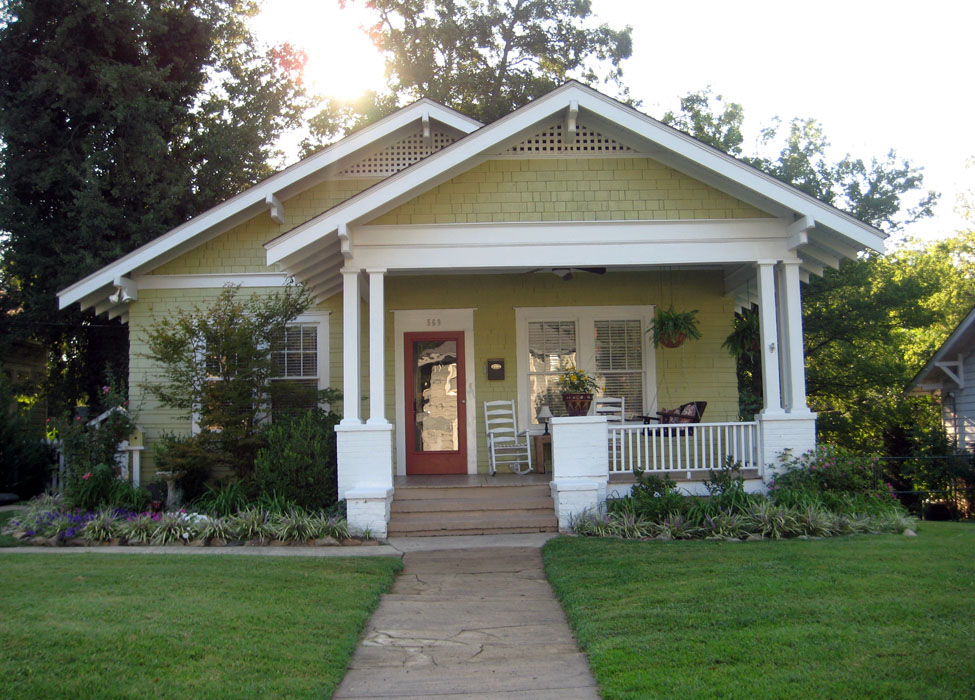
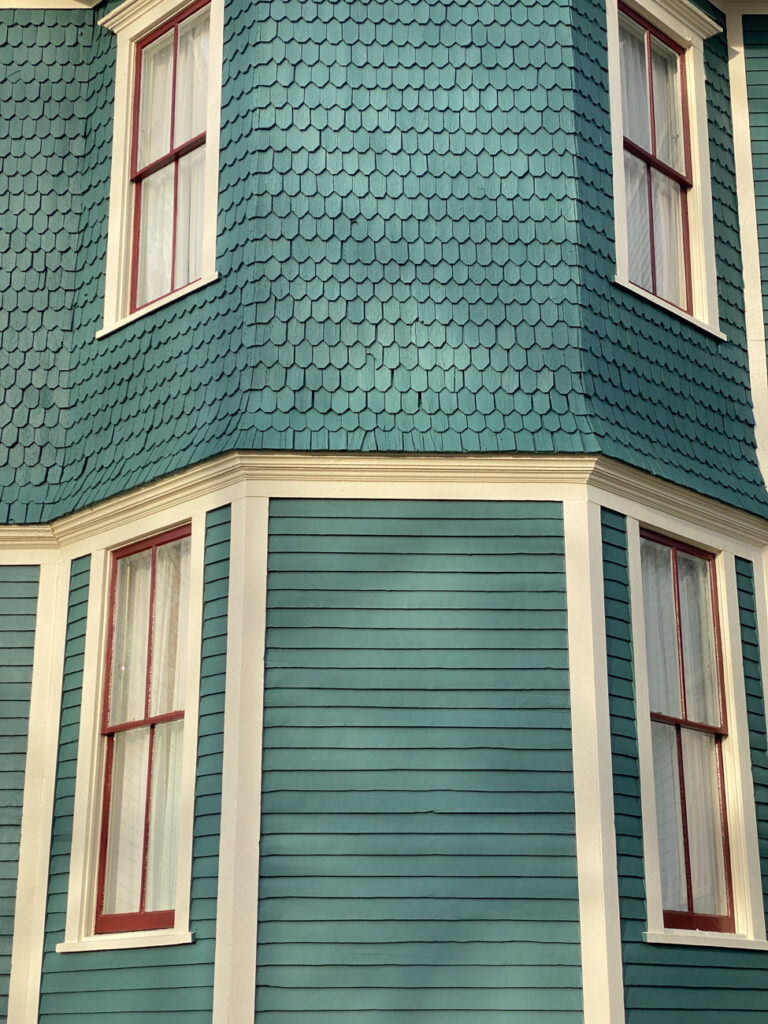
Many historic homes from the early 1900’s used cedar shake shingles as siding. I always find it interesting how many different patterns there are which shows the true craftsmanship of the builders. Some of those patterns are in the way the shingles are stacked and aligned, and others show a particular shape that was custom cut for each shingle. Talk about attention to detail.
Cedar Shingles vs. Cedar Shakes
If I’m being honest, I’ve only recently come to know the difference between cedar shingles vs. cedar shakes. I’ve always called them cedar shake shingles to describe the siding for historic homes but if we want to get technical, turns out there’s a difference.
Cedar shingles are thin and smooth, sawed in a mill for a more clean and uniform look. Cedar shakes are thicker and more textured which makes them more durable and gives them a more natural and rustic look.
With that new knowledge, I would have to guess that most of the houses I have worked on have cedar shakes.
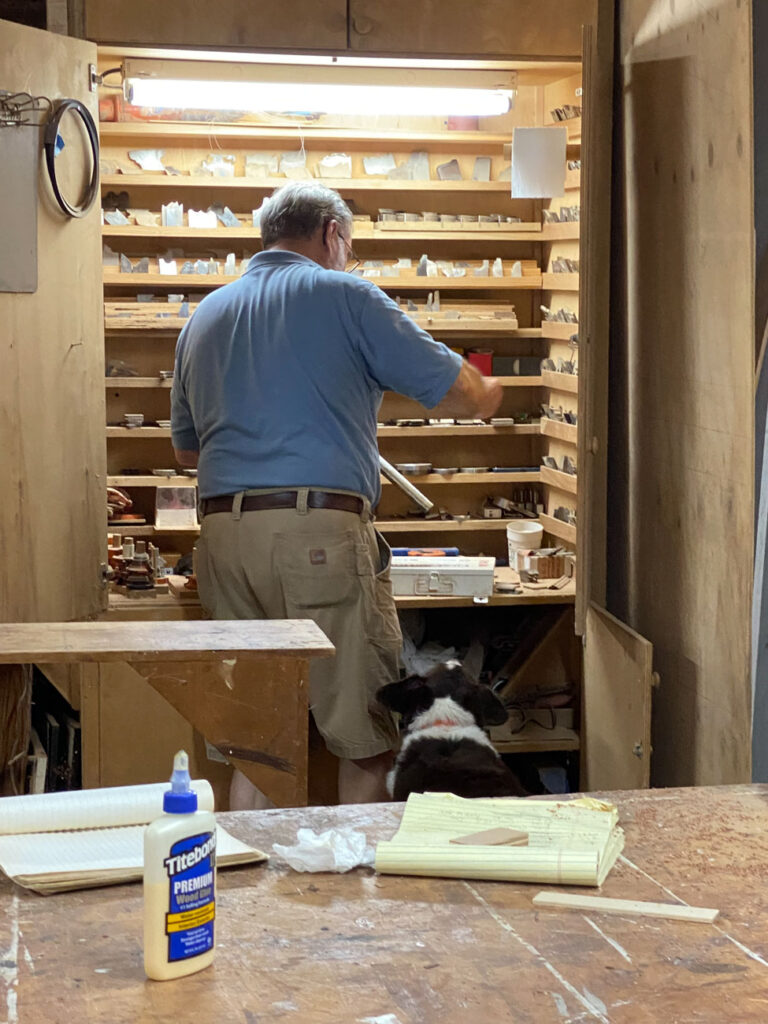
Where to Source Cedar Shakes
If you find yourself needing to replace or add to your original cedar shakes, here are my recommendations. First, check with your local lumber company to see what they have in stock or can source for you.
My local company has bundles of B or C grade shakes in stock for a relatively low cost. With that low cost comes a gamble as to how many will be of a good quality meaning some you’ll have to toss. There’s no real formula to determine how many you’ll be able to use out of each stack. Sometimes it’s almost all of them; other times we toss half of them. Regardless of that potential waste, it’s usually my first option due to the cost savings.
The second option is to have them order you A grade shakes which can get expensive. However, if you have to make custom cuts, it’s worth it. I’m also sure you could also order from any of the large home improvement stores but I personally like to order local for materials when I can.
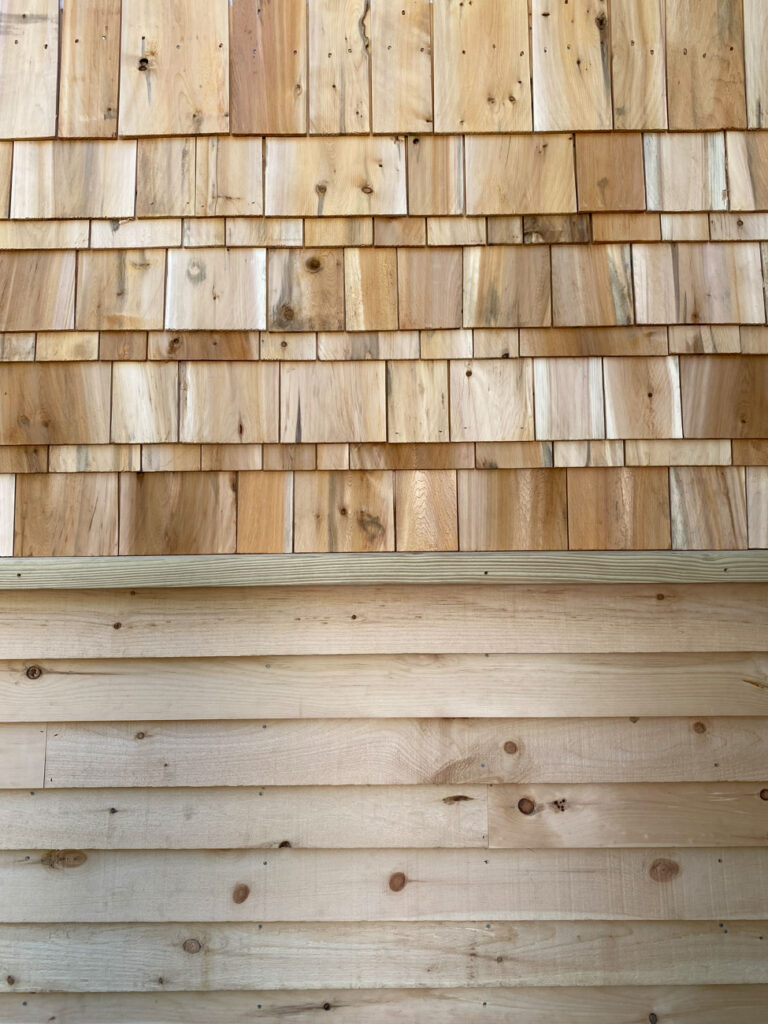
With either option make sure they are unfinished, natural wood and not any type of synthetic material, especially if you are making repairs next to the original shakes.
How to Remove Damaged Shakes
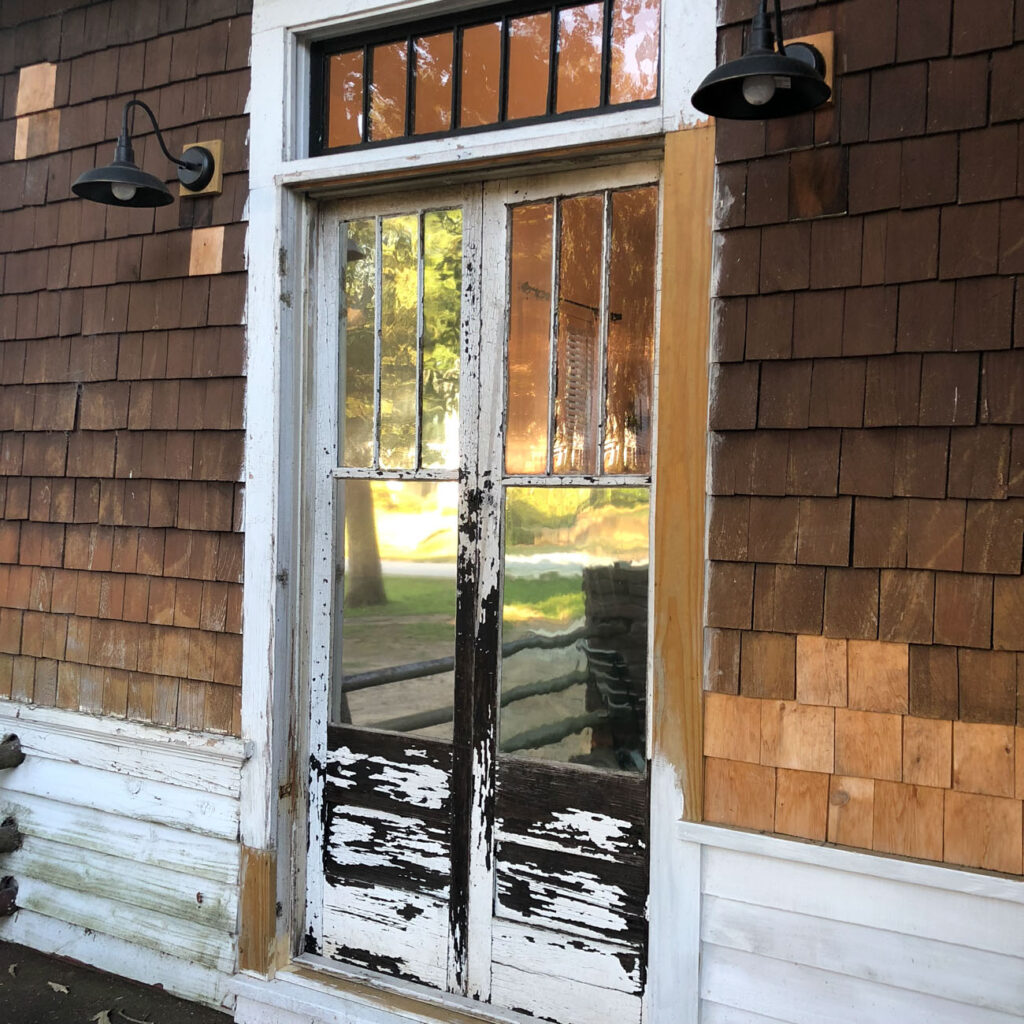
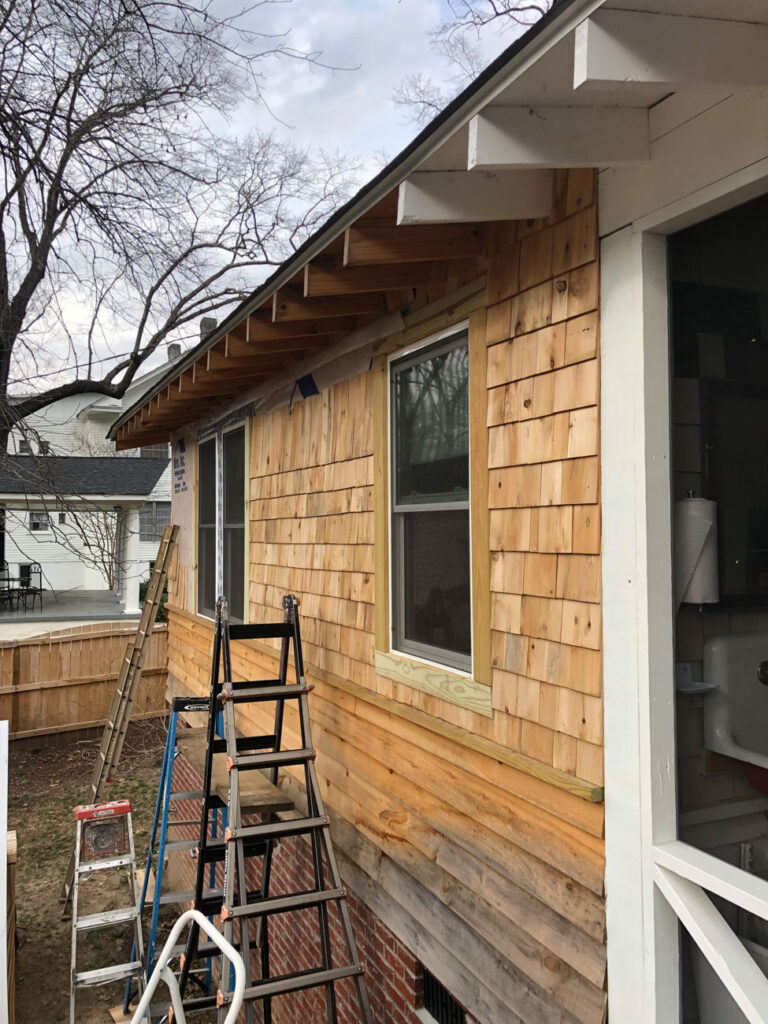
If you come across damaged shakes, you’ll need to remove the entire shake. Don’t try to patch any type of damaged area other than a nail hole with wood filler. If you do, it will be quite noticeable. Cedar shakes are installed in rows starting with the bottom and the row above overlaps the one below usually by a few inches. This means the nails holding it in place are covered by the shakes above.
You’ll need a flat crowbar to first try and get the damaged shake loose. In some instances the nail will pop out just enough to be able to remove it. However, often times it won’t budge. If this is the case you can try one of two things.
First, you can try to wiggle the shake out by pulling it down and out, leaving the nail behind. With this method you’ll have to find a tool to pull the nails left behind so that the replacement sits flat. The second option is to use a reciprocating saw to cut the nails underneath. My only caution with the saw is to be careful not to damage the other shakes during removal.
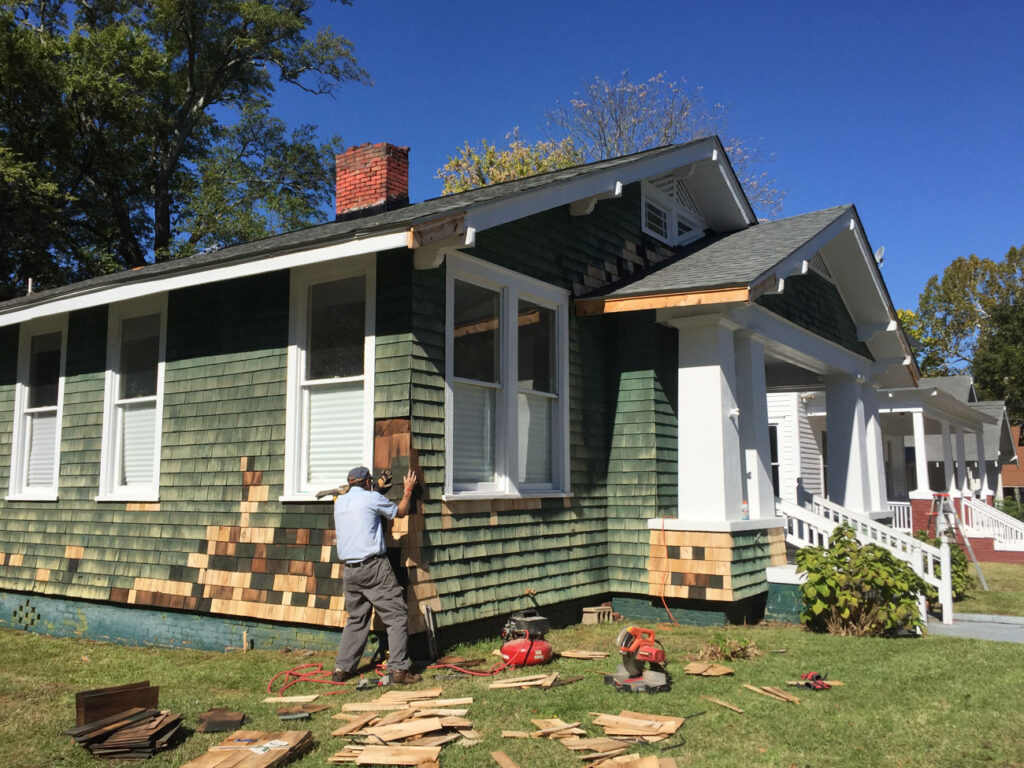
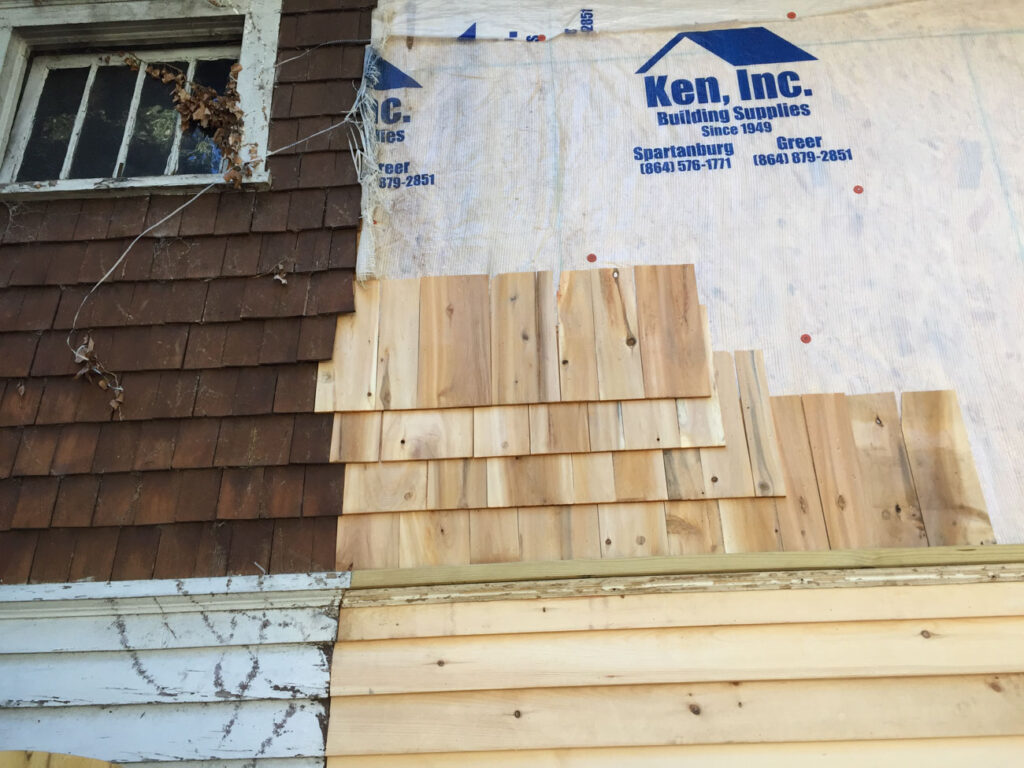
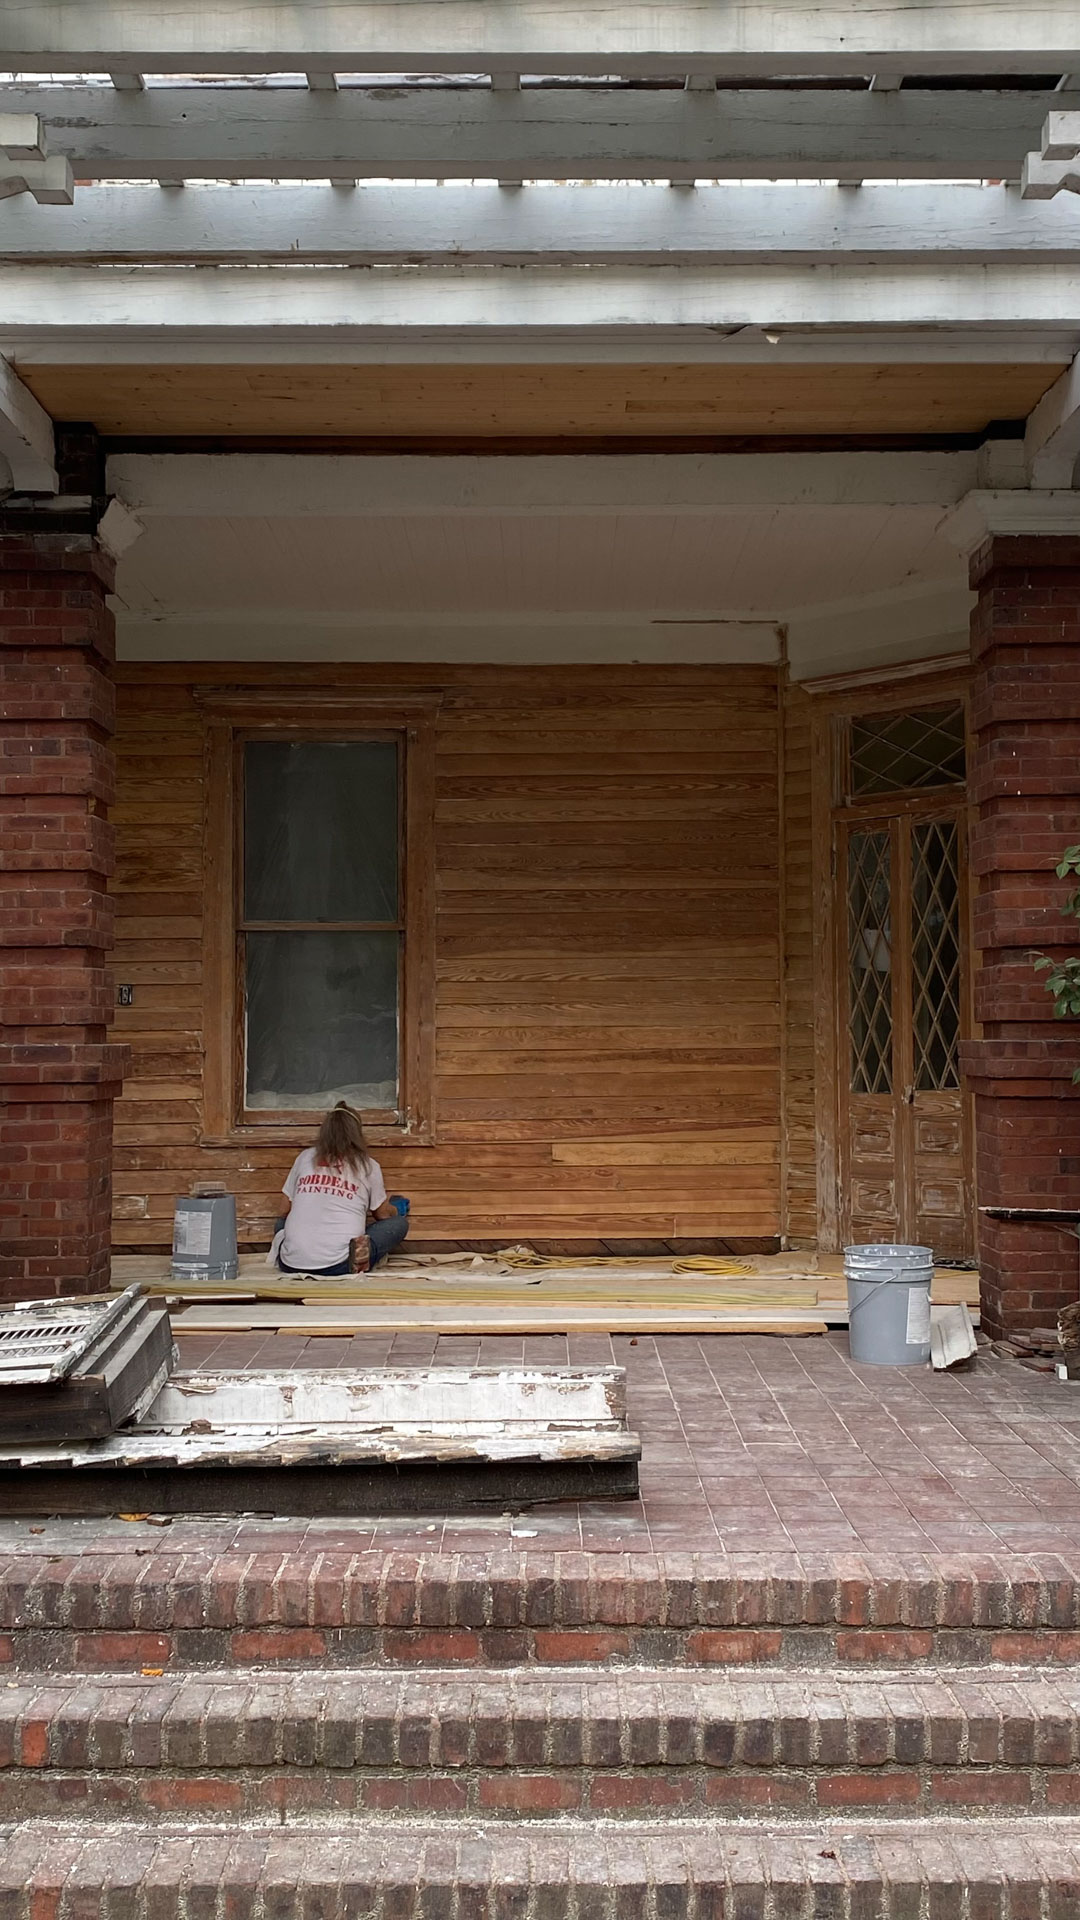
Below we used a combination of some salvaged shakes and new ones at The Americana to blend in with the original siding.
Installing the New Replacement Shakes
The easy part is installing the new replacement shakes. Simply cut them to size using either a miter saw, an oscillating saw, or a utility knife. We’ve used all three so it just comes down to preference. Make sure the bottom of the replacement shakes lines up with the bottom of the row.
The same goes if you are having to replace a section vs. just one or two shakes. In this case, you’ll want to vary the width of the shakes, copying whatever pattern your house has.
The last piece of advice is to make sure if you are replacing a large area, to feather in the new shakes with the old on the left and right of each row. In other words, don’t have a straight line where you cut out and replace the shakes because it will be noticeable. The goal is that once stained, you can’t tell the difference between the new and the old.
Major Exterior Changes & Salvaging Original Shakes to Reuse
If you are making significant changes to parts of your exterior, consider salvaging some of your original shakes to reuse. For example, if you are resizing a window or door, or adding an addition, there might be an opportunity to reuse some of those salvaged shakes.
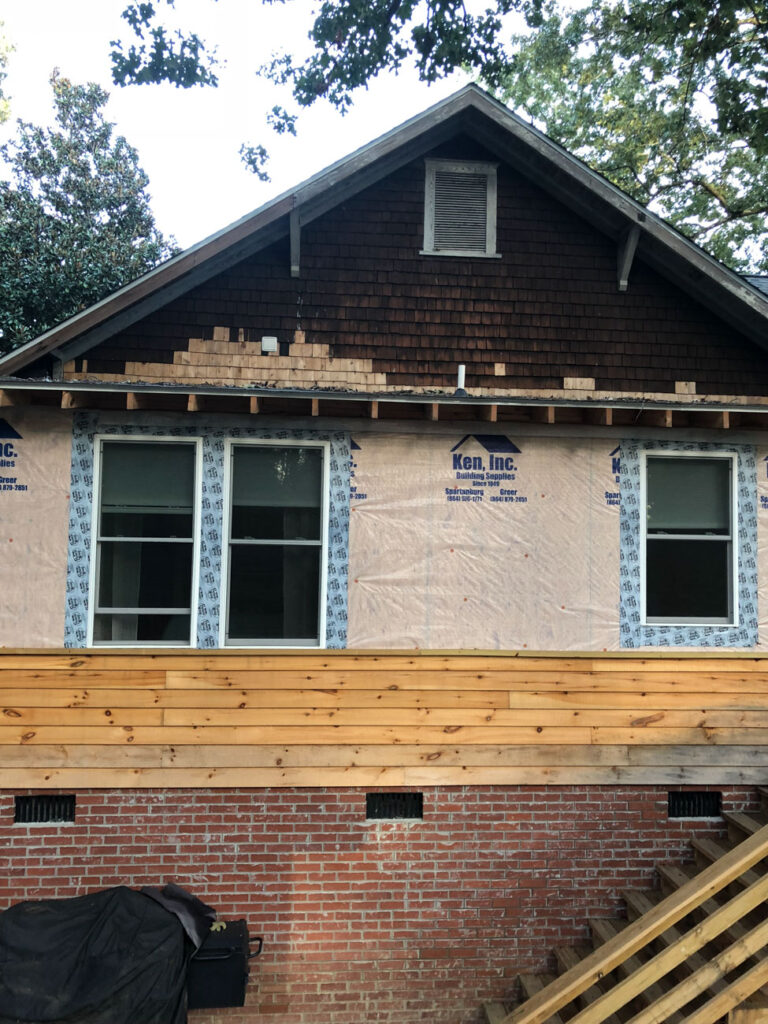
Along the back of My 1914 Bungalow, I did just this. We removed half of the back wall of the house to add an addition. Before the demolition began, I went through and pulled off as many of the original shakes as possible and saved them for later. After the master bedroom and screened porch additions were completed, I used the salvaged shakes to finish the siding on the screened porch to match the existing original shakes that wer close by. I also used some for repairs to other areas and then added all new shakes for the master bedroom addition.
Adding an Addition
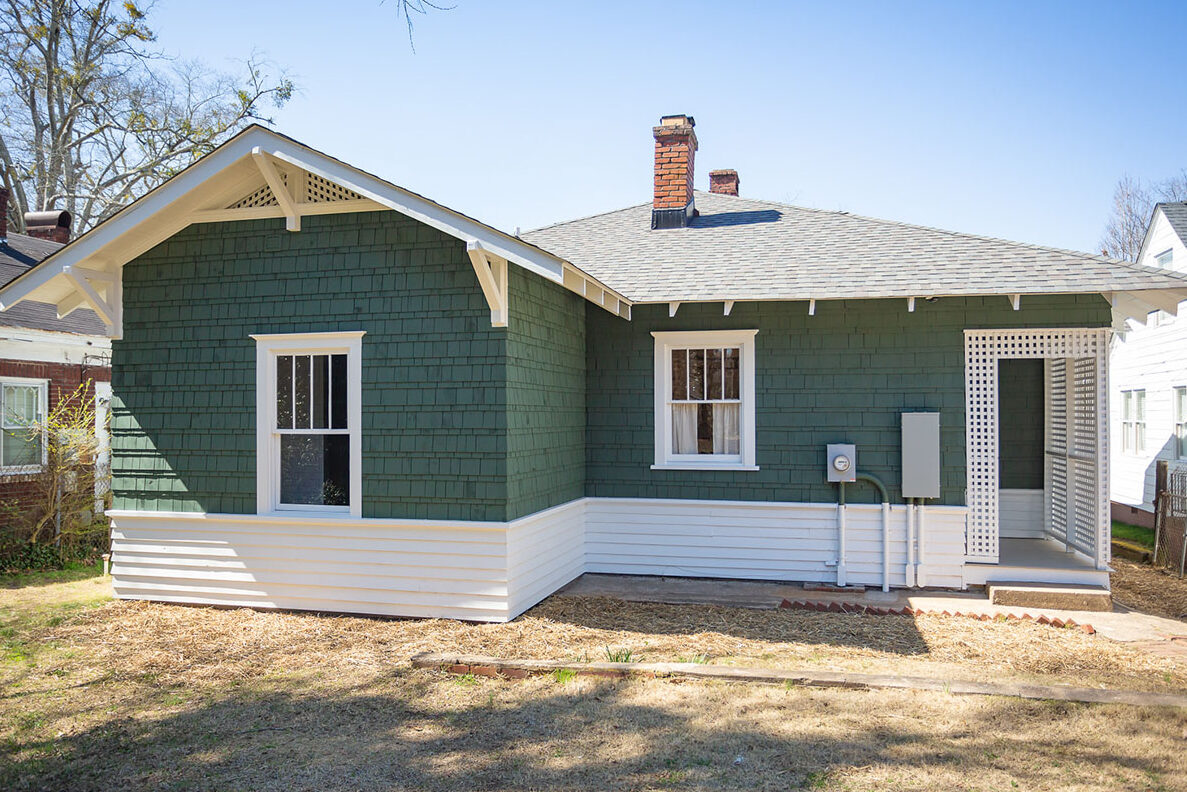
If you have an addition to your historic home, the goal is the same as above. The goal is that you can’t tell the difference between the old and the new. Be sure to follow the same pattern and to make it look as close as possible to the original part of your home as we did here at Peronneau Place.

When we had to tear down the back addition and rebuild, we were careful to continue both the cedar shakes and the wood siding to match the original. The end result makes it hard to tell it was an addition.
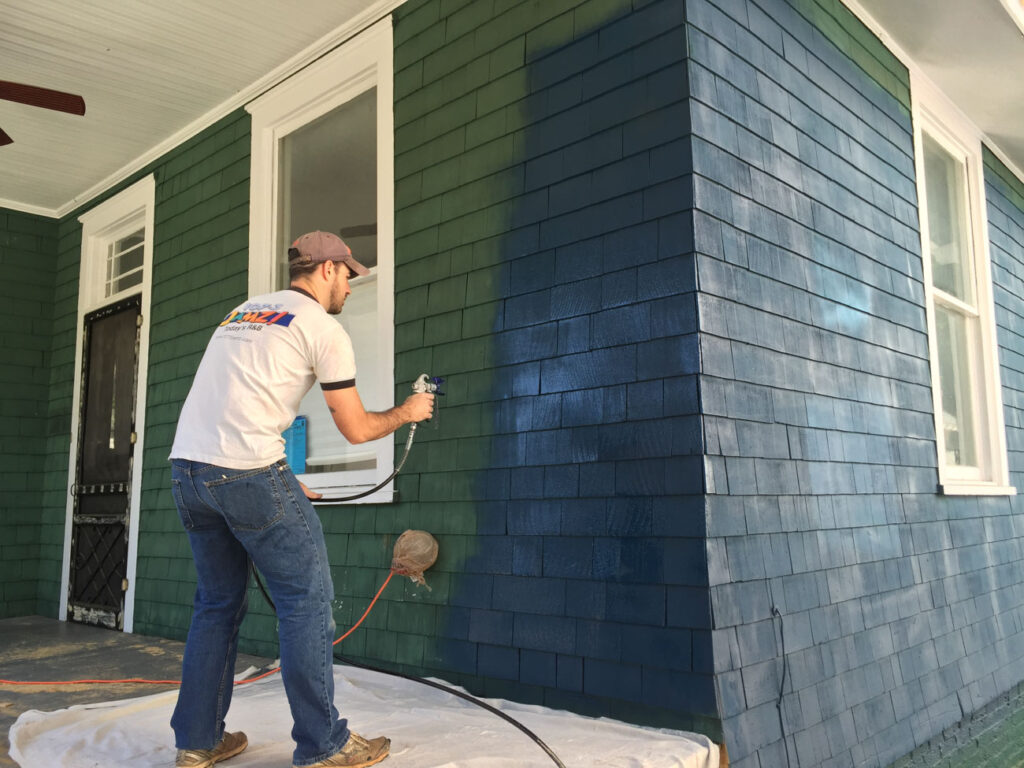
Paint vs. Stain
My last piece of advice is to stain your shakes rather than painting. I learned this the hard way. If your cedar shakes have never been painted, it’s really challenging to try and make repairs or add an addition and match the patina of the aged, original shakes. My solution is to use a solid color stain that can be matched to any color you want. The stain penetrates the cedar for a more long-lasting finish as opposed to paint. And one last note, if you decide to pressure wash the house before you begin painting, go easy on the cedar shakes and always spray the water from the top down.

The End Result
The goal in the end is that once stained, you can’t tell where any repairs were made or if an addition was added. I find that repairing cedar shakes isn’t incredibly hard in most instances, it just takes time and like any historic home repair, attention to detail. If you’re considering trying this yourself, it’s completely doable!
Sourcing Wood Siding
Local Lumber Yard
If you find yourself in need of wood siding to match your original, whether it be for repairs or an addition, my advice is similar to the cedar shakes. Always start with your local lumber yard. They have been my go-to for years and if they don’t have it in stock, they usually can source it for me.
Custom Made at a Mill
If you are unable to find it in stock, you may need to track down a local mill and have it custom made. I won’t sugar coat this for you. This can get expensive, but sometimes it’s the only option. You can provide them with a piece of the old and they can mill it for you. The biggest problem other than the cost with this option is finding a mill that still operates. Many of them have closed their doors which is unfortunate.
Types of Wood Siding
Over the years, we have replaced several styles of wood siding with different profiles. Here’s a quick run down of the three most common profiles we use and where we sourced it from.
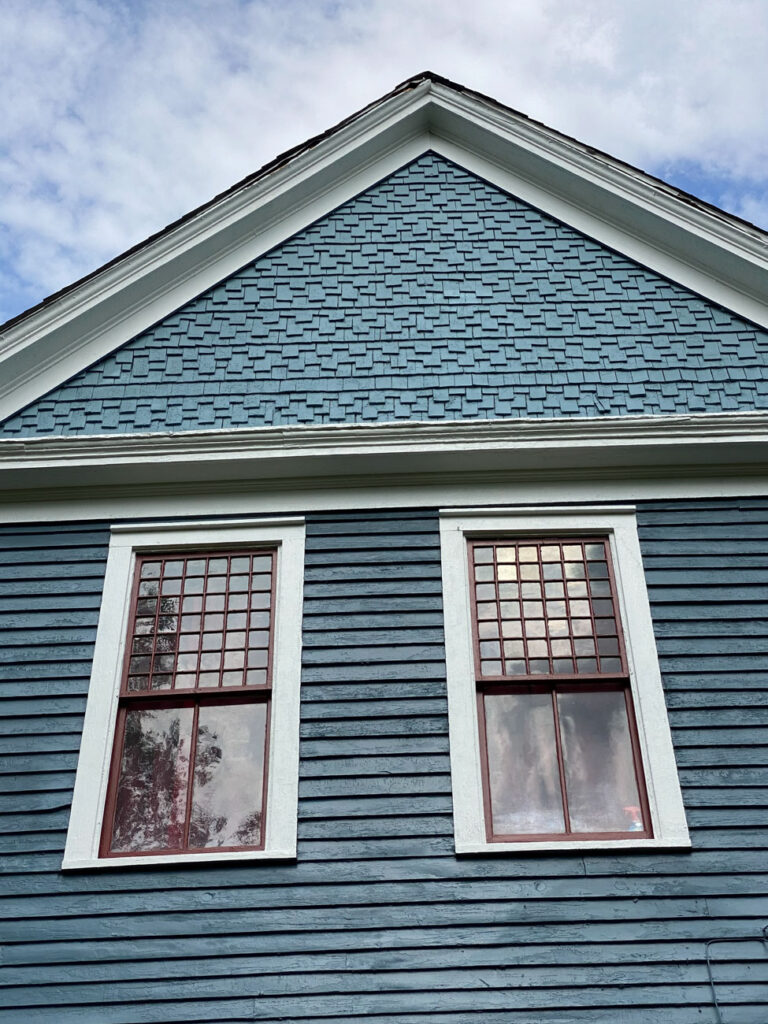
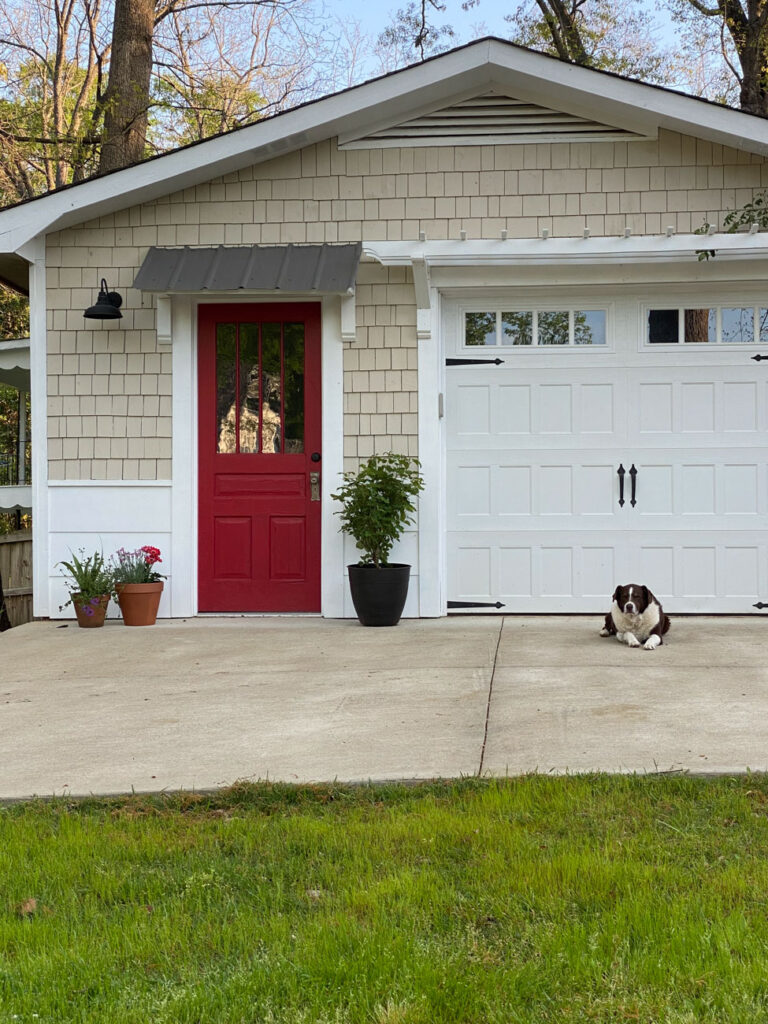
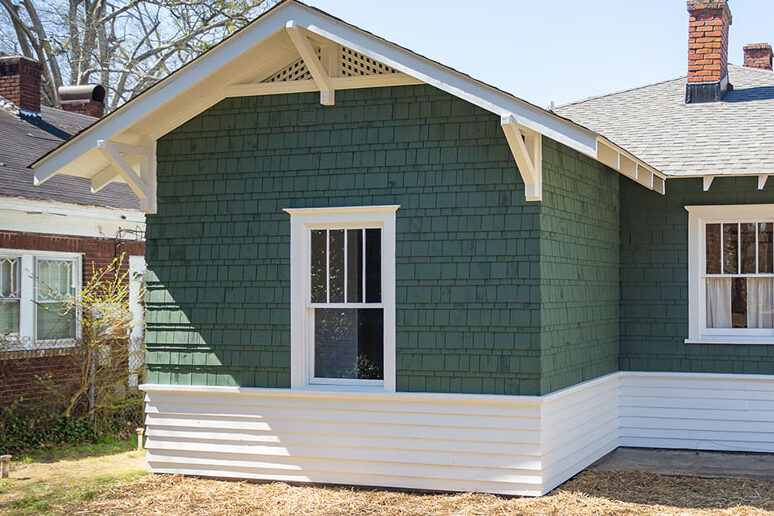
Bevel Siding: Looking at this siding from the side it looks like an isosceles triangle meaning it gets thicker towards the bottom. This is installed horizontally with one board overlapping the one below. This is the most common type of siding we have used and luckily our local lumber yard typically has this in stock. This photo of Peronneau Place shows bevel siding along the bottom and cedar shake on top.
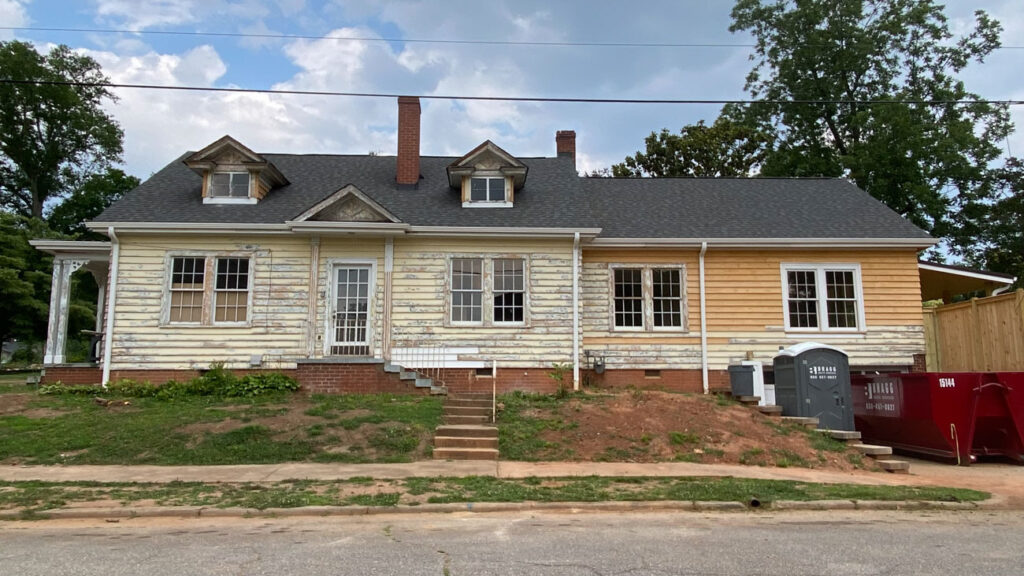
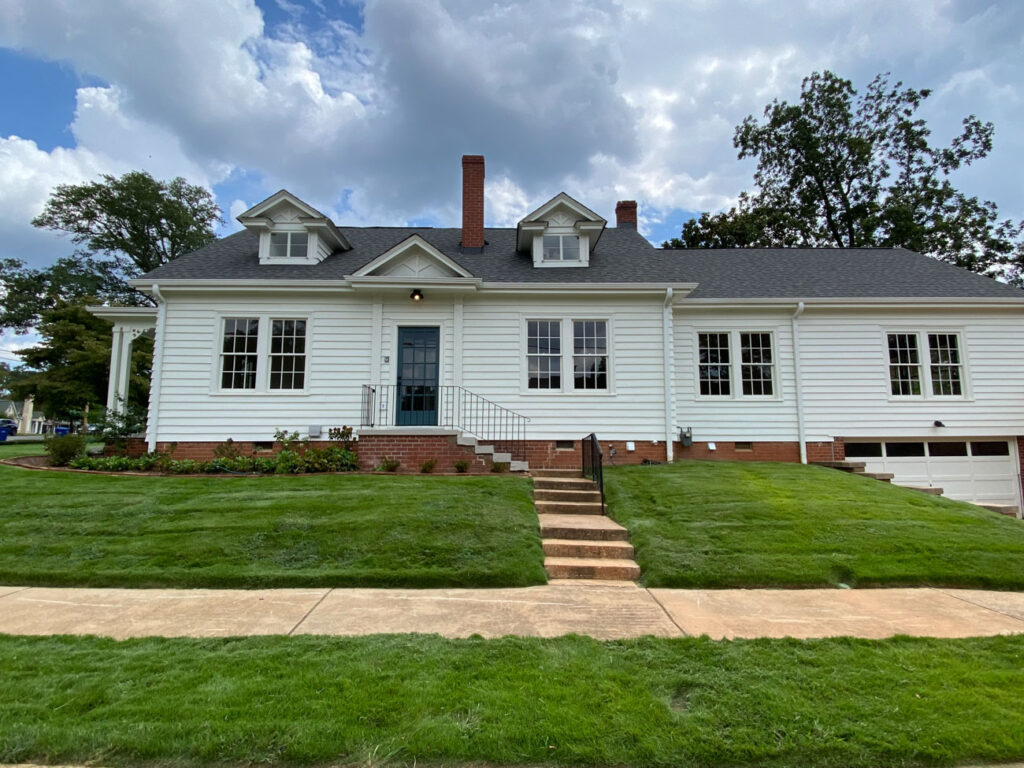
Clapboard Siding: Dimensional lumber such as a 1″x8″ or 1″x10″ board that is installed horizontally and overlaps the board below it. Easily found at the local lumber yard or the larger home improvements stores although anything wider than 10″ tall has proven difficult to find. The before and after below at the Corner Cottage show repairs using clapboard siding on the right side of the house.
Novelty Drop Siding: This profile has a swoop, or curve, and much like the two types above, is hung horizontally and overlaps the board below. Our local lumber yard has been able to order this siding for us and you can see how pretty it looks below at the West End.

Here’s a great article with more detail on the types of siding you might be looking for.
As with anything related to a historic home, there are times when it’s difficult to source materials to match. In this case you may have to have something custom made by a carpenter or at a mill if you can find one still operating. In general I’m not a fan of more modern materials like Hardie Board but I’m not completely against it. On a couple of occasions we have used it in high moisture areas. This could be where the siding meets two roof lines or high exposures to the sun. We always make sure it matches the profile of the original wood siding if we go this route.


+ Show / Hide Comments
Share to: