Restoring Original Siding: What Lies Beneath


Alright so after reading the first post in this series, Removing Vinyl & Aluminum Siding, let’s talk about what lies beneath. You made the smart decision to remove that ugly vinyl or aluminum siding and your old house thanks you. So now what? Today I want to look in closer detail what might lie beneath and some tips on how to restore, repair, or replicate, the original materials. We’re also going to take a look at an almost worse case scenario. And before I forget, thank you for restoring your historic home.
Repairs You’re Likely to Encounter
Nails, Nails, and More Nails
The first thing you’ll learn is the number of nails it took to install your vinyl siding. As hard as you may try to remove them all as you go, about half way through (if you make it that long), you’ll get tired of being careful and just rip the vinyl or aluminum siding off. And then comes time to remove all one million of those nails left behind.
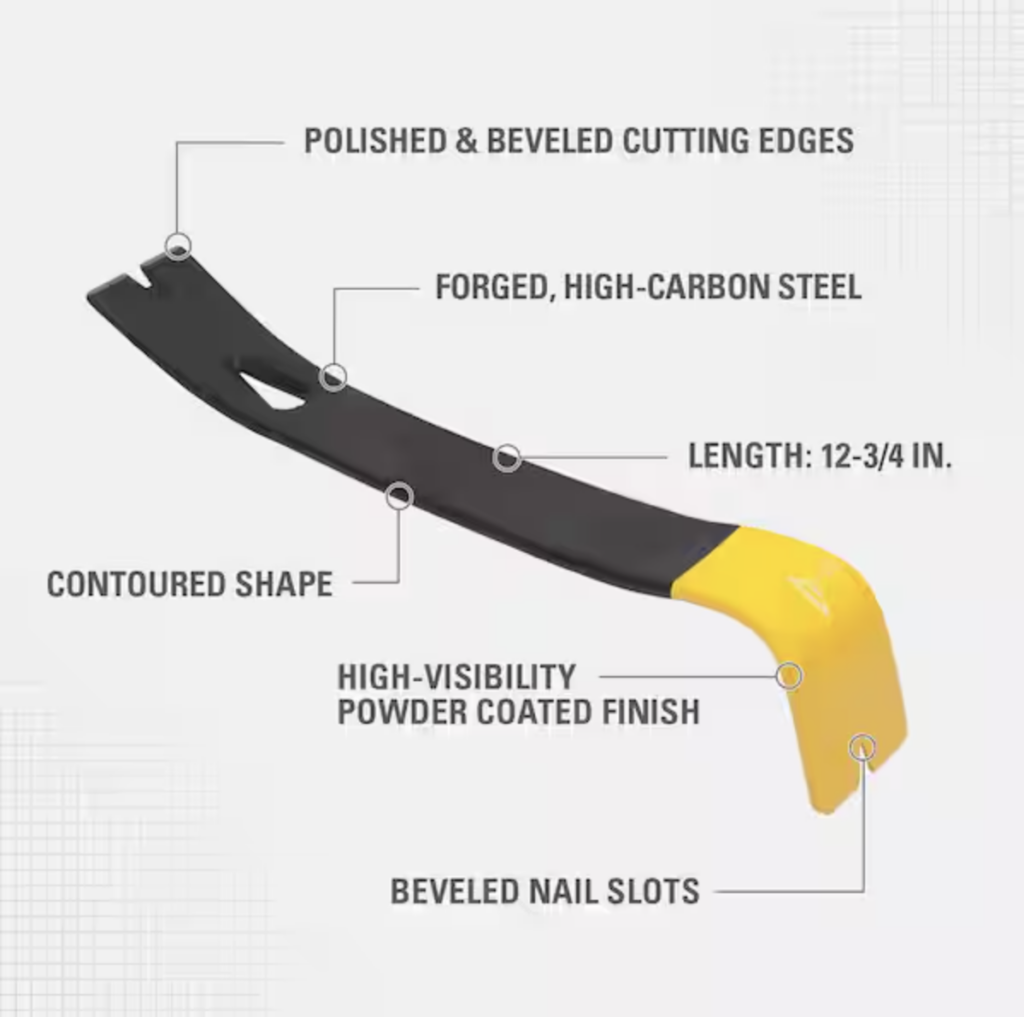
If you don’t have a flat crowbar, you’ll need to purchase one. This 12″ Wonder Pry Bar will work best since it has nail slots on both ends and a beveled edge too.
Here’s another set with three different sizes that would work well too, especially for trim.
There’s no easy way to do this so just tackle as much on one side of the house at a time as you can. You also might want to purchase a Magnetic Clean Sweep, or borrow one, to pick up all of the nails from the ground once you’re done.
Window and Door Trim
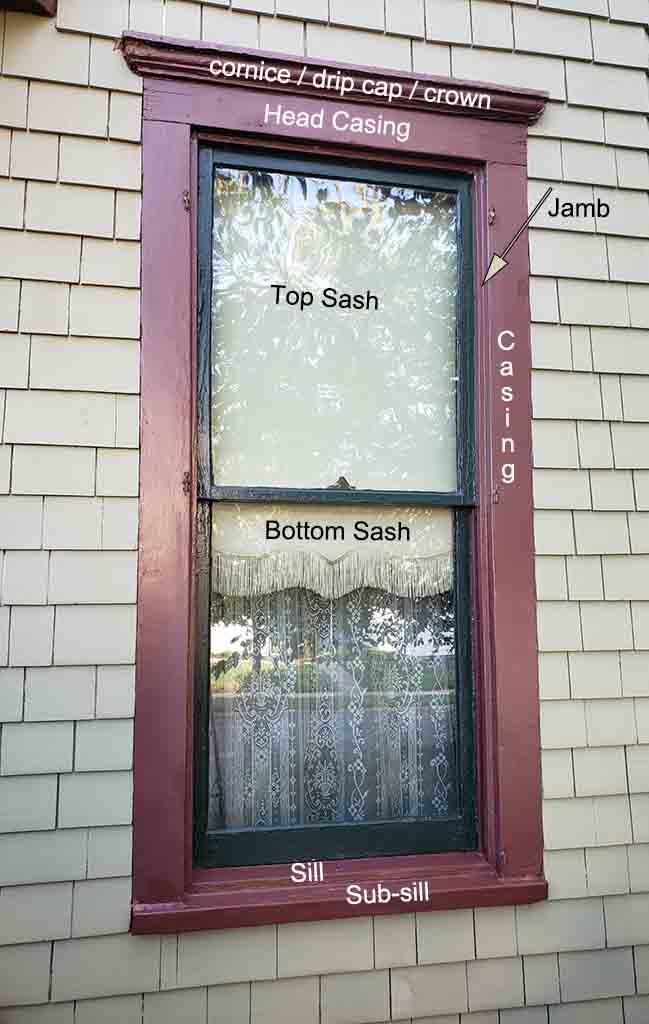
Let’s talk old door and window trim anatomy for just a minute.
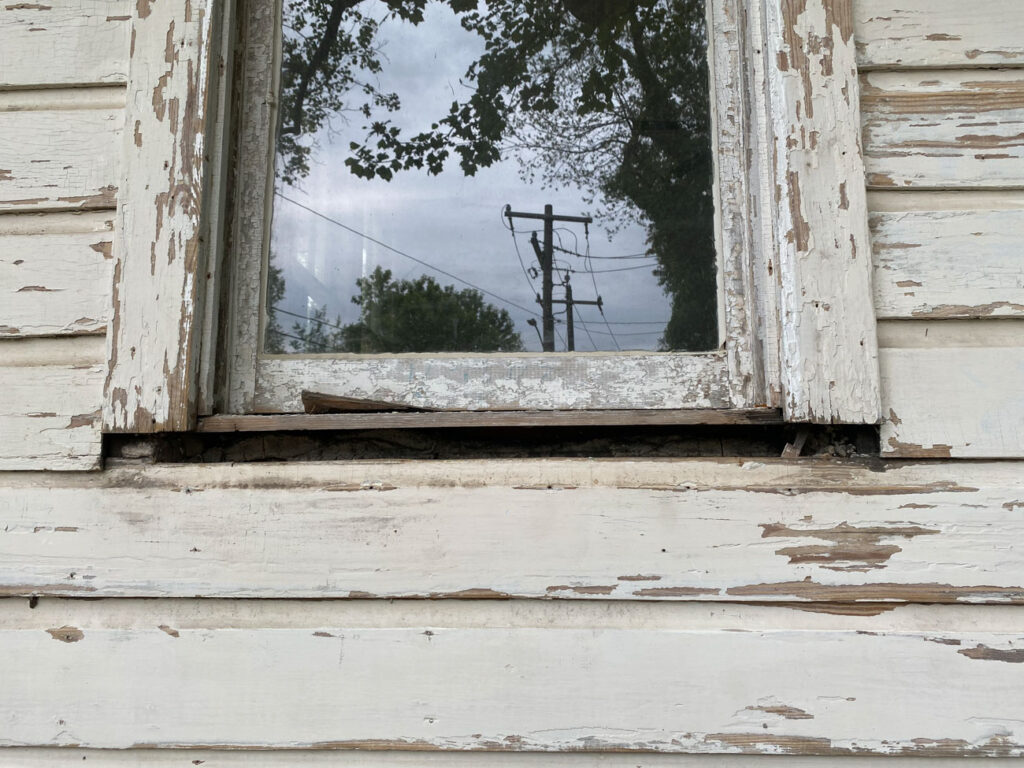
Here’s a great article breaking down of all of the parts of a window on a historic house if you’re interested. While we won’t get into all of these parts today, there are three areas that are typically damaged when vinyl siding was installed – window sub-sill, door or window drip cap, and sometimes the casing.
The reason these were damaged was because they protrude out from the house. In order to get the vinyl siding to lay flat, they cut them off. Basically, they butchered them.
In most cases, you’ll need to cut those out completely, replicate, and reinstall. I tried to patch the window sills on a house many years ago and it wasn’t beautiful then so I’m sure it’s no better now. In other words, don’t do what I once did. Remove, replicate, and replace.
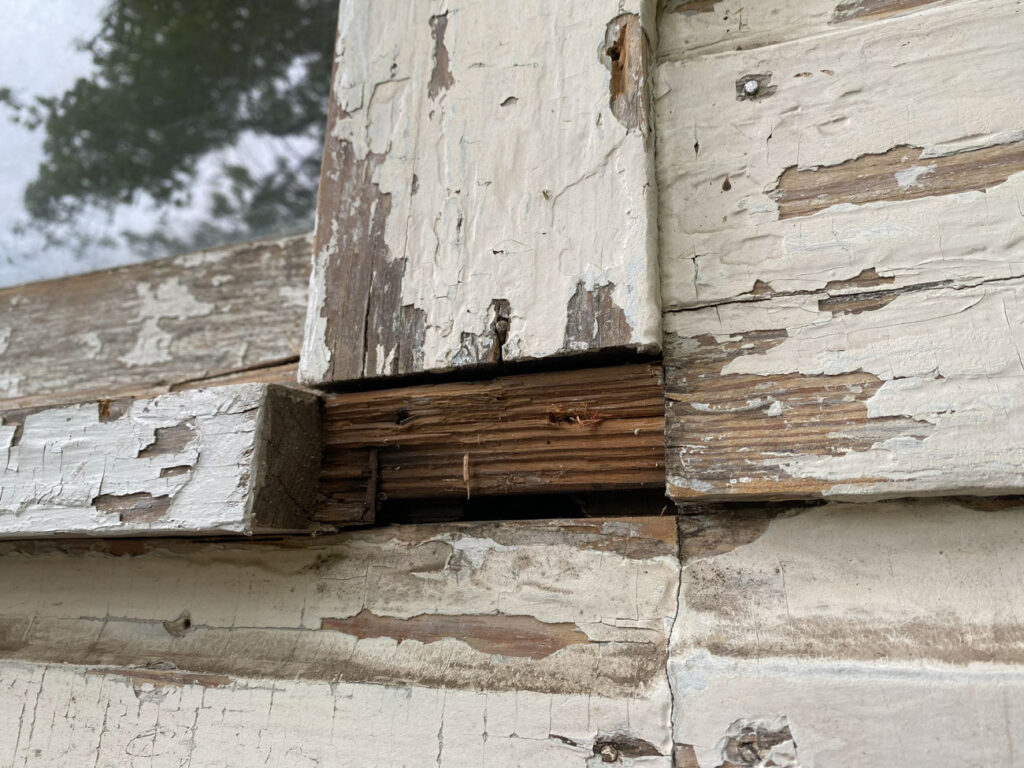
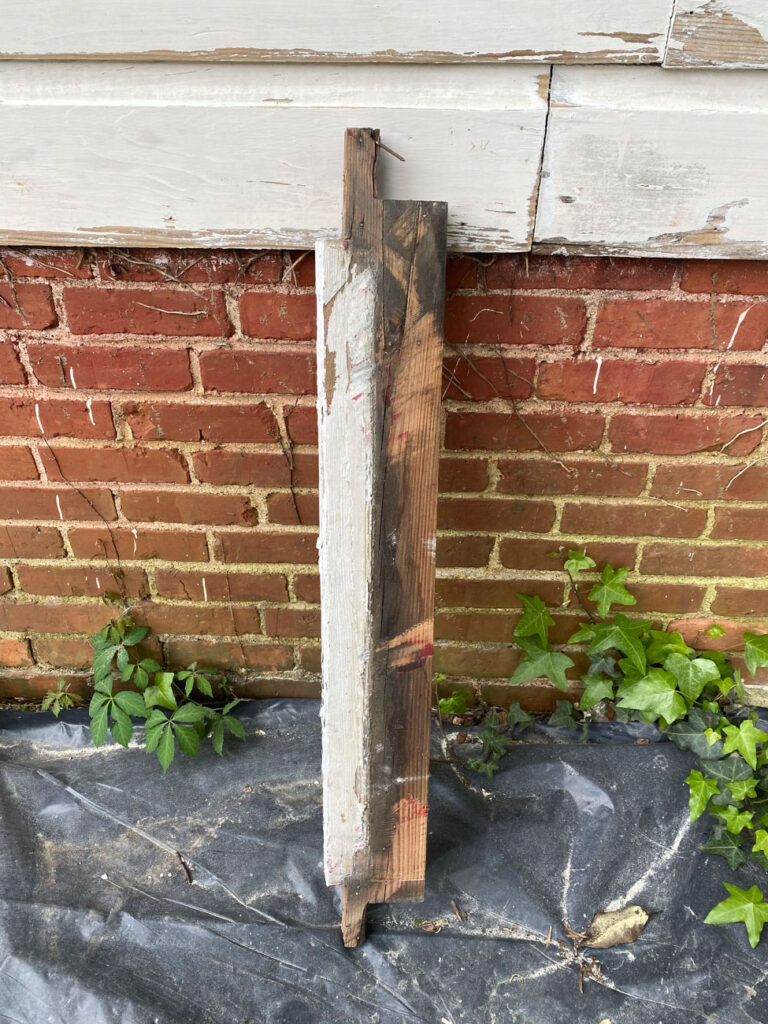
To remove the damaged material, you’ll end up using a combination of tools like a flat crowbar, reciprocating saw, and a hammer. I watched the guys at the West End and there’s really no easy way to do this. So, just figure out what works best for you. For the sub-sill above, they first used a flat crowbar to try and separate the sill from the sub-sill and then used the reciprocating saw to cut the nails. Next they used crowbars and a hammer to pull it out all while trying not to damage the siding. It’s hard work but worth it.
Wood and Cedar Shake Siding Restoration
I’ll do a deep dive into this subject in the final post of this series, Removing Original Siding: Cedar Shake and Wood Siding Repairs. To briefly touch on it, you’re likely to have to make some repairs but hopefully not a ton. The biggest repair I see are the small holes that were drilled into the siding to add insulation. Those will need to be plugged and the siding replaced. The hope is that they drilled them in a line so it’s minimal replacement for the siding.
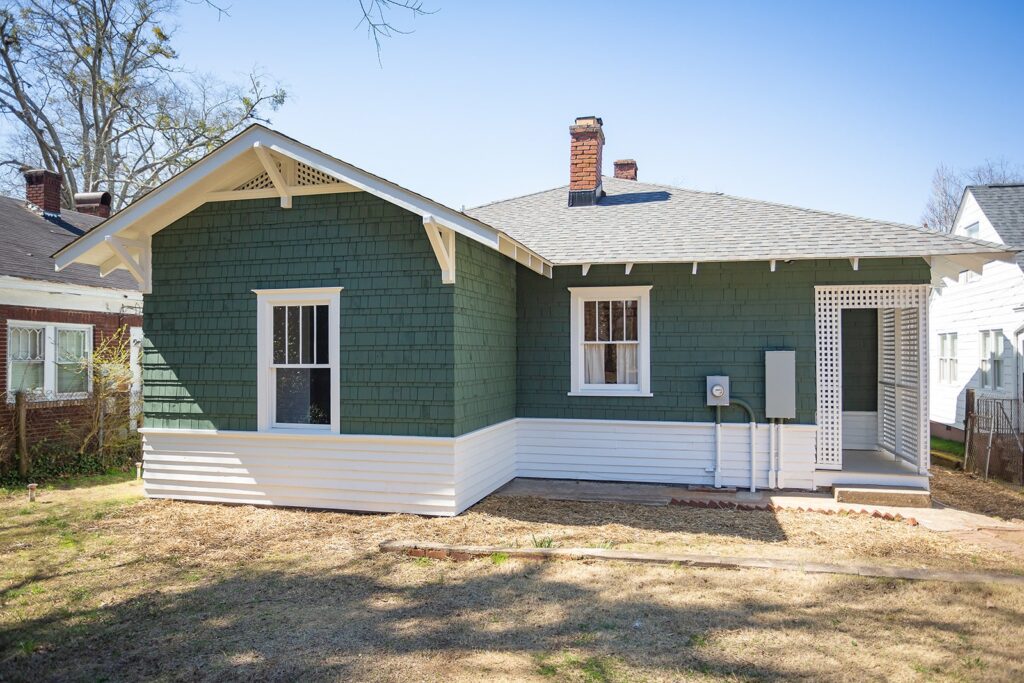
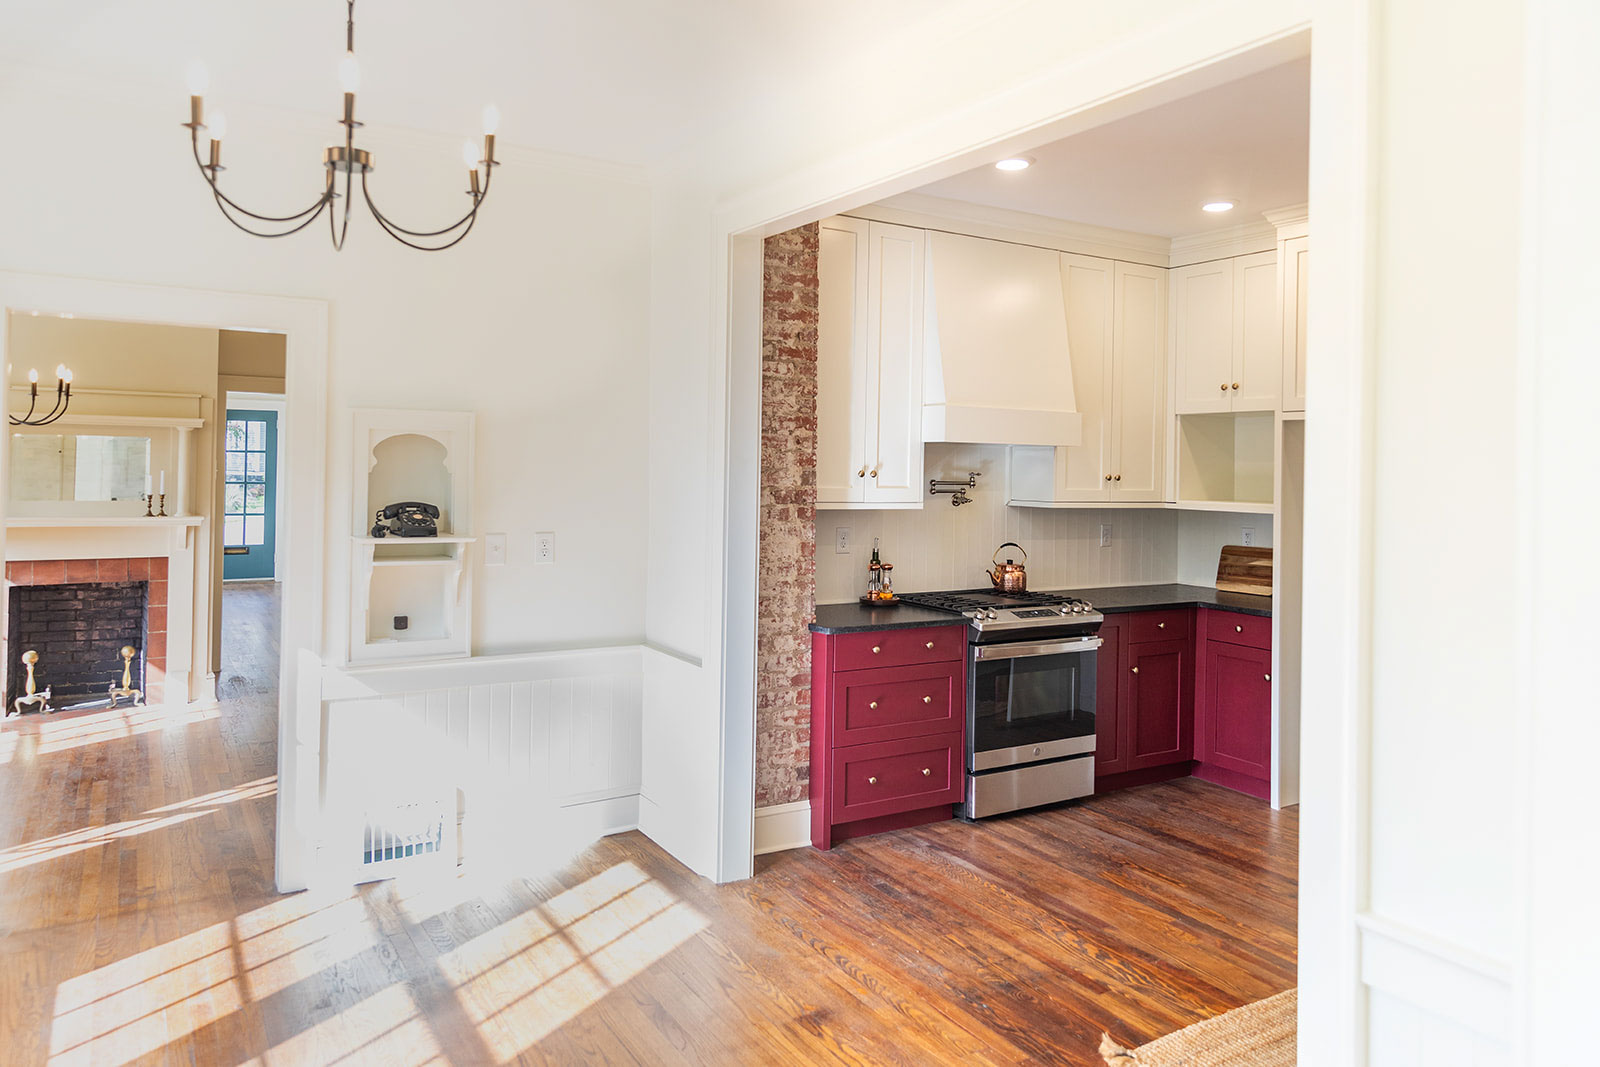
The main reason the vinyl or aluminum was installed in the first place was for maintenance reasons. Homeowners simply got tired of the upkeep of painting an exterior home. The good news is that the siding typically protected the original underneath. We’ll chat more later on sourcing siding materials and how to add new to match when needed. The end goal is to make the old and new all look the same so that once painted, you can’t tell the difference like below at Peronneau Place.
Prep Work to Paint
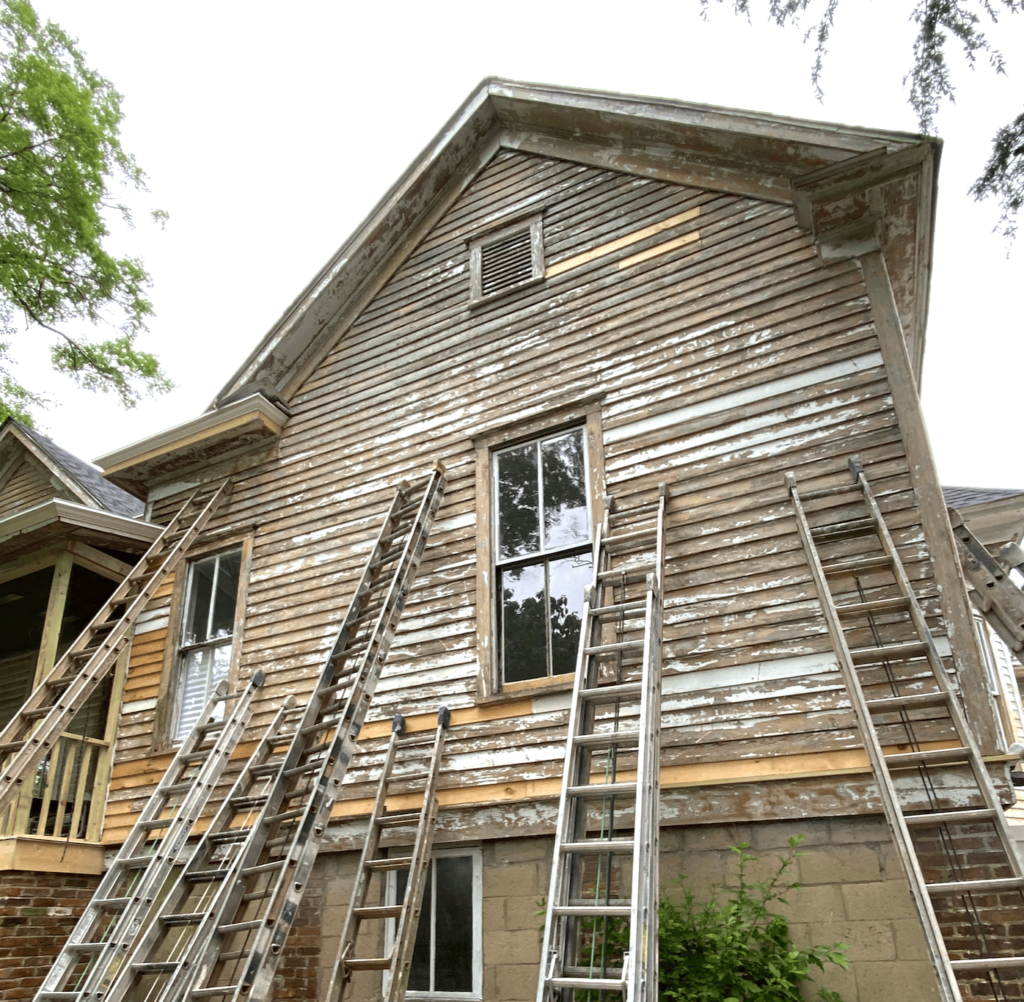
Once all of the nails are pulled and the trim and siding repairs have been made, you’ll need to spend significant time on the prep work. No historic home paint job will last long if you skip this step. Lots of scraping, sanding, and caulking is required before the primer can go on, followed by paint. For a small to medium sized one-story home, this should take a week or two, minimum.
And Now Let’s Discuss the Worst-Case Scenarios for Restoring Original Siding
The Very Worst
The very worst-case scenario is that under the vinyl or aluminum siding nothing is there. This means for whatever reason they tore all of the original siding off, wrapped the house, and then installed the vinyl. If that’s the case you’ll have to make the tough decision whether to keep the vinyl siding or tear off and install a more appropriate material. This is a tough call for sure.
A Close Second
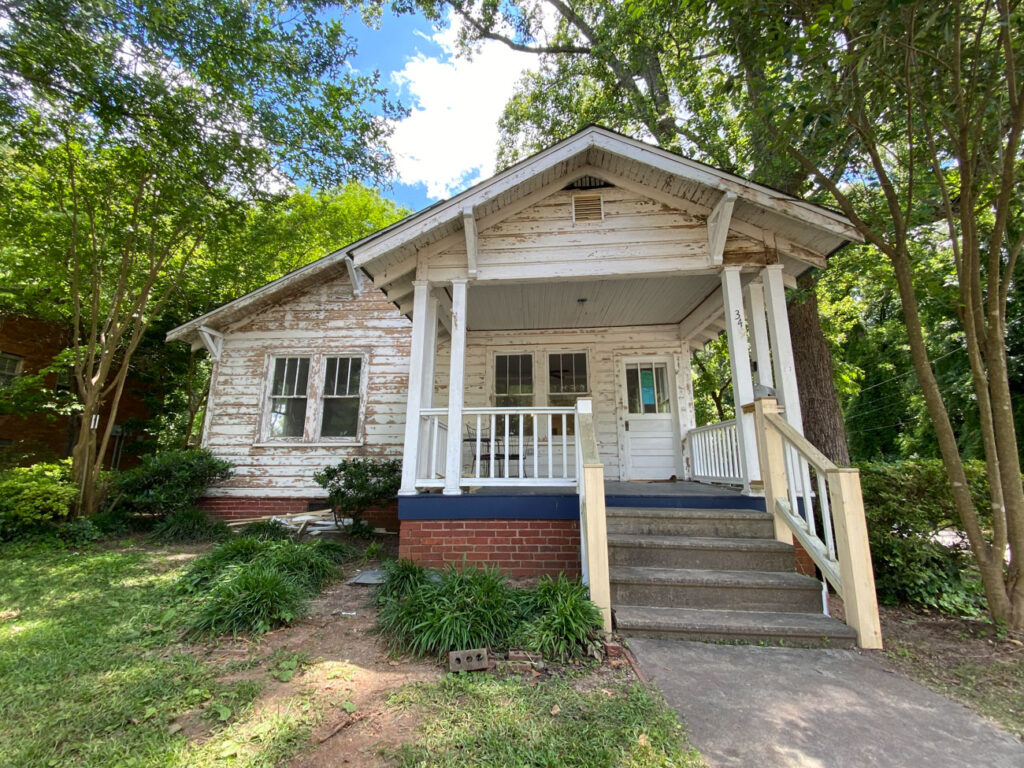
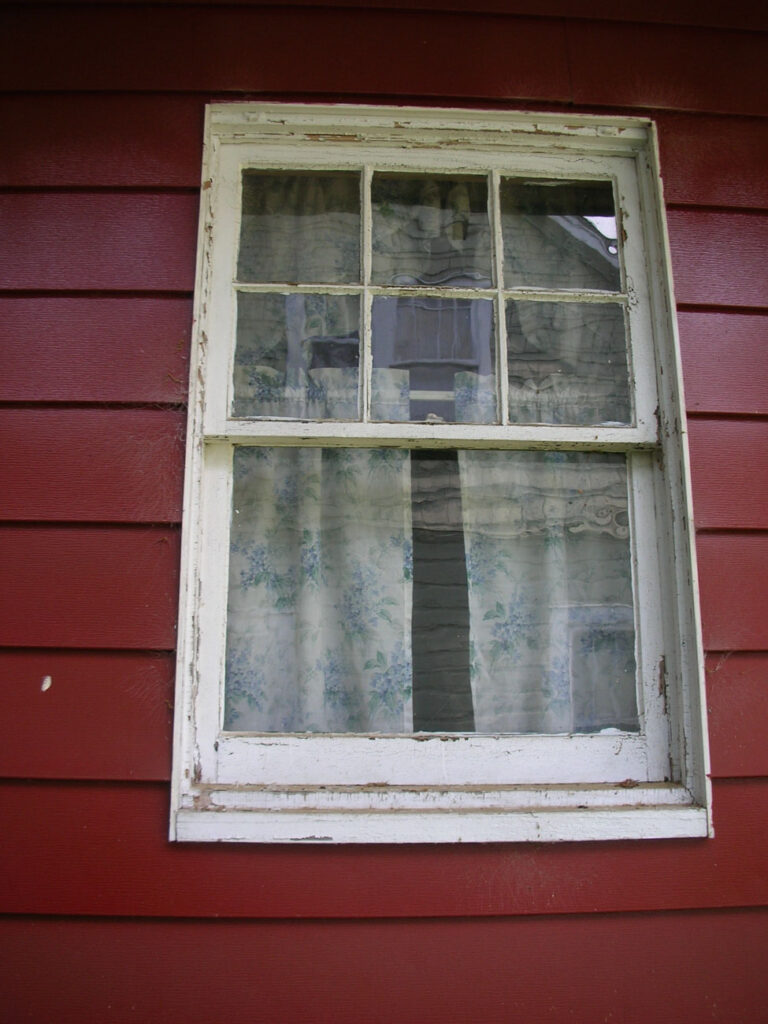
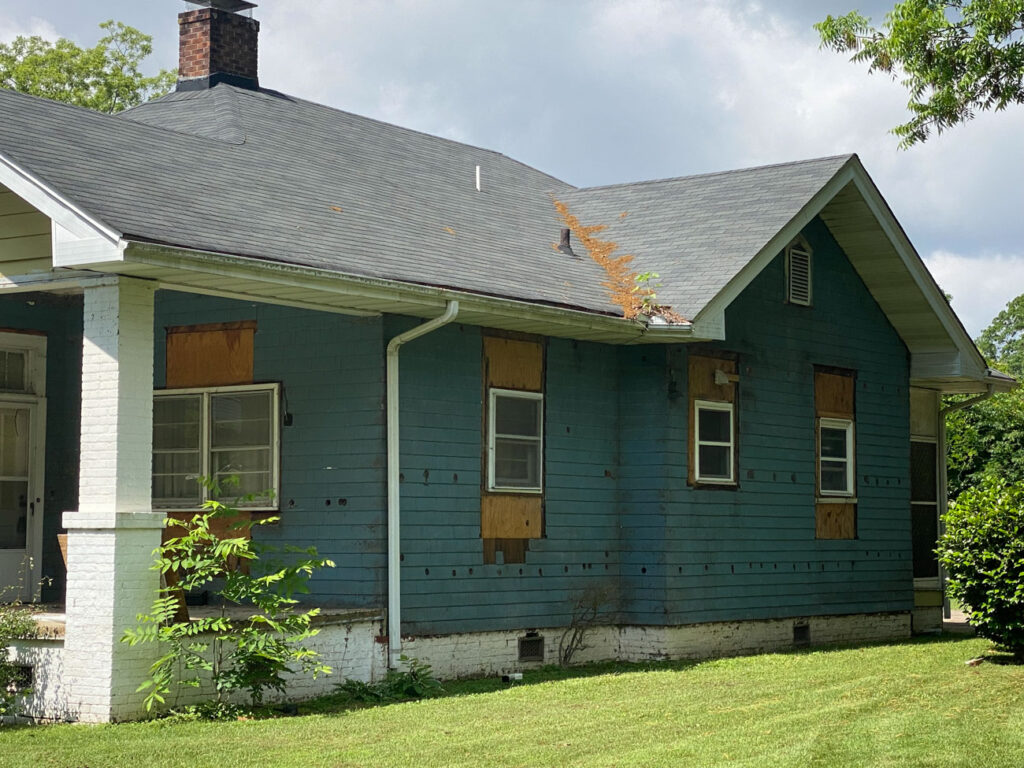
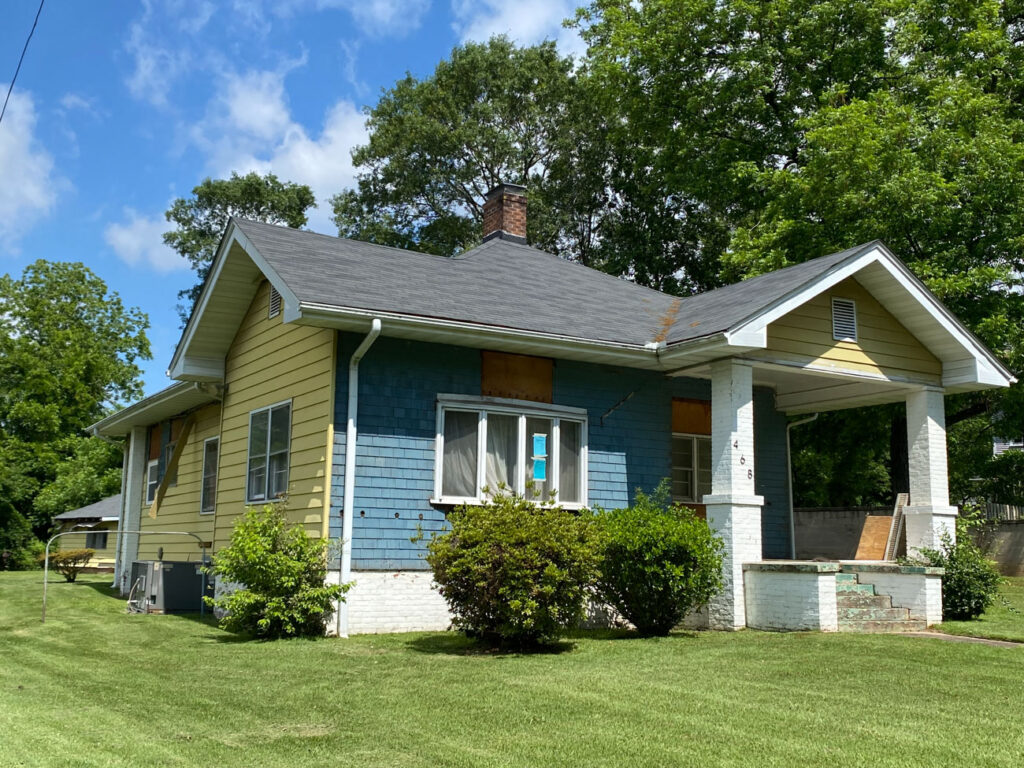
And now for the runner-up, which is a close second. The majority of historic homes, especially 1930 and earlier, have large, beautiful windows with wavy glass. If you have smaller windows in your historic home and typically without wide casing, they are probably replacement windows. They are not original and do not fit the house.

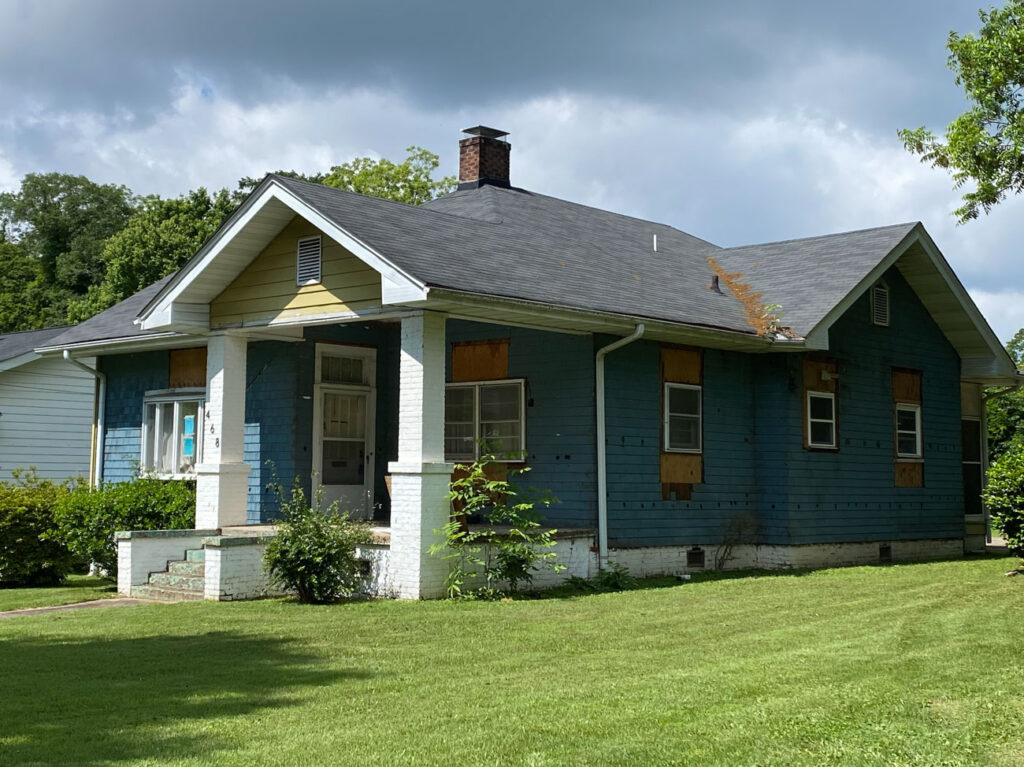
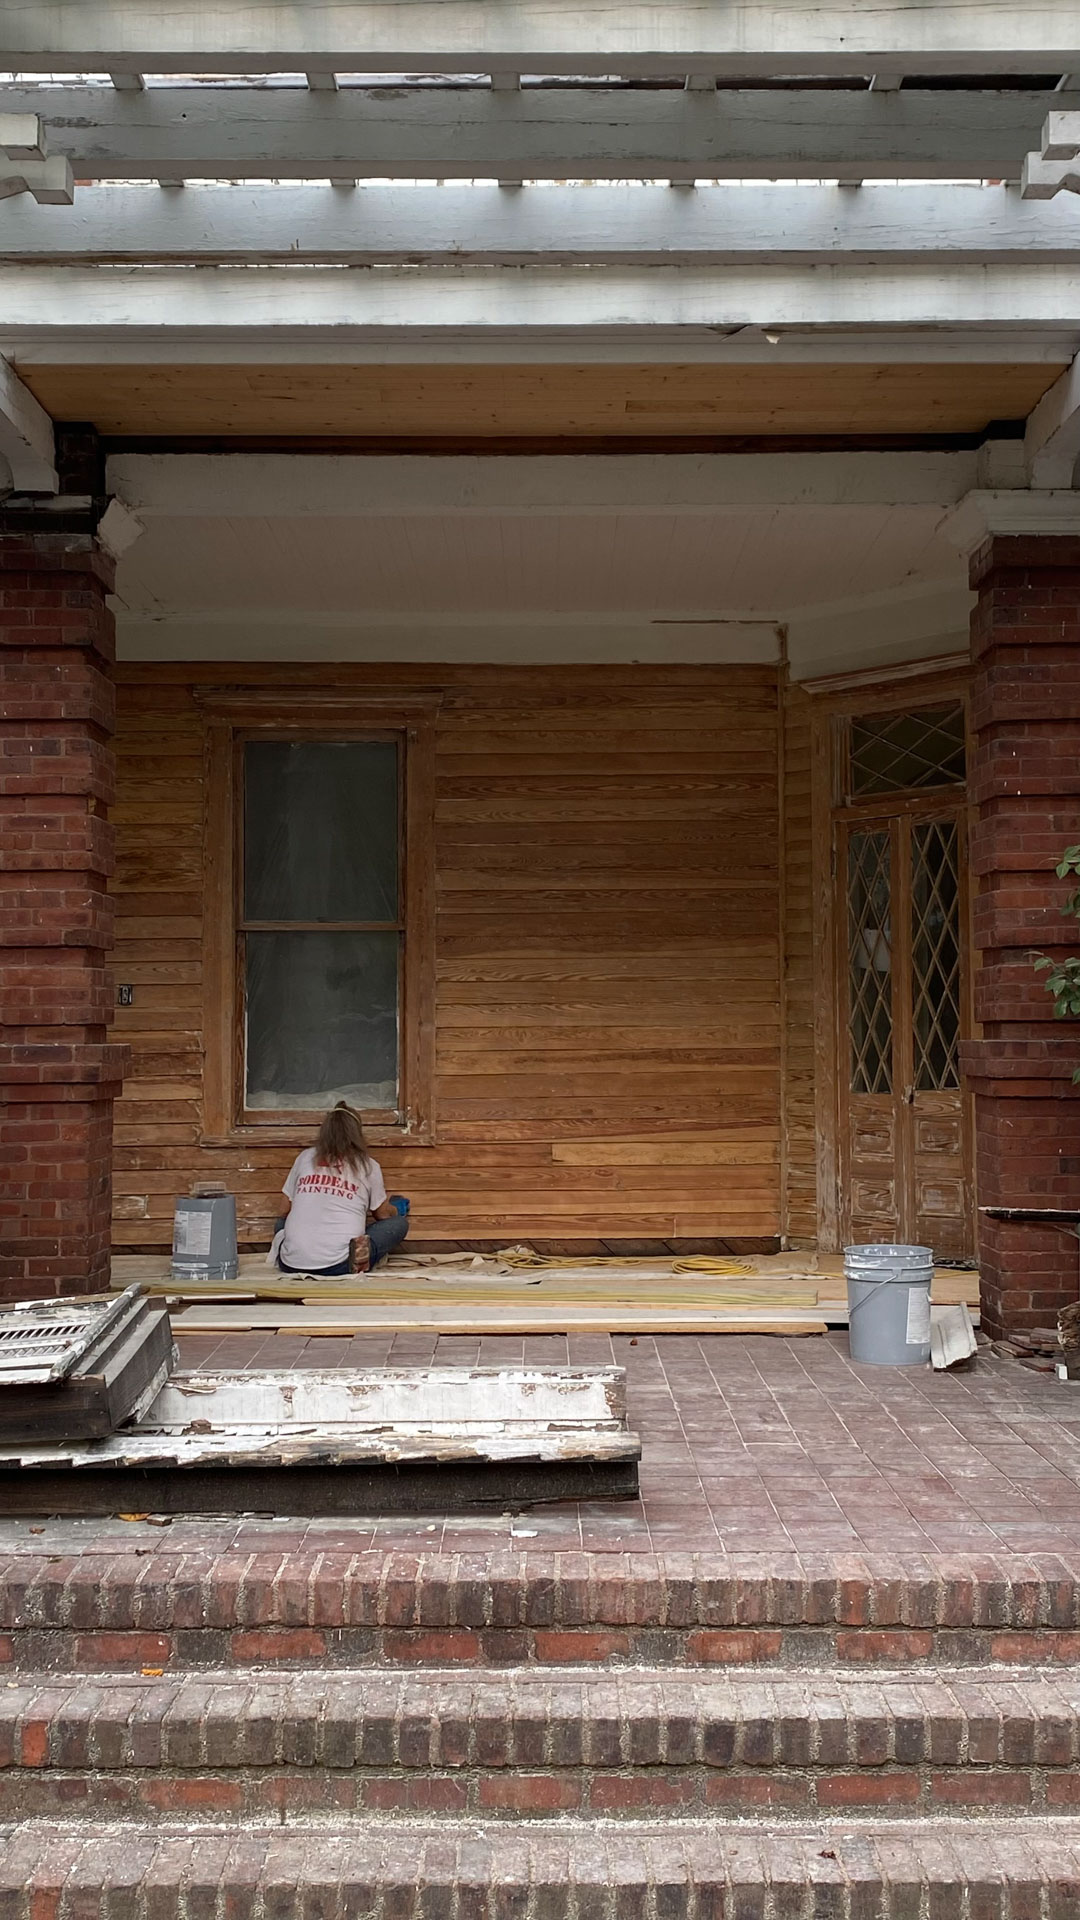
If you have both small windows and vinyl or aluminum siding like the house I’m using here as an example, you can almost bet you’ll run into what they have encountered. The large openings where the original windows were taken out were framed in for the smaller windows, and then covered up. So, when you remove the siding, you open up what I like to call a big can of worms.

What to do about that Big Can of Worms?
The choice on what to do comes down to where you live and what the rules and restrictions might be.
If you live in an area where there are no restrictions, you could either install that darn vinyl siding again, or install new windows to fit the large openings. Just please don’t install vinyl windows. I beg you.
If you live in a locally designed historic district like Hampton Heights, where I live, we have restrictions. While I am not on the architectural committee who rules on cases like this example, I would guess that since the siding has already been removed, it cannot go back on. Nor can any other type of siding since the original has now been uncovered. And, new historically appropriate wood windows would need to be custom built and installed to fit the original openings.
The good news? A home like this example would go back to what it looked like originally. The bad news? Custom wood windows can get pricey. Either way I think it’s a win for the community so I will be curious to see the outcome.
The moral of the story, do your research. Know what will be required if you run into a similar situation.
And if you do restore the siding and windows, the community and I thank you.


+ Show / Hide Comments
Share to: