One Room Challenge: Family Room Reveal


Done. I’m actually done!! I finished on time and am thrilled with the way my new Family Room turned out. In case you’re just now joining us, here’s a quick recap. The One Room challenge is a six week challenge that occurs twice a year in the fall and spring. Twenty designers along with guest participants (that’s me!) choose a room in their home to remodel. We document the process and share each week. I decided to participate the day before it started and somehow managed to pull it off.
If you would like to go back and check out the weekly progress, here are the links:
Week 1 | Week 2 | Week 3 | Week 4 | Week 5
The Before
So let me back up to give a little background on this space. If you read week one’s post, I was calling this room the Den/Study to start with. Honestly, I didn’t know what else to call it. I wasn’t really sure what the space would be. My historic home has gone through a full renovation over the past 18 months. Those renovations included changing the function of all but one room in the house, and an addition to the back. With this new lay-out, this room lies dead in the center of the home. It is essentially the gateway to six spaces and is the central station of my home. Once I started styling it with all of my favorites, I quickly realized it will be where everyone hangs out. So I’m calling it the Family Room.
Now let’s take a quick look back at what the space looked like when I bought the house…

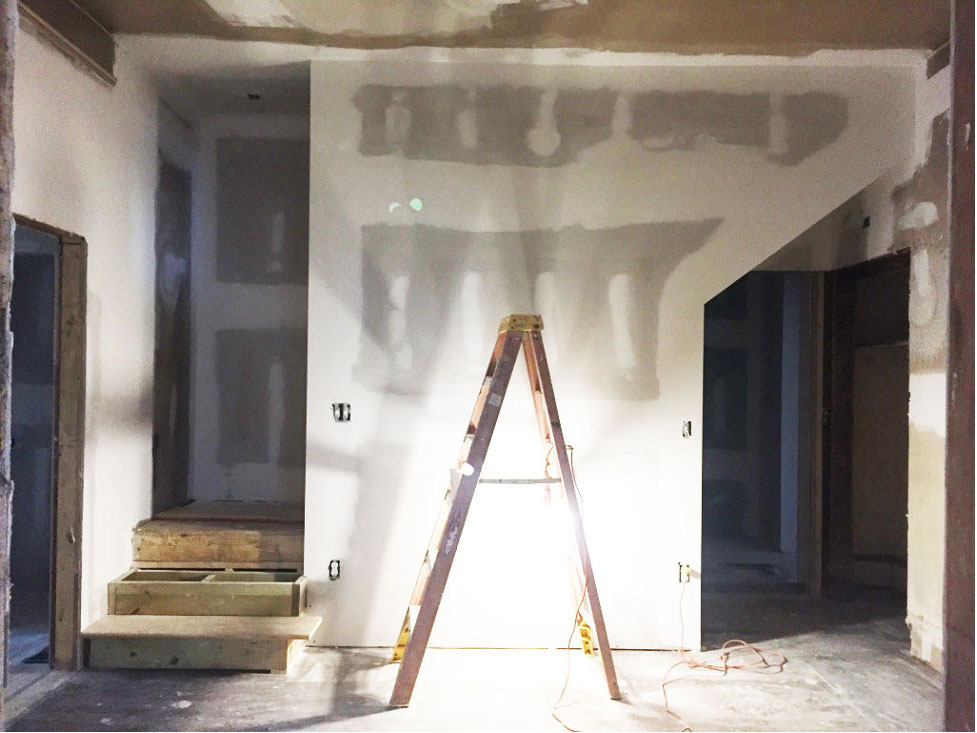
Then again after major demo was complete and drywall was up….
And then again right before the One Room Challenge began…..

The Family Room After
And now I’m so excited to show you the final results!!!!

Y’all, I actually have a finished space in my home!!! Yay!!! Now I’d love to walk you through what changes were made and how I hope this space will be used for many years to come. Since the space isn’t huge, we’ll focus on each wall so I can share all of the details.
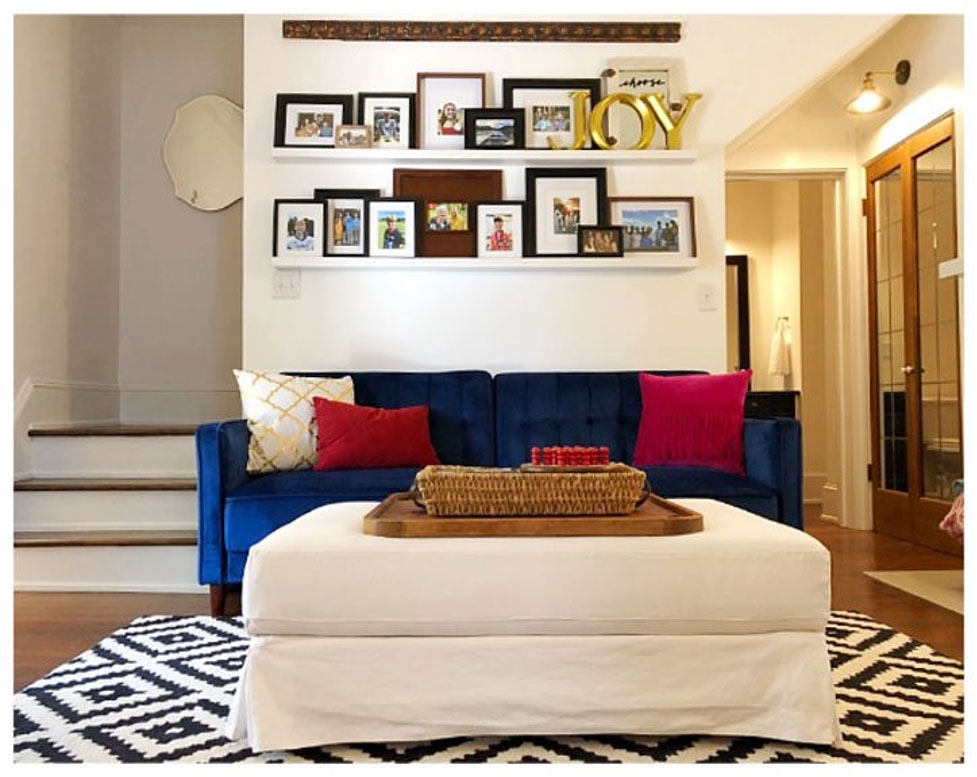
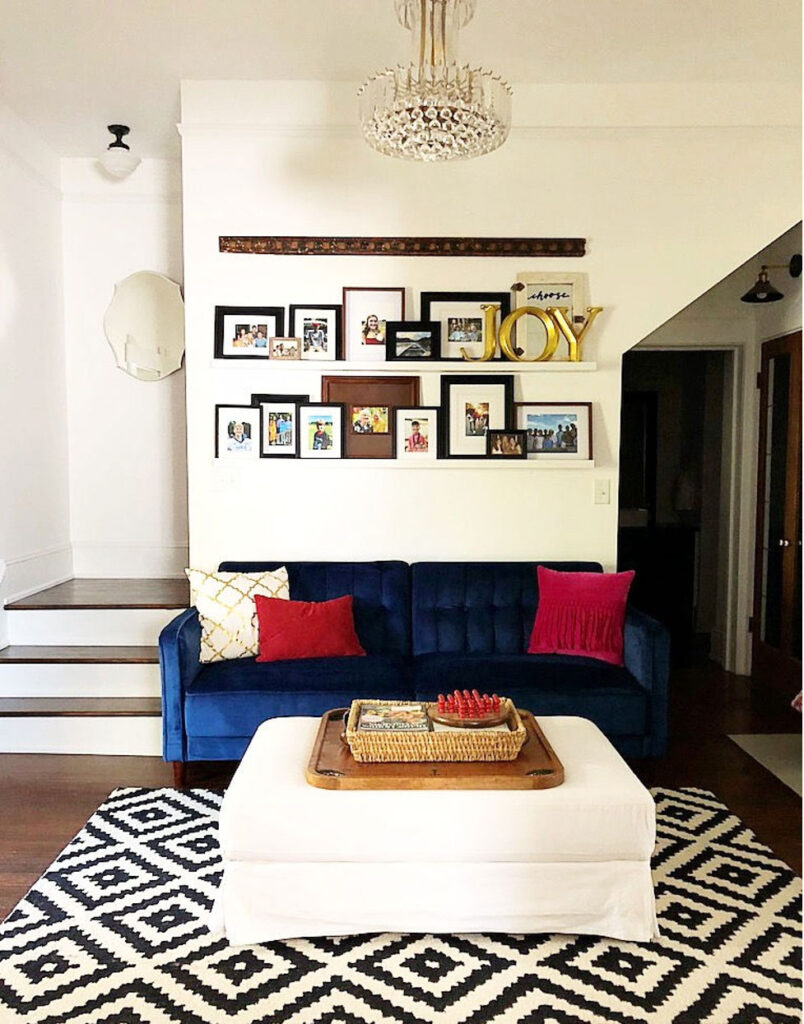
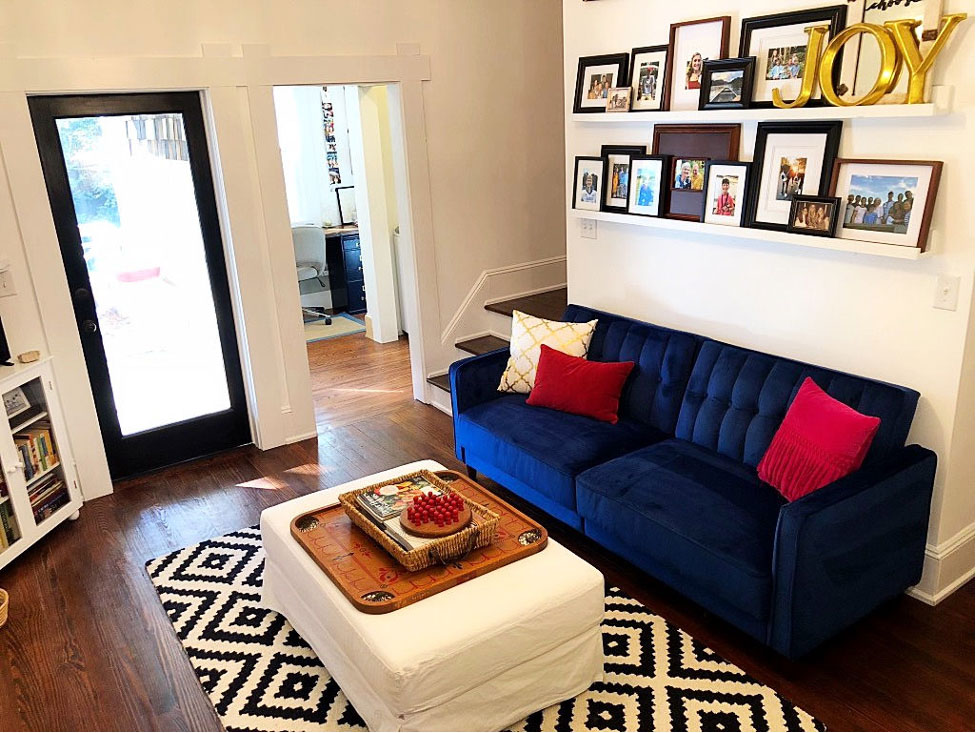
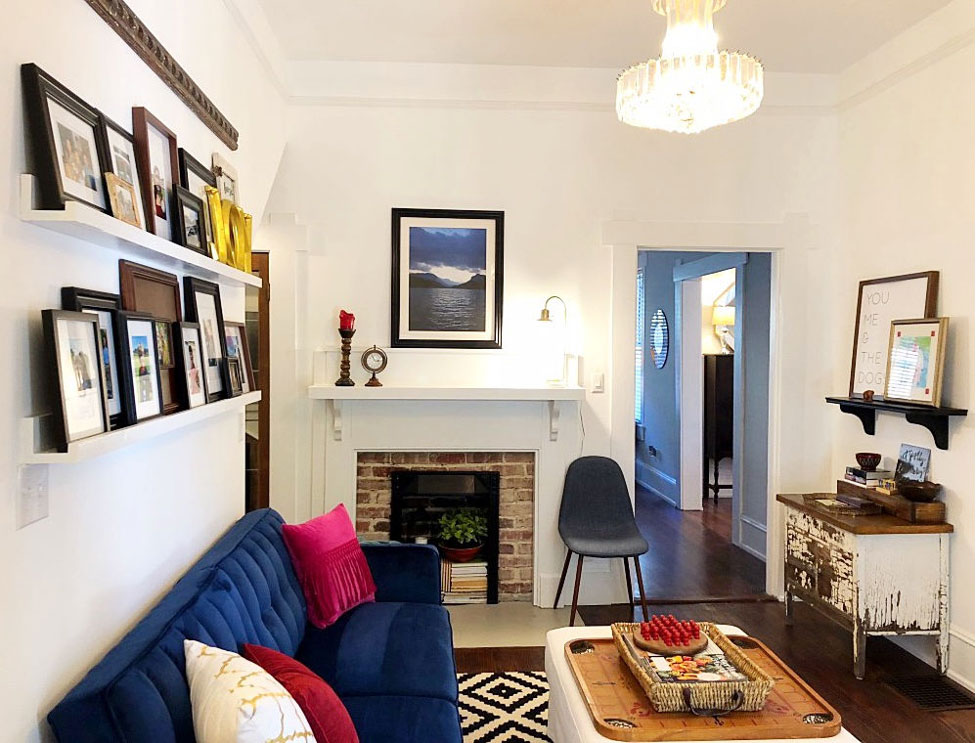
Stairwell + Blue Velvet Couch
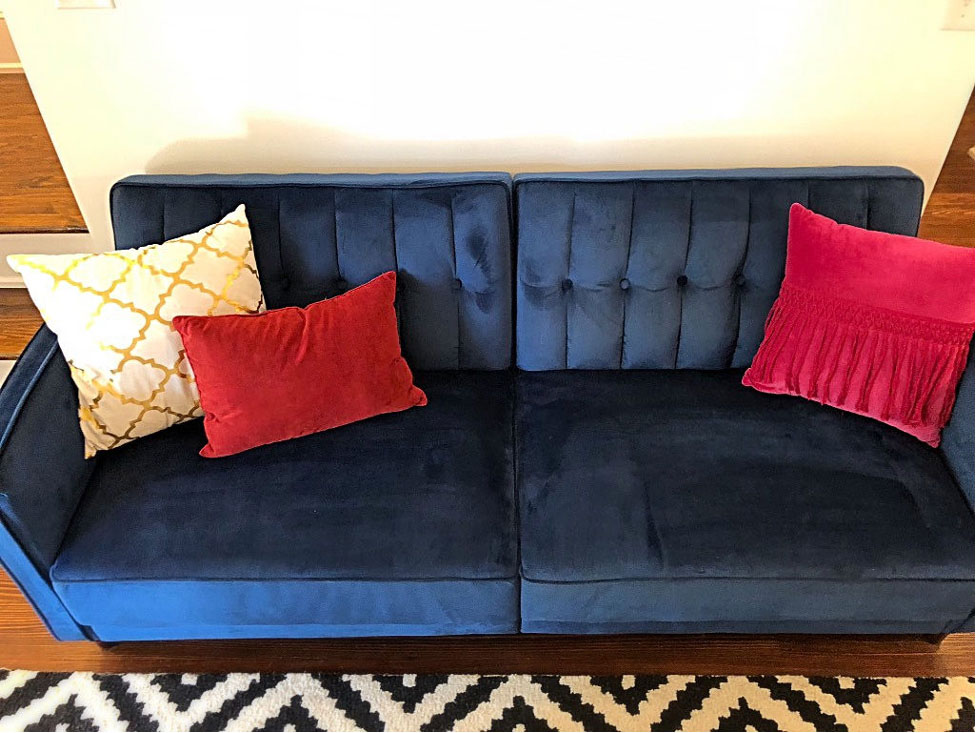
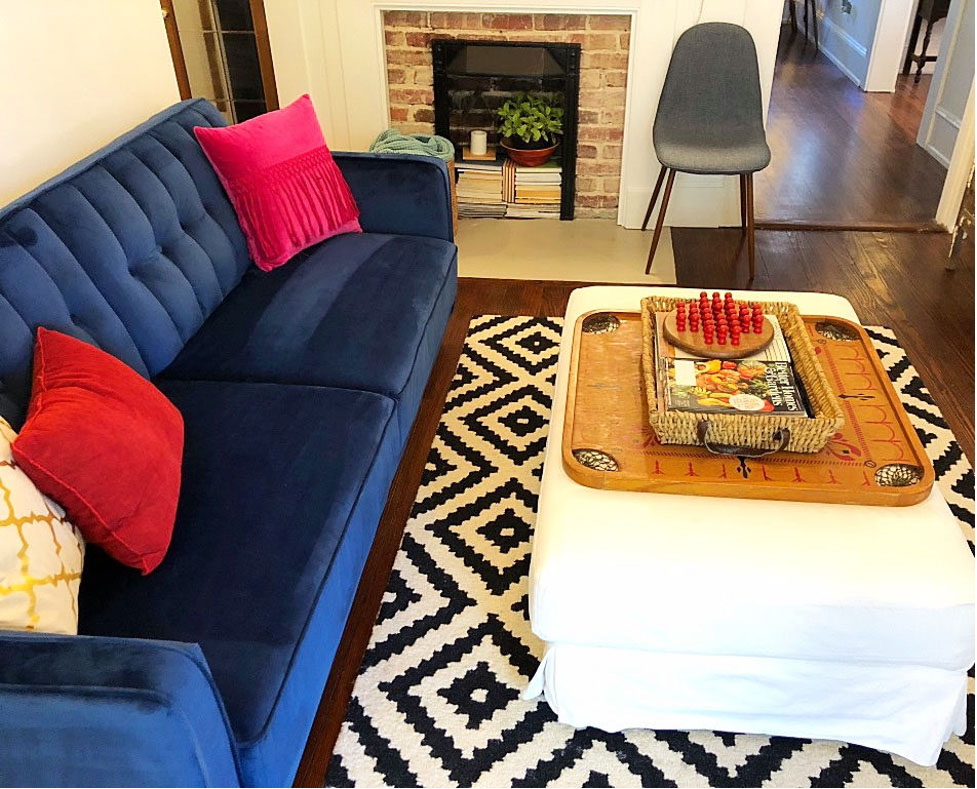
First up is the stairwell wall where the super chic blue velvet couch takes center stage. I can’t really tell you why, but right from the beginning I knew I wanted a blue velvet couch. Actually, I purchased it about this time last year even though I had no idea where I’d use it. Bright throw pillows were added for contrast and I personally love the eclectic look!
On the wall behind the couch are stairs to the attic space. I’m hoping to convert the attic space to living space sometime down the road. During construction, I went ahead and added the stairwell because it made sense construction wise. However, I’ll be closing it off for the time being. To close off the attic stairs, I installed a salvage door. I then painted it a deep red and added my favorite mirror for a touch of glam.
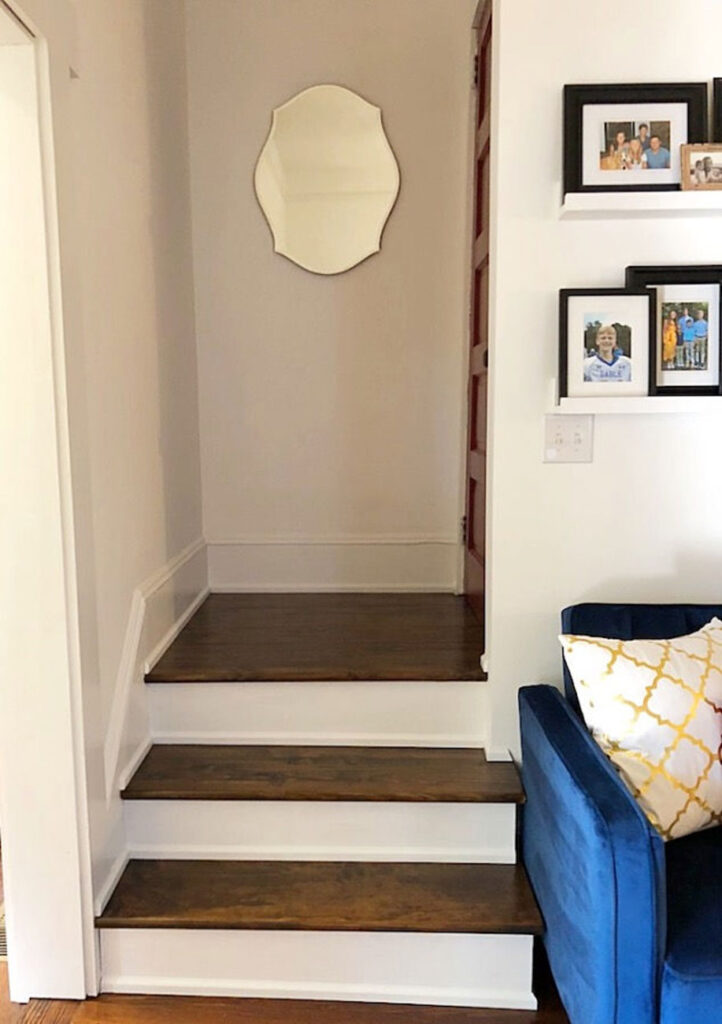

We matched the existing picture molding and basecap with salvage materials and after a fresh coat of white paint, it looks brand new. And last but not least, we sanded, stained, and added a few coats of polyurethane to finish off the steps.
Fun Fact: Under the stair landing is extra storage off of the master closet which is perfect for storing suitcases.
Picture Ledge Gallery Wall
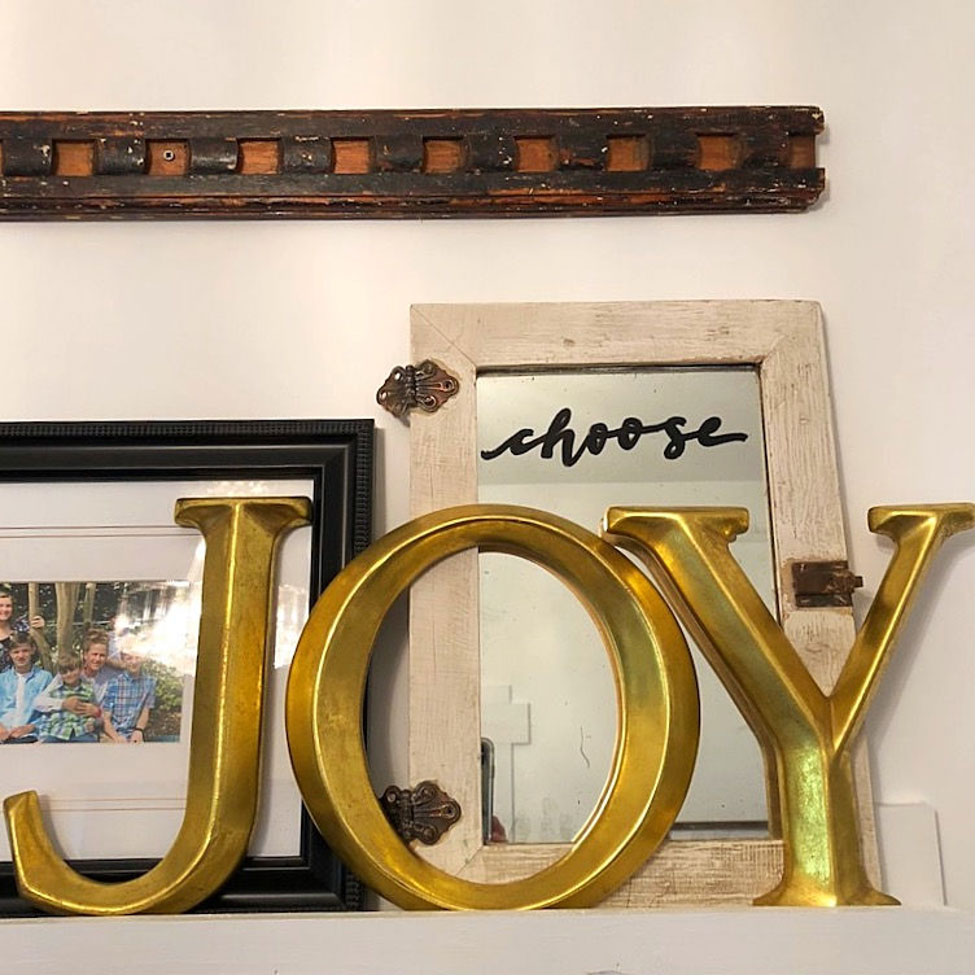
Above the couch I added two picture ledges. I love to display pictures of all of my favorite people so decided on a picture ledge. This way I can change them out periodically. There’s a mix of black, white, and stained frames as well as a vintage piece of dental molding above the top ledge.
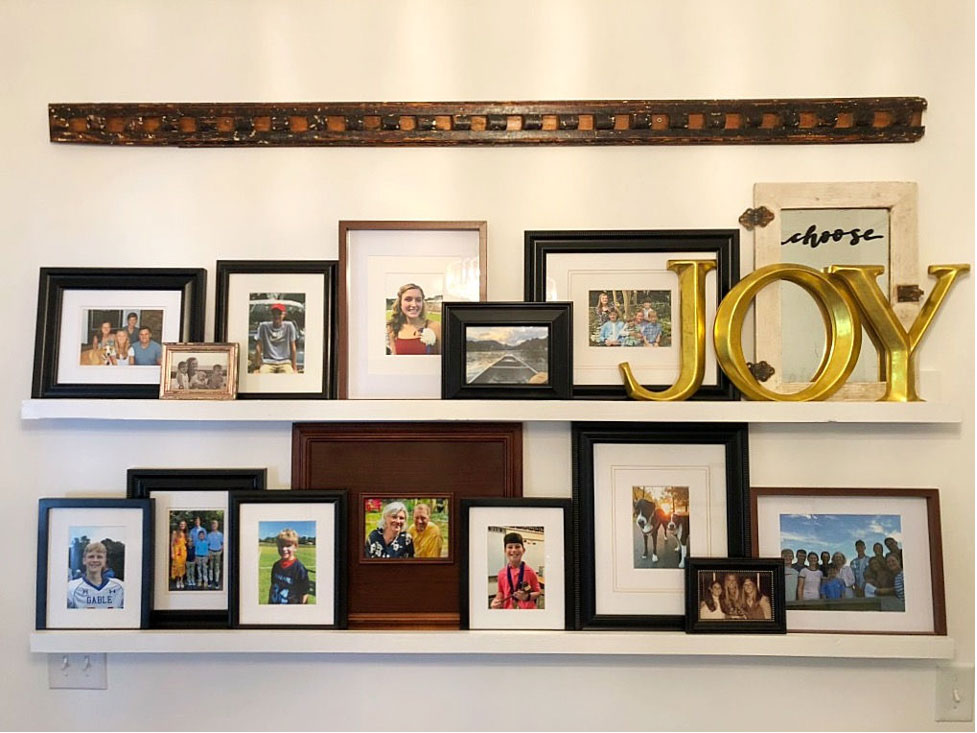
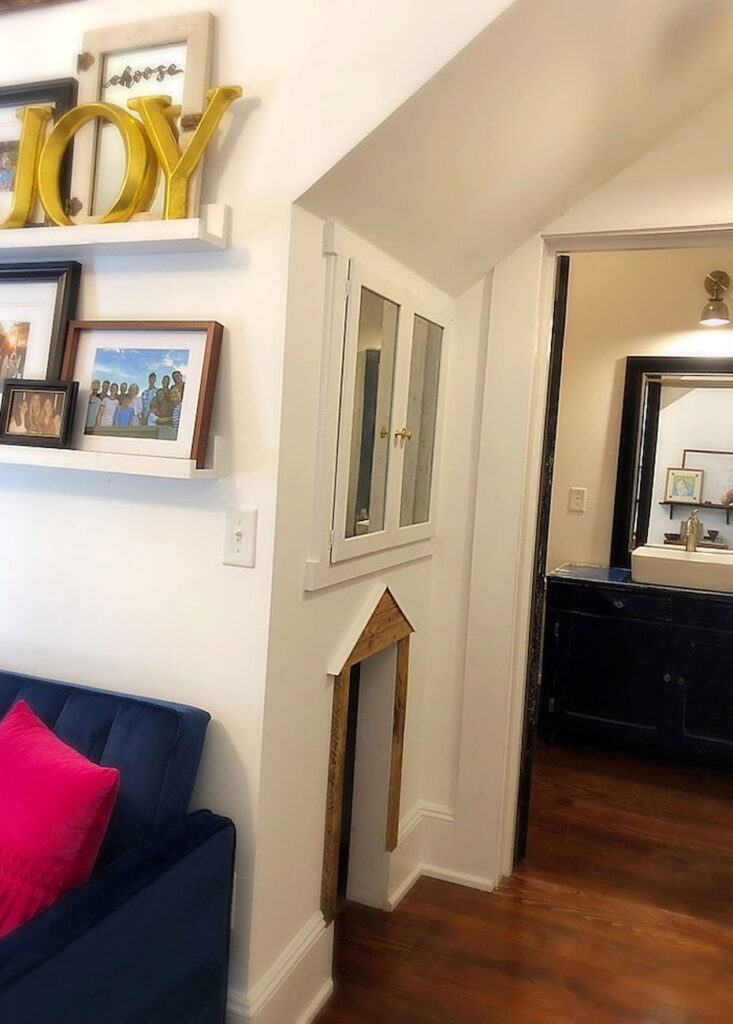
If you look to the top right, you’ll find the letters J-O-Y boldly displayed in front of an old medicine cabinet mirror I found underneath the house when we were cleaning out last year. I had my very talented niece paint the word ‘choose’ on the mirror so that I have a daily reminder to choose joy.
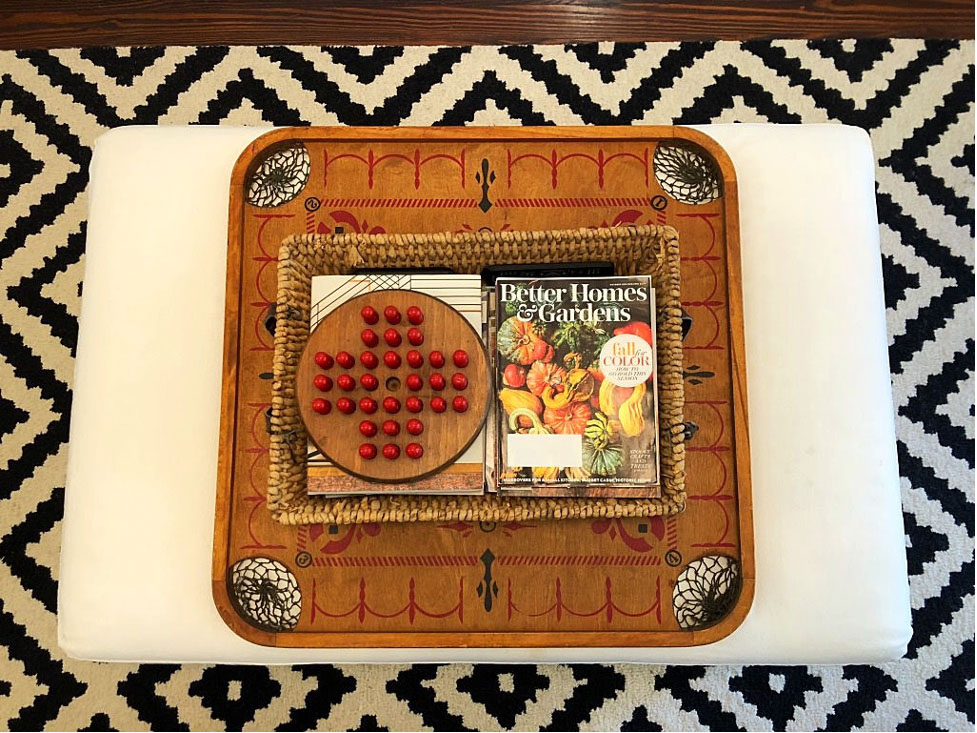
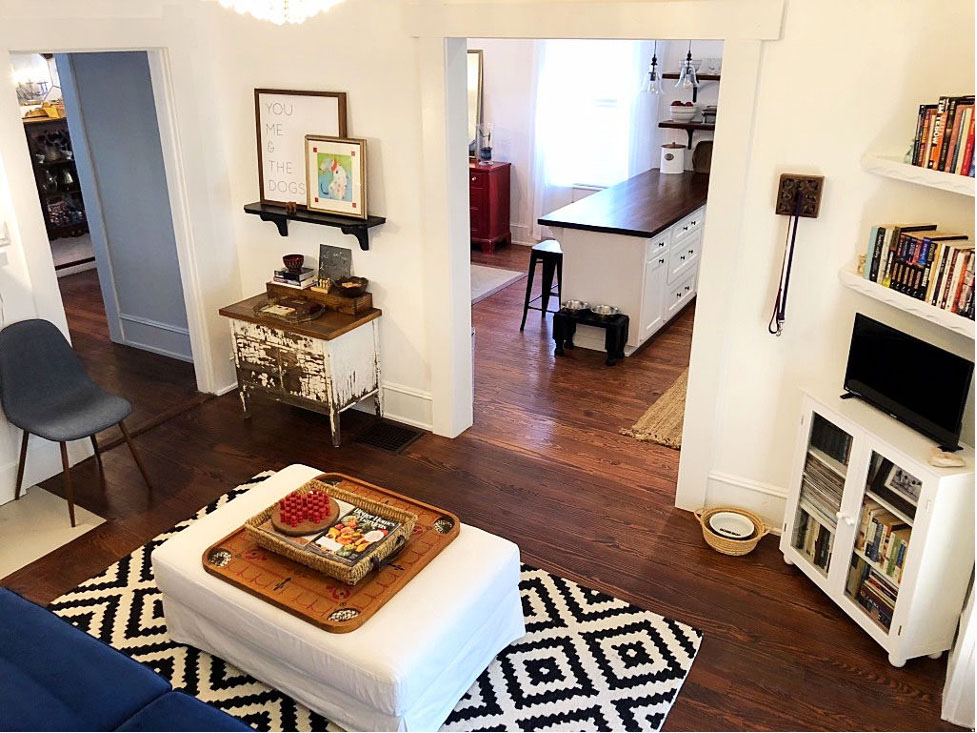
Right in front of the couch is a white ottoman that I literally found on the side of the road one morning. I’m not kidding! I was walking the dogs downtown when I saw that someone had just moved out of a loft and I couldn’t believe how great of shape it was in. So, I took it home, washed it (it has a removable cover) and use it as a coffee table paired with a vintage game table and a basket filled with magazines and one of my favorite games. It sits on top of the great black and white rug I purchased and I love the contrast of the old and new pieces.
Vintage Chandelier
And last but not least, let’s not forget about the repurposed sparkly chandelier. This was originally in the dining room but just like the blue velvet couch, I knew this vintage chandelier’s new home was going to be in this space. It really sets the tone for the vintage eclectic look of the room.
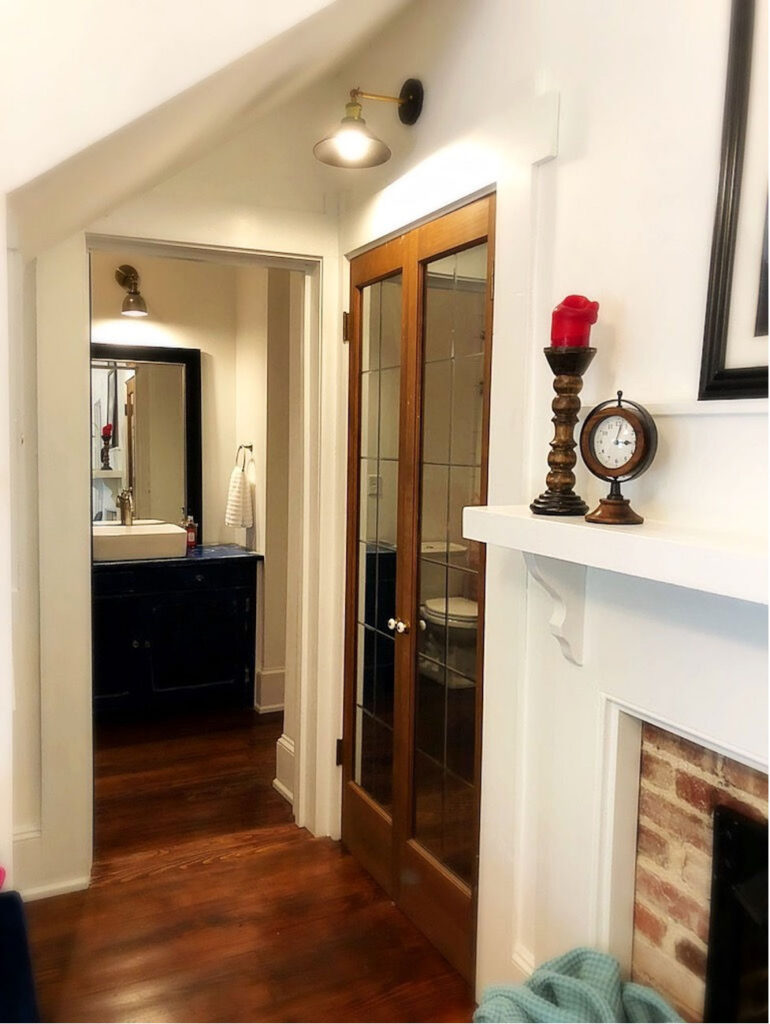
Guest Bathroom Access
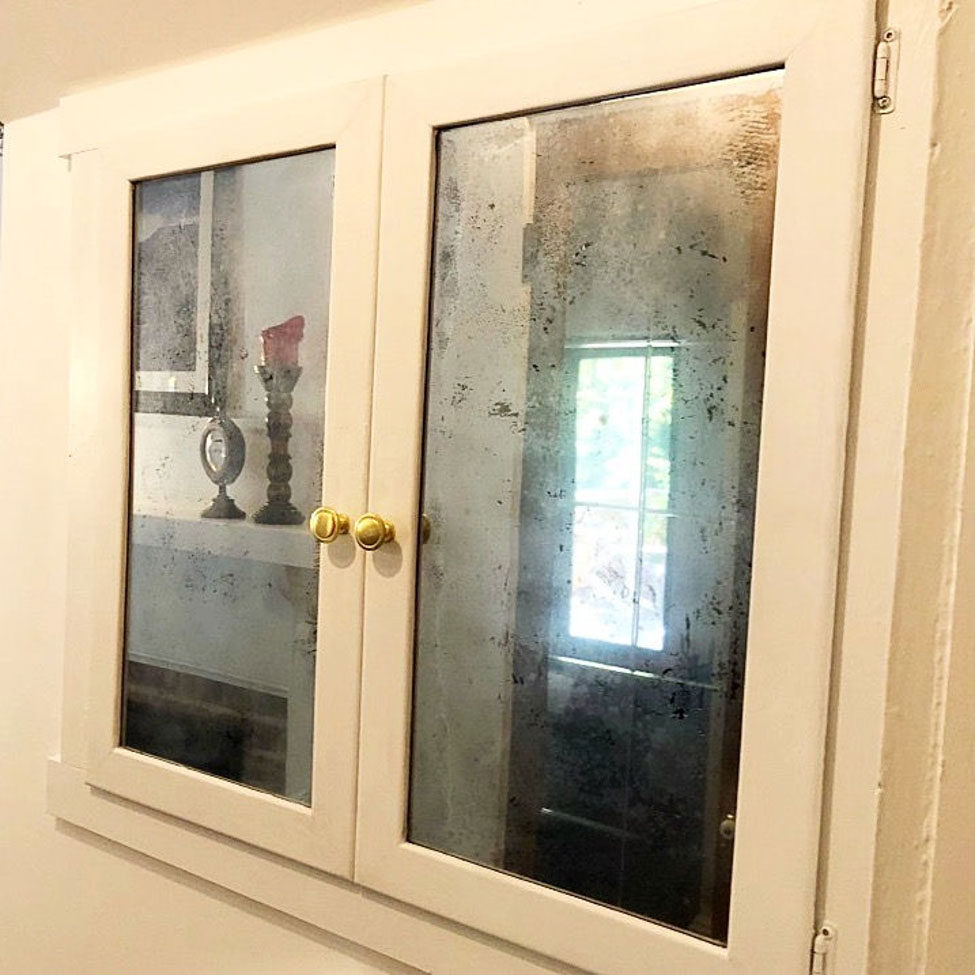
To the right of the couch, you’ll find a pass through into the guest bathroom. Designed specifically for guests to use whether they’re visiting one evening for dinner or spending the night as a guest, the bathroom has Jack-and-Jill doors leading from both the family room as well as into the guest bedroom for easy access. One of my favorite design features that came from this pass through is the space underneath the stairs. I believe in using every square inch of a house when possible and was thrilled to be able to carve off both a storage cabinet above and a little ‘dog house’ for the pups below.
FYI: The blue bathroom vanity was a cabinet found in my grandfather’s medical office.
The doors for the storage cabinet were found in the basement of a renovation I currently am working on and they were almost a perfect fit. The cabinet unit was completely rotted but fortunately the top glass doors were in great shape. So, I took them home, cleaned them up (notice a trend here) and added the mirrored spray I talked about in Week 4. All that was required were a few modifications to the opening and trim for the doors to close into. The cabinet now houses board games, art supplies, and other creative items.
Below the cabinet doors you’ll find the ‘dog house’ which I’m sure my dogs will never actually step foot into. I saw this idea on Pinterest some time ago and because I love my dogs, I thought it would be a cute little touch to the space. FYI: The wood surround is made of salvage boards saved from demo that were planed down and sanded.

Whew!!! That’s a lot for just one wall, right? Okay the remaining three walls should go a little quicker. I hope but no promises…..haha.
Fireplace Wall
Next up is the fireplace wall which if you’ll recall was completely covered up with drywall when we started in this room.
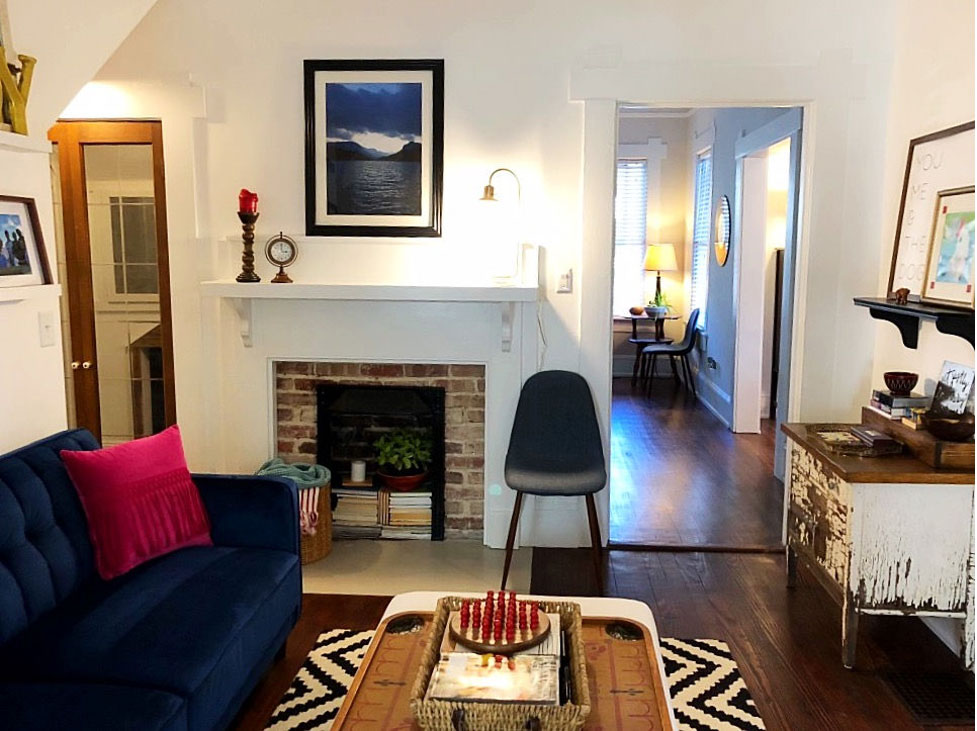
After we tore out the large closet addition on the stair wall, we found an original closet. At some point in time it was covered up with drywall. It was the perfect size for a linen closet so after a few coats of paints and built-in shelves, the closet houses linens as well as cleaning items just perfectly. The doors were picked up by my parents at the Habitat ReStore and I added the mirrored film to the back of them to hide what’s inside and I just love how they turned out. To finish off the space, a black and brass light fixture was added above for additional lighting.
To the right of the linen closet you’ll see the original brick fireplace that also was covered up. During the beginning of demo, the carpet removal revealed the hearth of the fireplace but drywall covered up the brick itself. Truthfully, I was planning to add a faux insert and just tile over the drywall but one thing lead to another and the next thing I knew I had torn everything out. So glad I did! The black insert was saved and reused from another fireplace we had to remove from the new dining room and the beautiful mantel and surround was salvaged from a client’s demolition (I hold onto a whole lot of stuff from all of my projects which comes in handy quite often).
All I really had to do was clean up the brick and I chose to leave the original patina as a nod to the past. To finish off this wall, I added a picture of my favorite place on earth – Lake Lure, NC – and added this cool brass lamp I found at the last minute from Walmart of all places. A chair was added for extra seating along with a couple of blankets, a plant, and accessories and this space is complete.
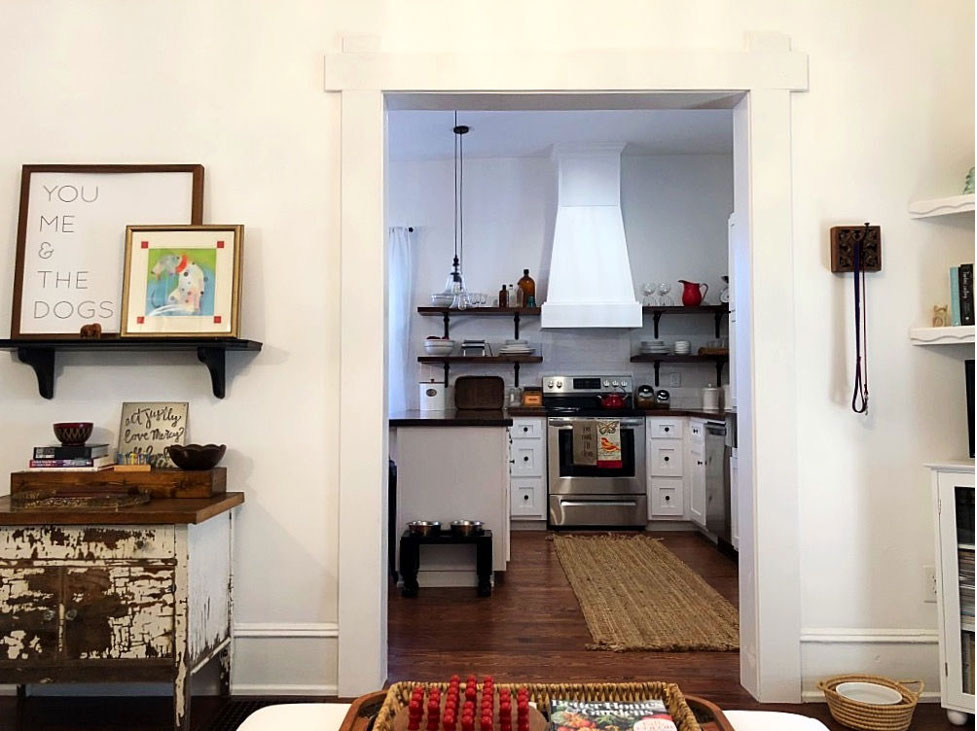
Kitchen Wall
Continuing to the right, you’ll see the entryway into the kitchen. If you can imagine, the kitchen was originally the only bathroom to the house. After finalizing the floor plan, the door casing (previously leading into the bathroom) was enlarged. This created a more open floor plan between the kitchen/dining room and the family room.
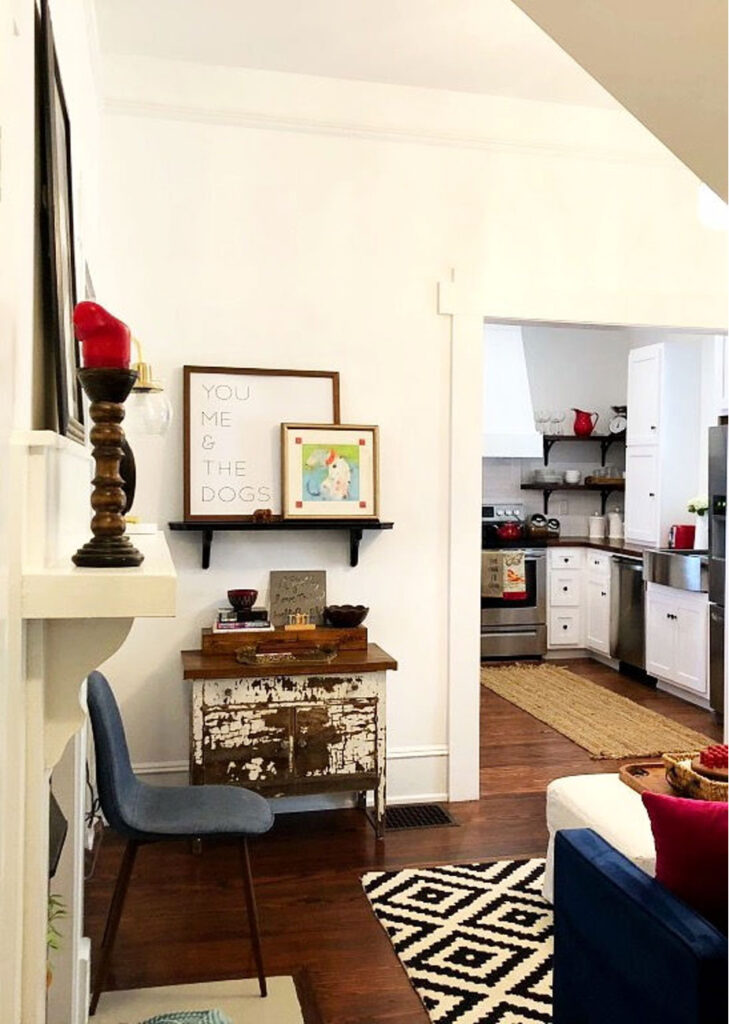
To the left of the opening is a shelf with a little dog art because, well, we’ve already established I love my dogs, and below is an antique table that used to belong to my Papa. I’m a sentimental fool and there’s nothing I love more than to be able to use furniture and other items from those I love to beautify my home.
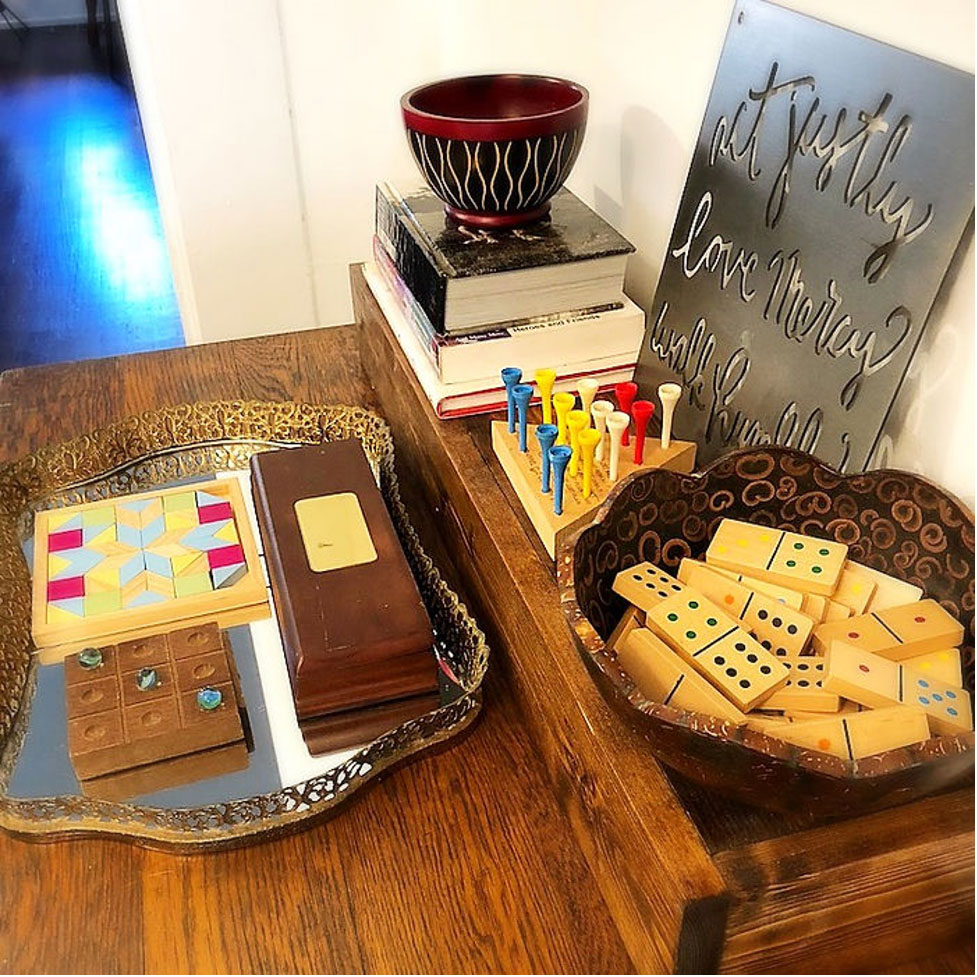
While I had not originally planned to go this route, I ended up setting up a game station of sorts on this little table. Once I pulled out more items from storage, I realized I had a lot of ‘old school’ games and puzzles so decided to display them in bowls that I’ve collected from my world travels. I love for my design details to share my life story and I hope that when the kiddos come over to visit and hang out that I can convince them to put down their phones from playing Fortnite and instead, to play some ‘old school’ games that actually involve face-to-face interaction and conversations. We’ll see how it goes.
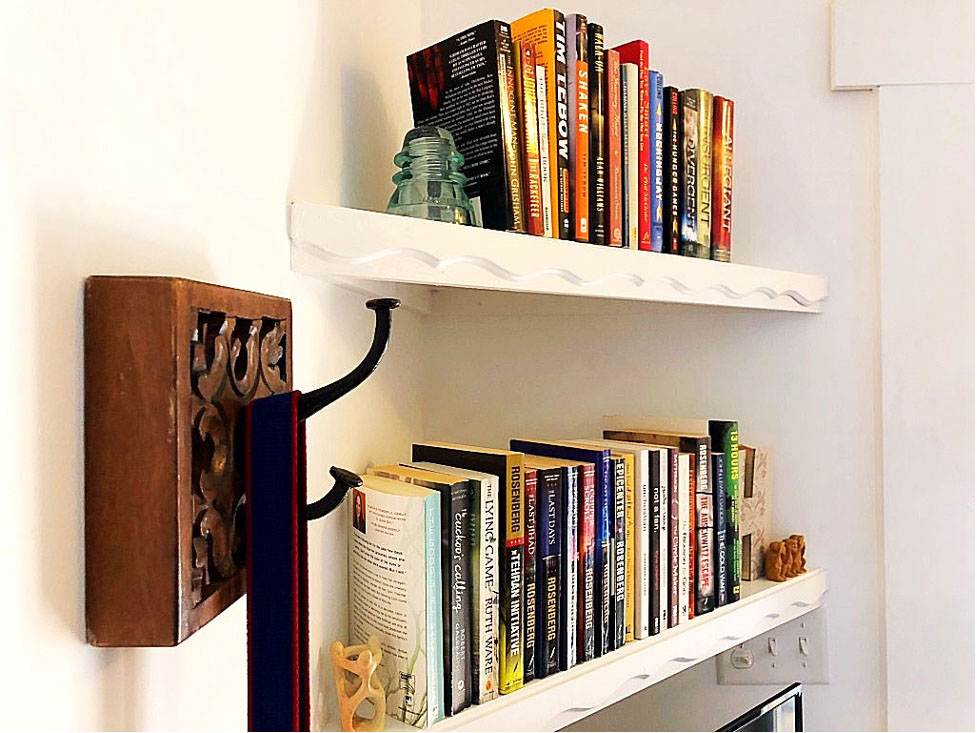
To the right of the kitchen opening is a small bookcase with some custom corner shelves above.
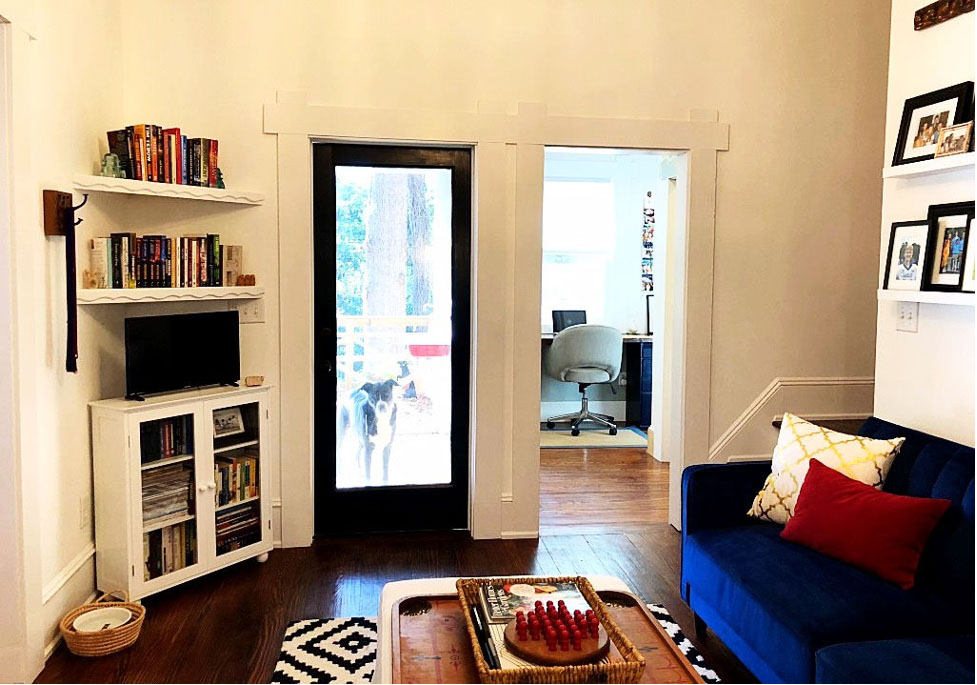
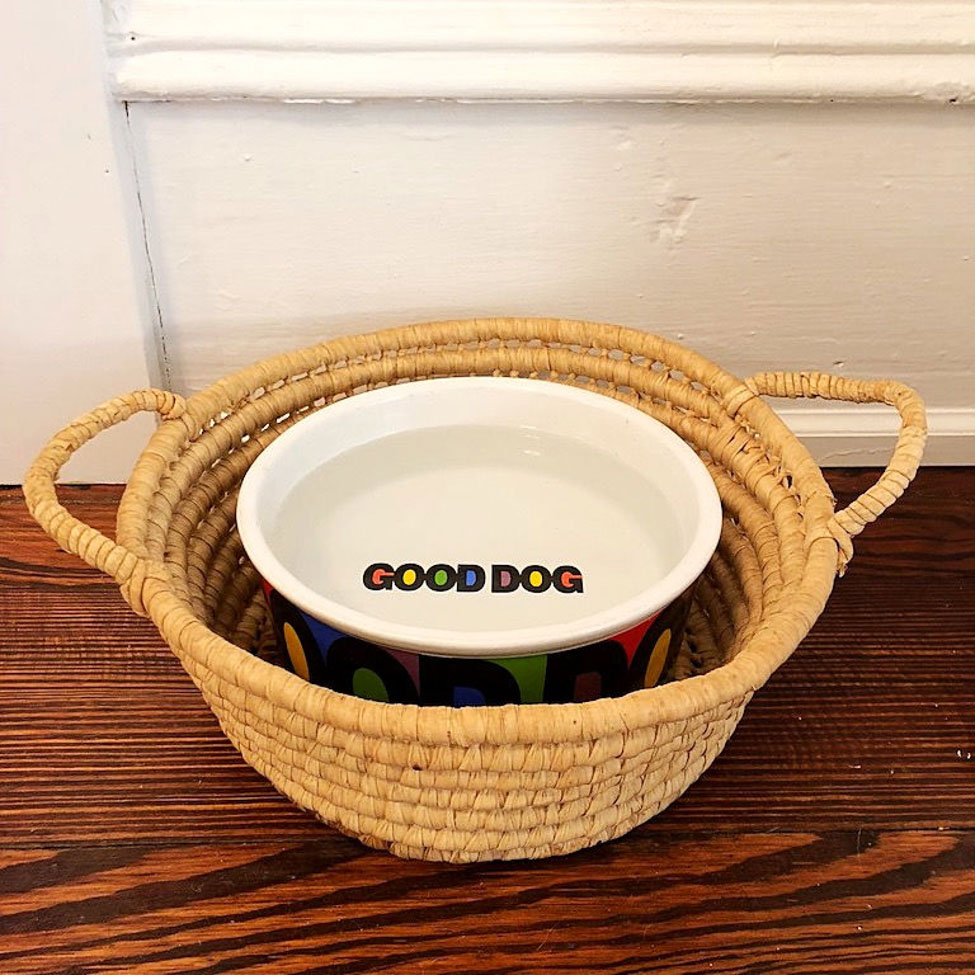
In this corner I have a collection of books and magazine and a few of my favorite display items. Nearby you’ll find a carved wood hook for the dog leashes and a woven basket for the water bowl.
Screened Porch Wall
And last but not least, is the wall that leads to the screened porch. This has a glass door on the left and to the right is the entryway to the master suite. The glass door was also a bargain find at the Habitat ReStore. Since I found it before we trimmed out the door, we were able to customize everything to fit. Oh and the back porch is hands down my favorite part about my home. So being able to see that view from the Family Room is a bonus.
And that’s pretty much a wrap! I hope you enjoyed looking through the pictures as much as I had walking you through my renovation. I said in the beginning that I work much better under pressure. Because of that, I’m certain that I wouldn’t have finished had it not been for the One Room Challenge. Be sure to check out all of the great new spaces created over the past six weeks by visiting the One Room Challenge blog and thank so much for the encouragement! Now, I’m going to kick back, relax, and enjoy my new Family Room!
Until next time…..


+ Show / Hide Comments
Share to: