The Kitchen Transformation and Checkerboard Floors at Peronneau Place


The kitchen transformation at Peronneau Place was one of the more dramatic renovations I’ve worked on. Not only did we gut the entire space but we also removed stairs to the basement and had to replace the entire flooring system due to it’s deteriorated condition. Once the structural repairs were made we found ourselves having to create the kitchen out of stock cabinets and for a little more drama I decided to hand paint the floors in a bold checkerboard pattern. Today I’m going to walk you through the entire process and if you haven’t already, be sure to see the first post on this project, Reworking the Floor Plan at Peronneau Place.

The Before
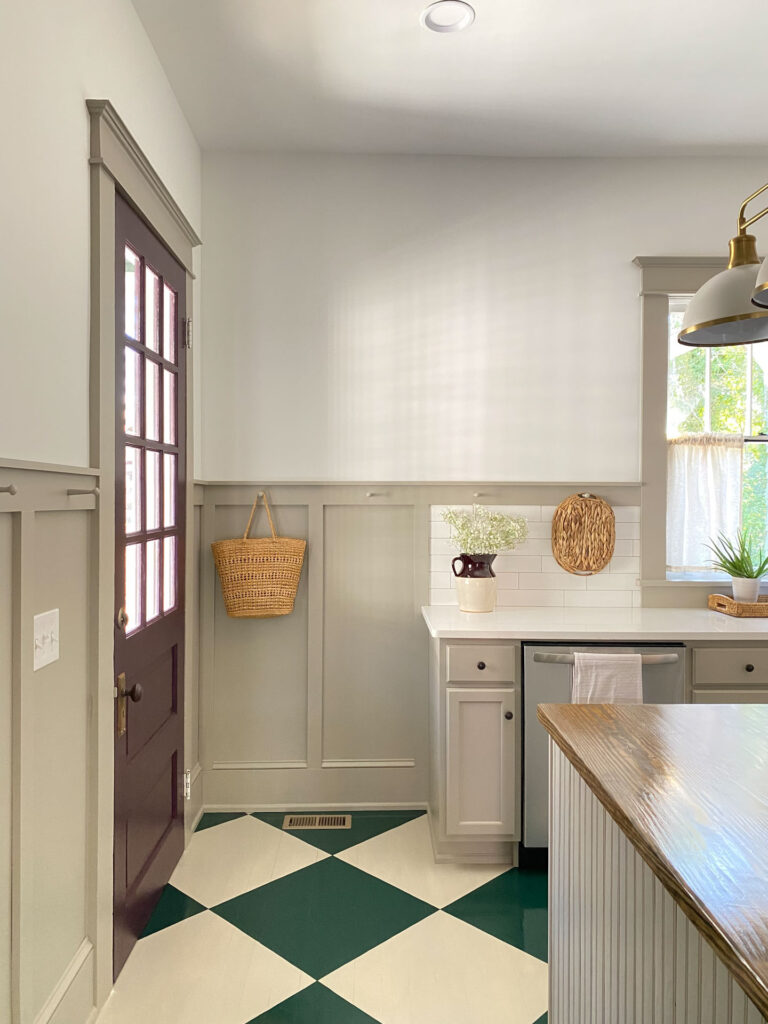
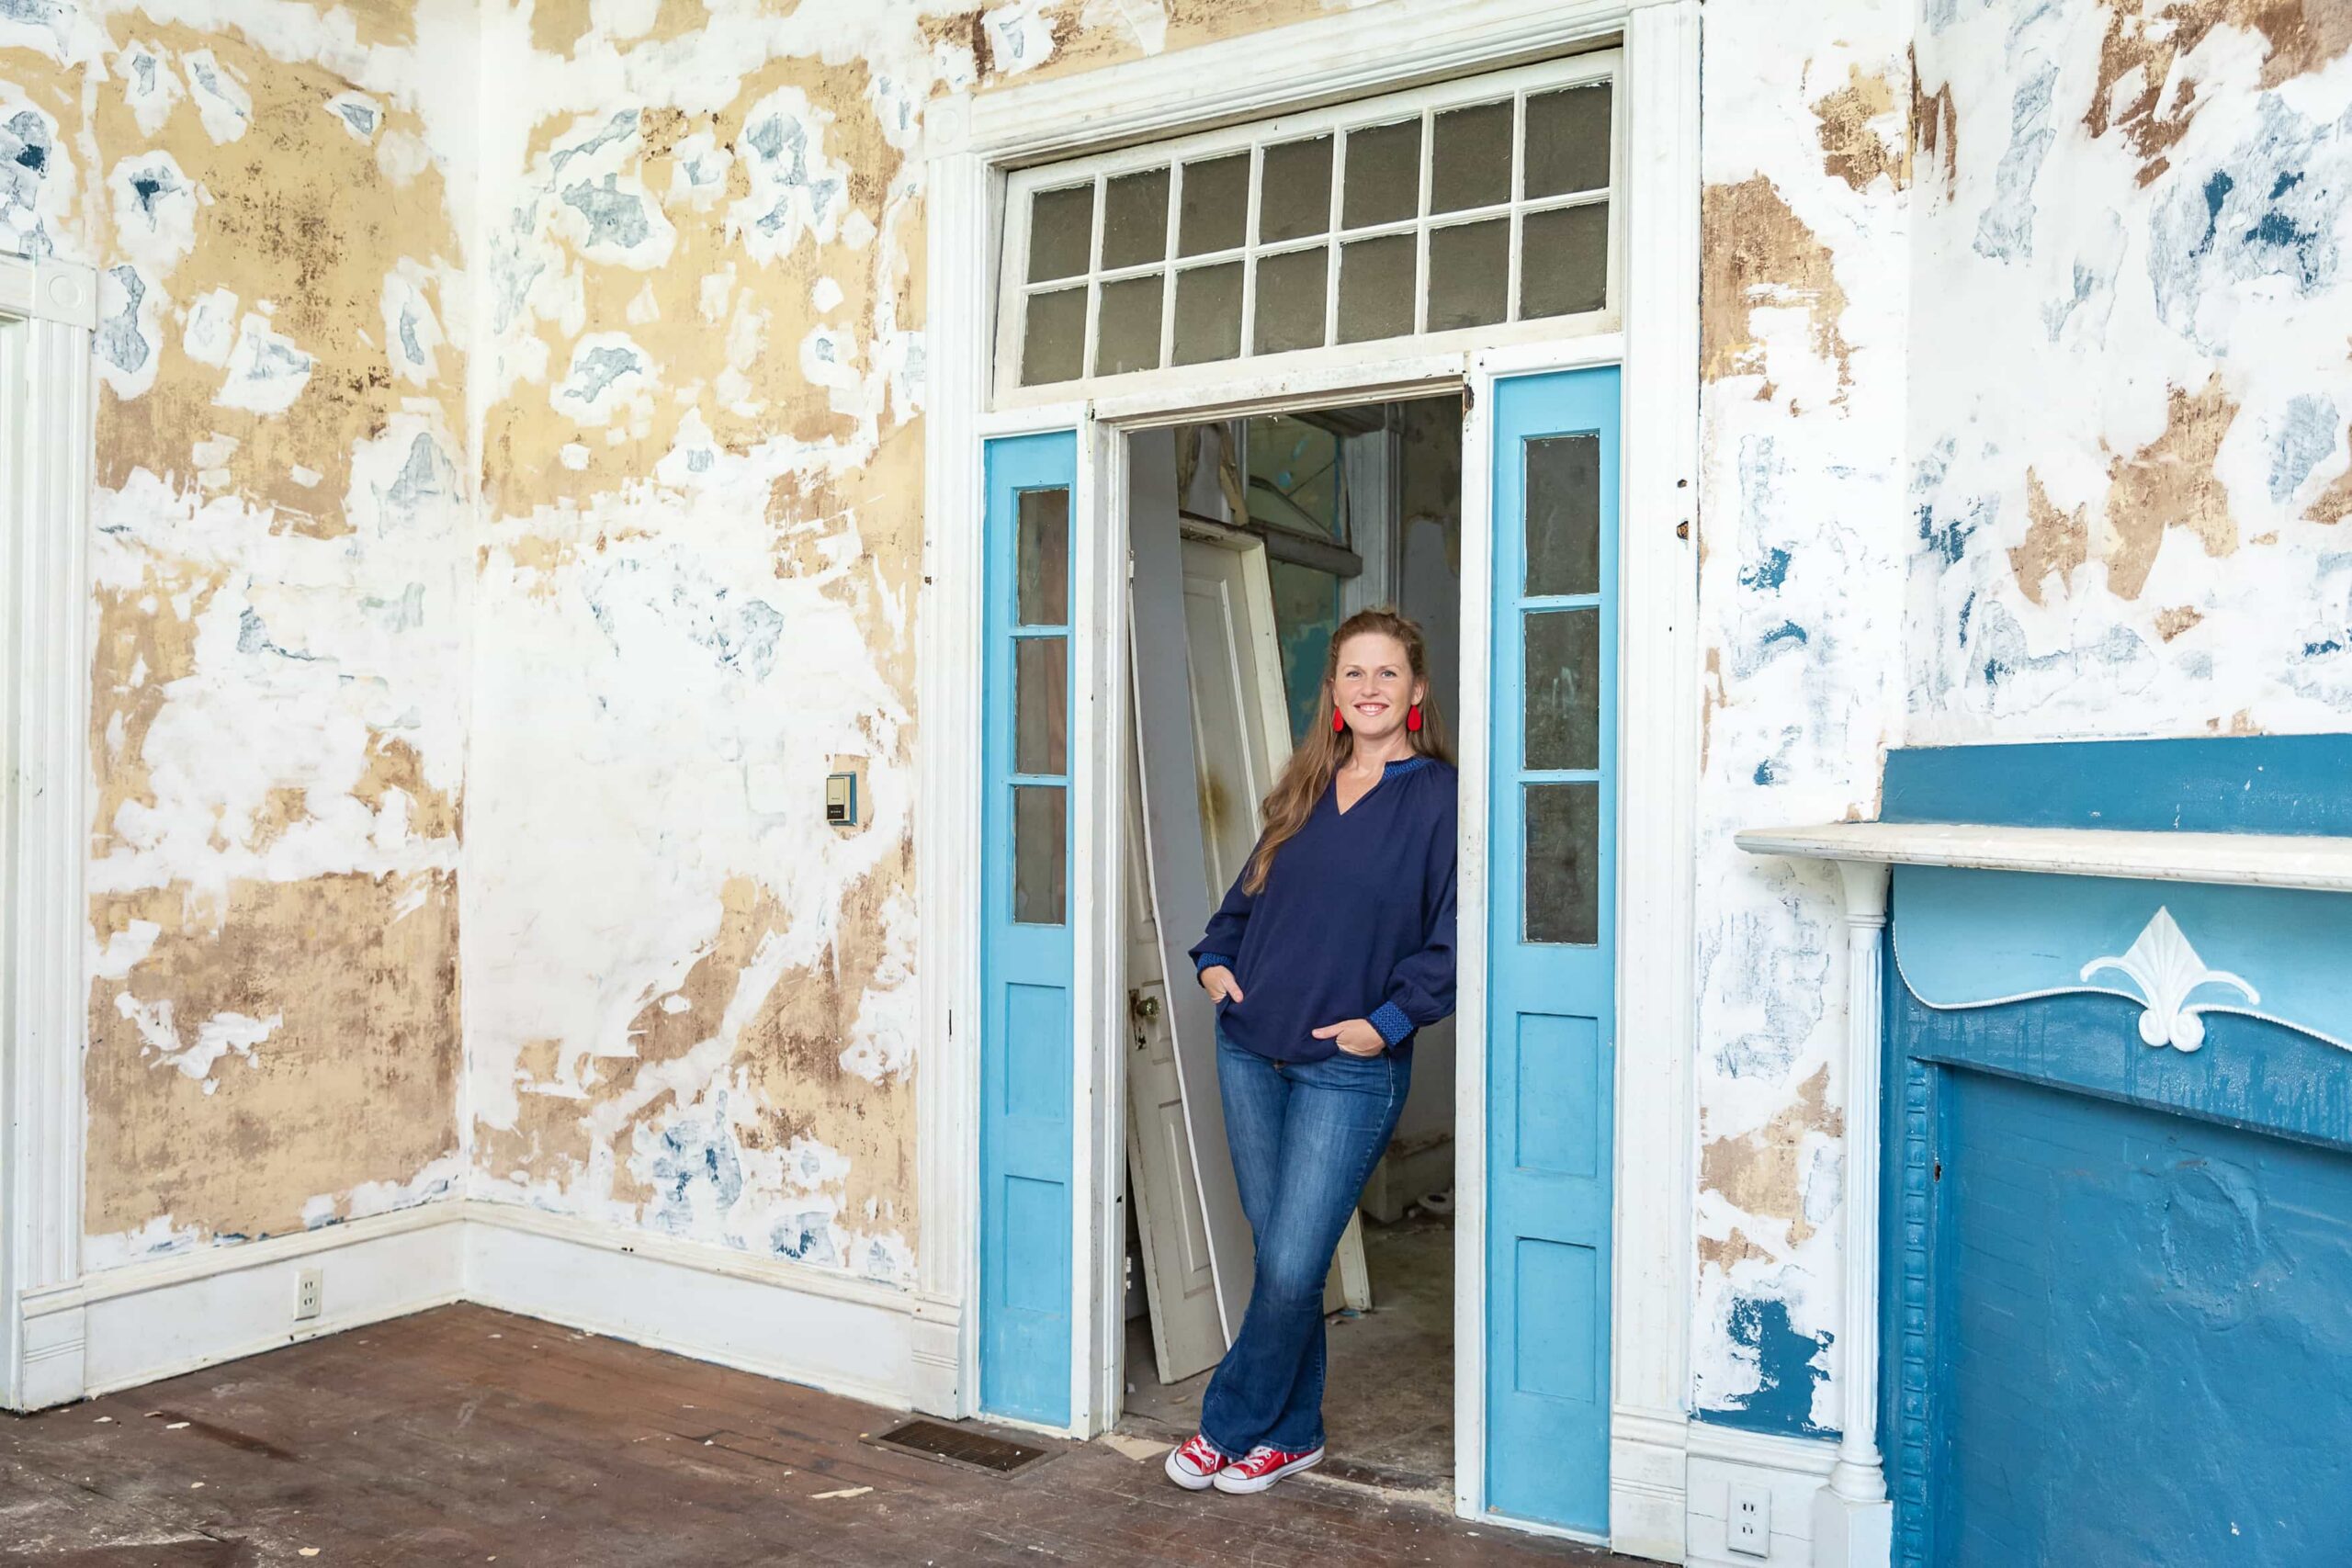
Much like the rest of the house, the kitchen was dark and dated. And honestly, it was just about the worst layout I’ve seen. I can’t imagine this was the original layout but perhaps I’m wrong. Immediately as you walked through a small hallway from the dining room you found a small pantry on the left and a door to a stairwell on the right. The stairs led to a crawl space, not a finished basement, so were taking up valuable square footage in the kitchen. Just past this walkway on the left was a second pantry door and the back door.
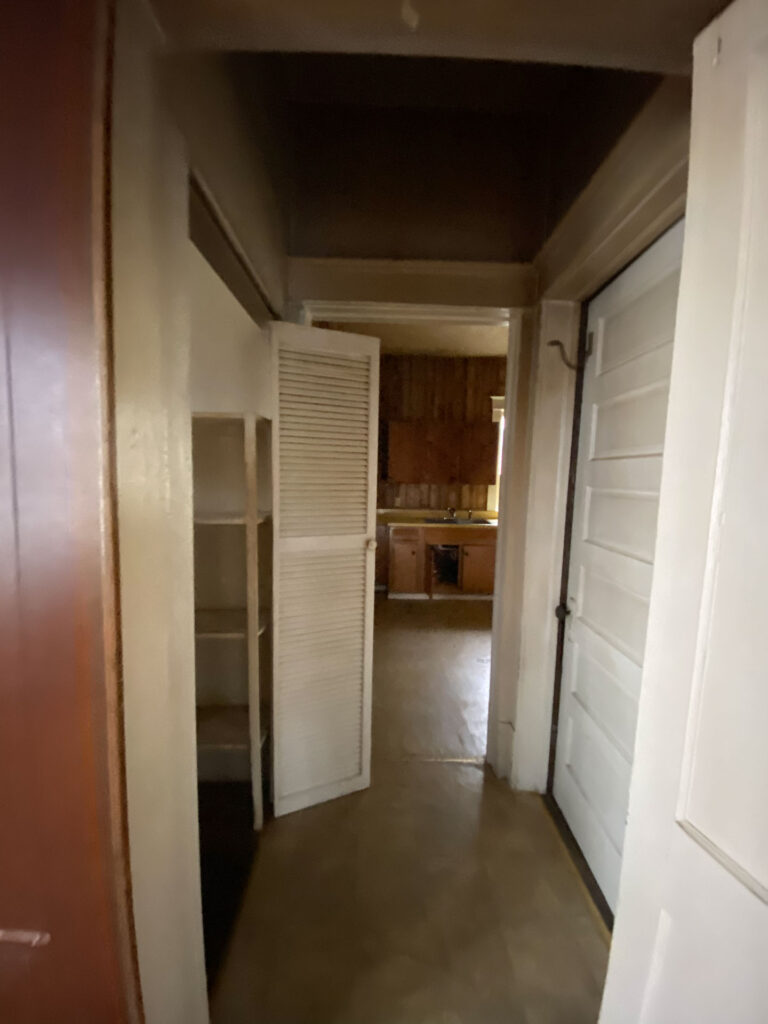
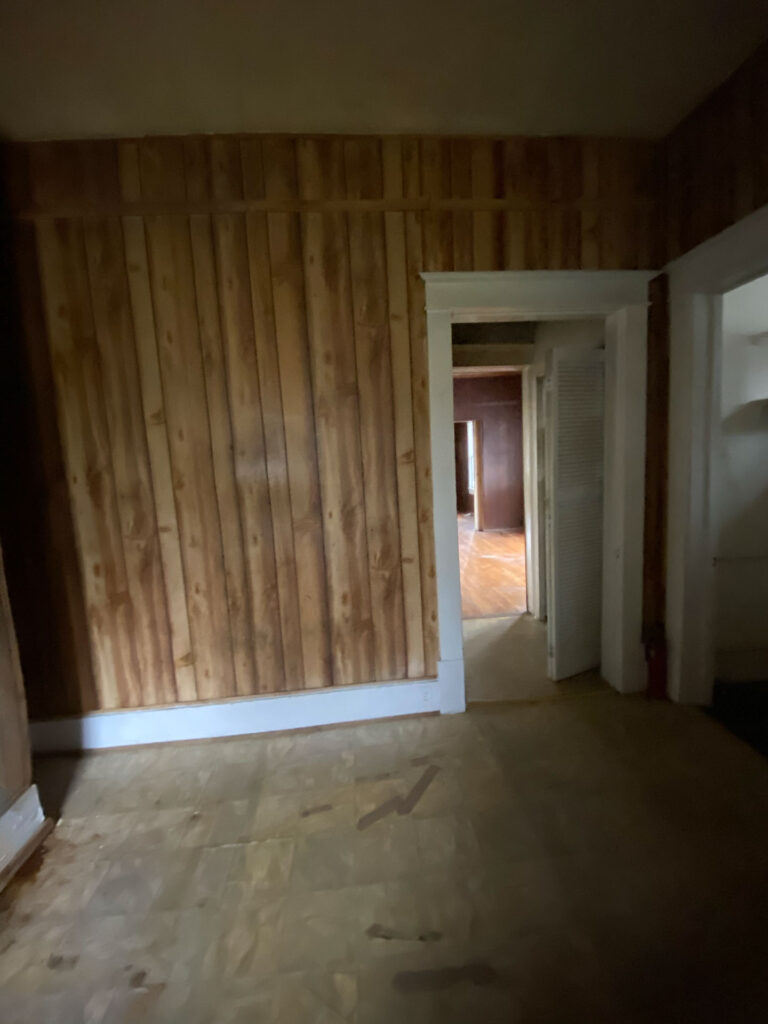
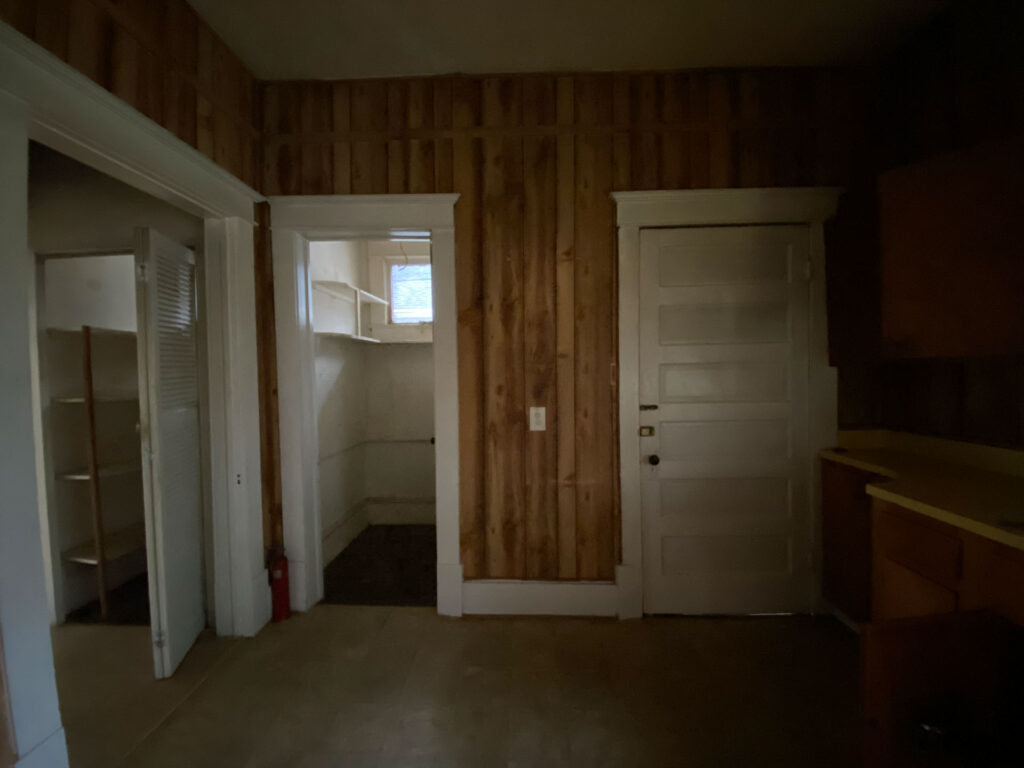
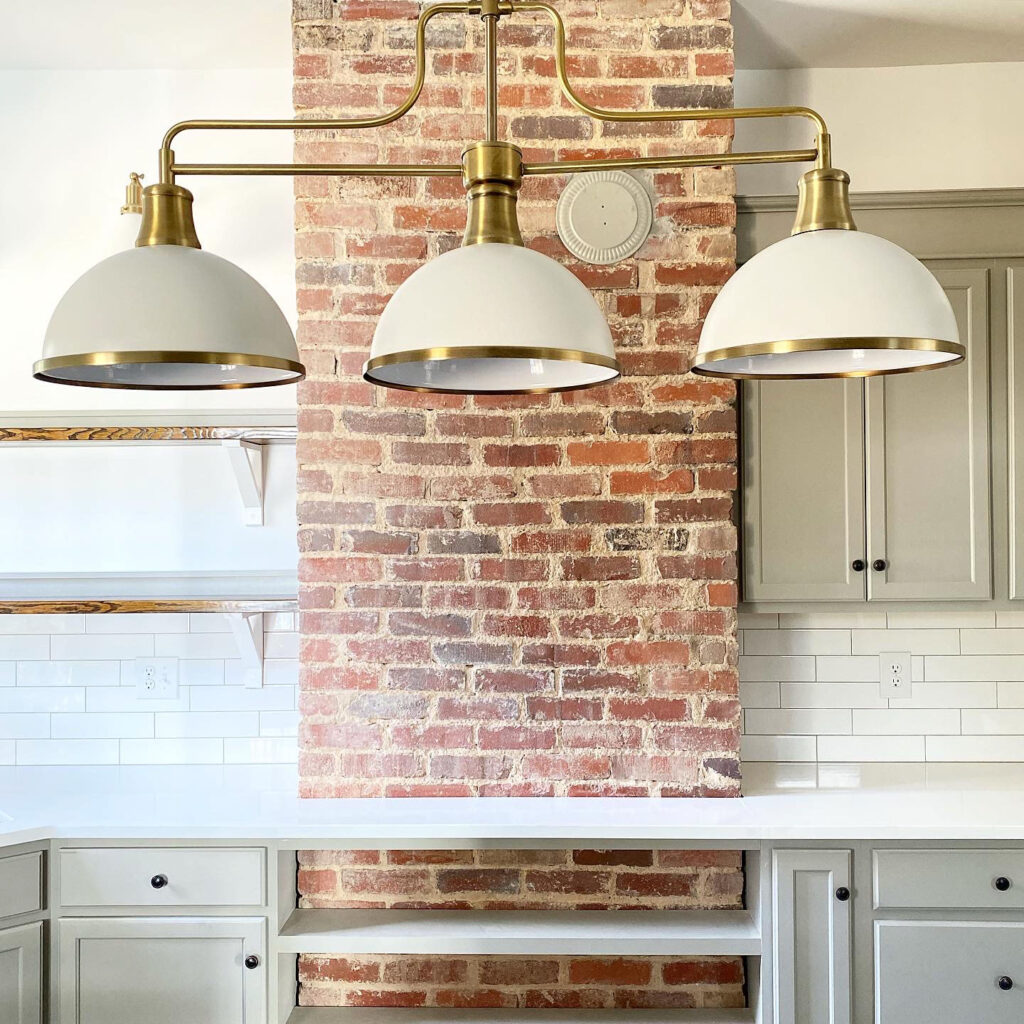
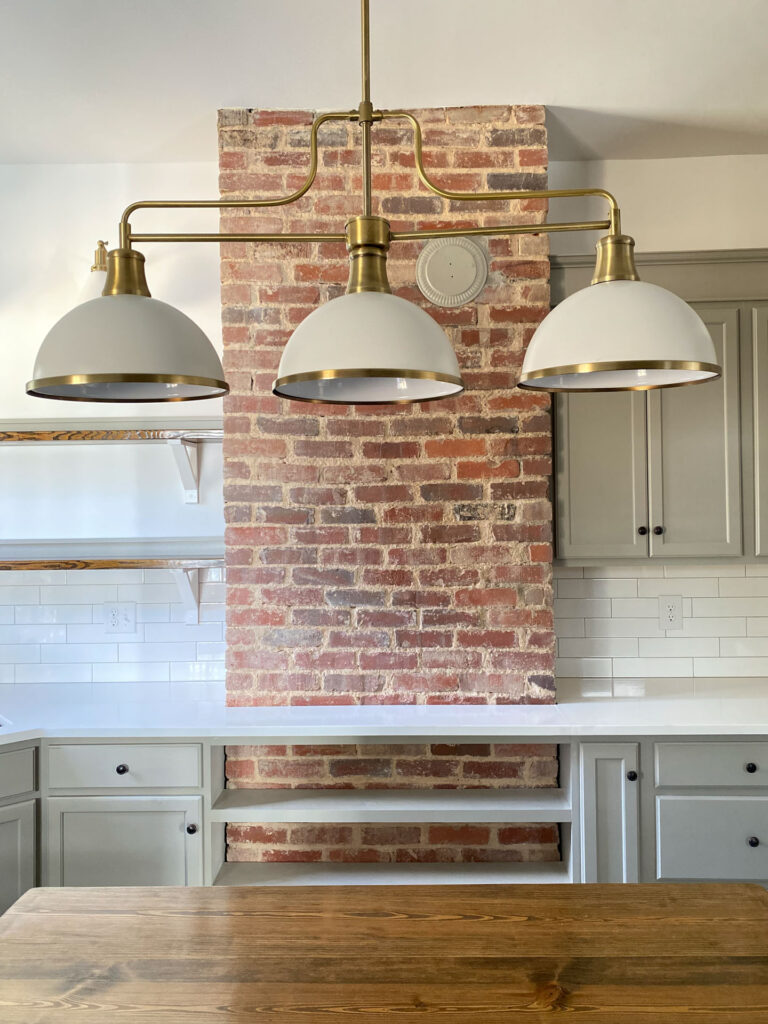
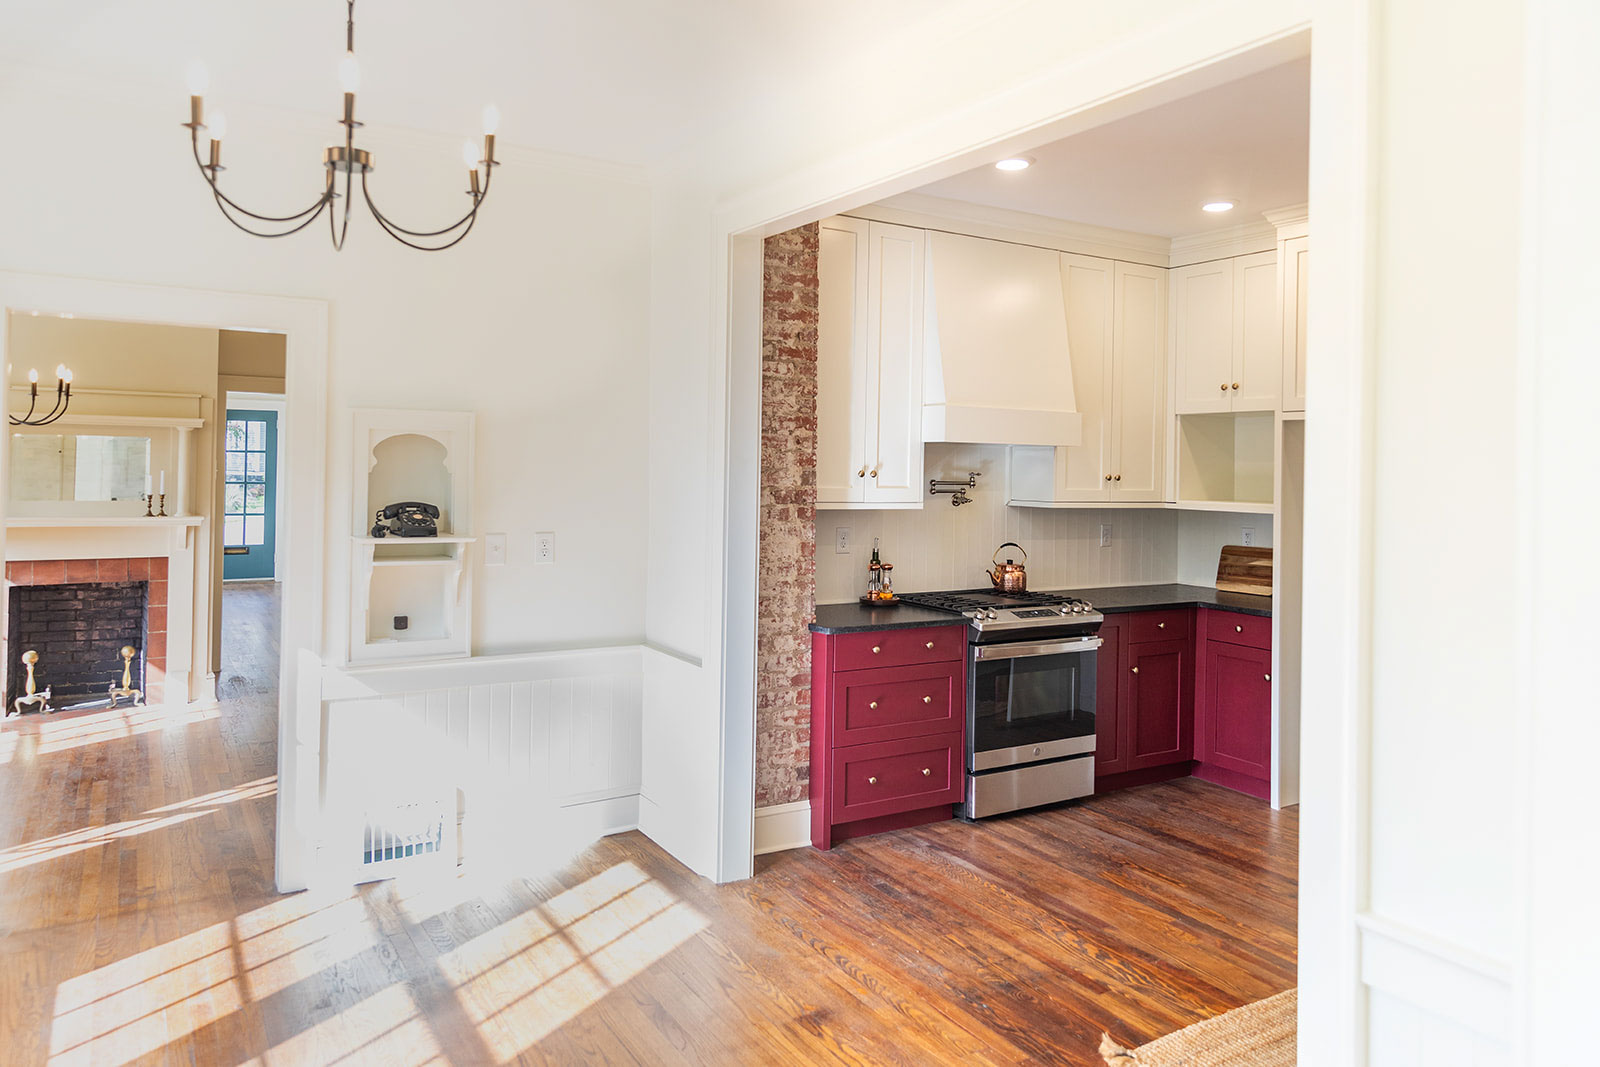
Once you actually entered the kitchen the cabinet layout was bare at best. They were competing for space with the back door to the left, a window along the back wall, and the door to the back bedroom on the right. Covered with paneling on the right wall was brick from the fireplace in the adjacent room.
The only solution for this kitchen was to tear out everything. And when I say everything, I mean every single thing.
The Kitchen Transformation
Demolition
The demolition process took an ugly turn once we started removing the vinyl floor tile. Because of the deteriorated condition of the floor system, it all ended up having to go. We also tore out the stairwell and the wall housing it which gave us the opportunity to expand the footprint of the kitchen.
We continued with demolition along the pantry and back door wall, tearing out everything in this space including the plaster walls. While I don’t always gut a space down to the studs, in this case we didn’t have much of an option. It was in such bad shape that we couldn’t make the structural repairs needed unless we did. The good thing is that we were then able to make the structural repairs and rework the floor plan at the same time.
Reconstruction
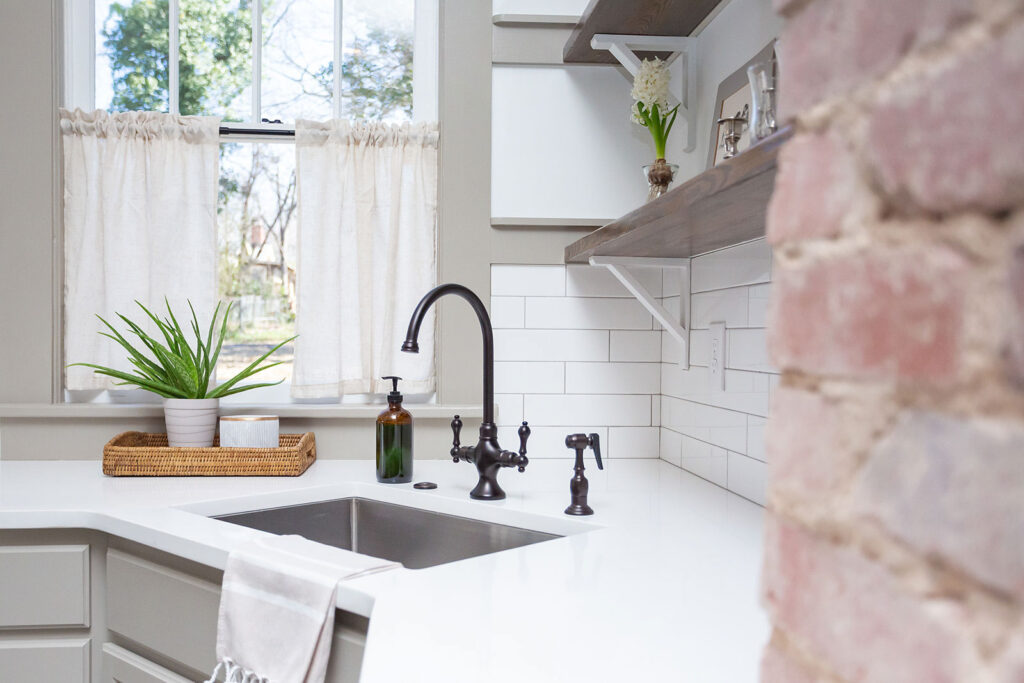
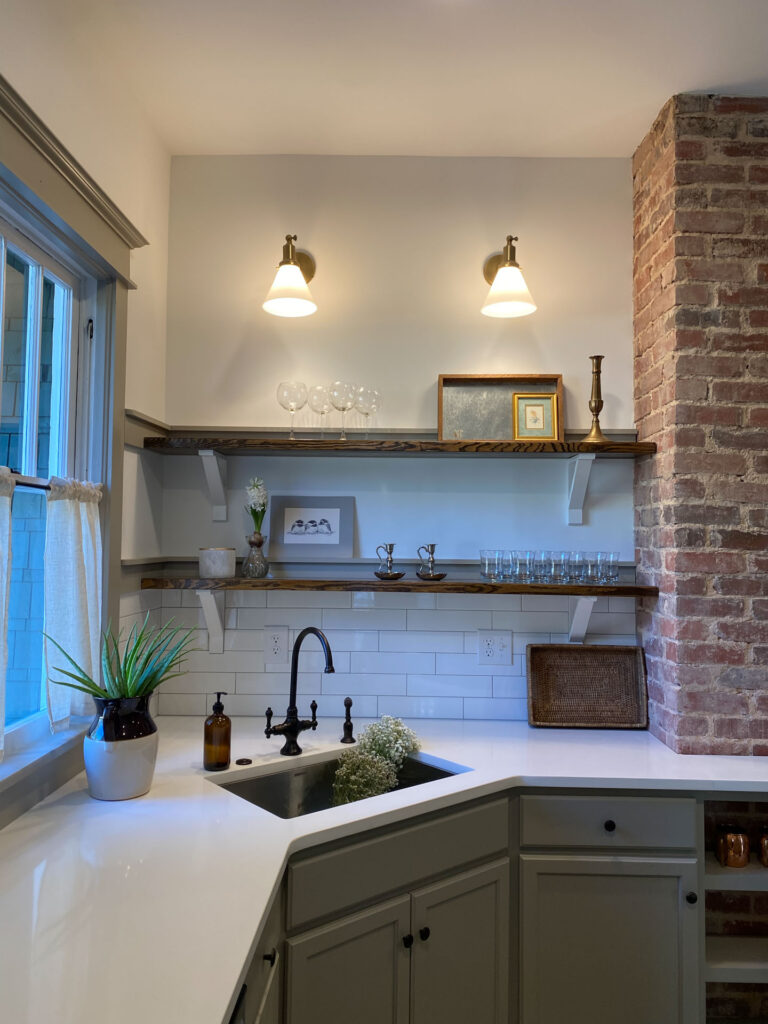
Once all the structural repairs were made and the framing completed, we insulated the exterior walls. One change you’ll notice below is that we reframed the window so that cabinetry could be installed along this wall. Later I had my carpenter adjust the sashes to make them shorter. I loved being able to use the original windows with an altered size in the same space plus a window over the sink is always a plus in my book.
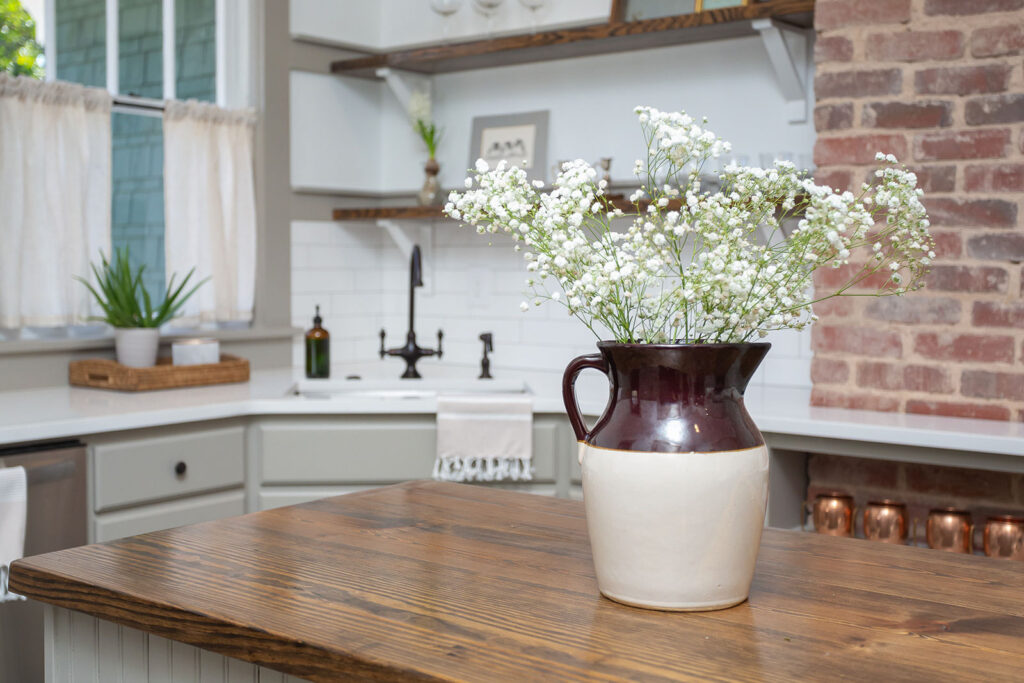
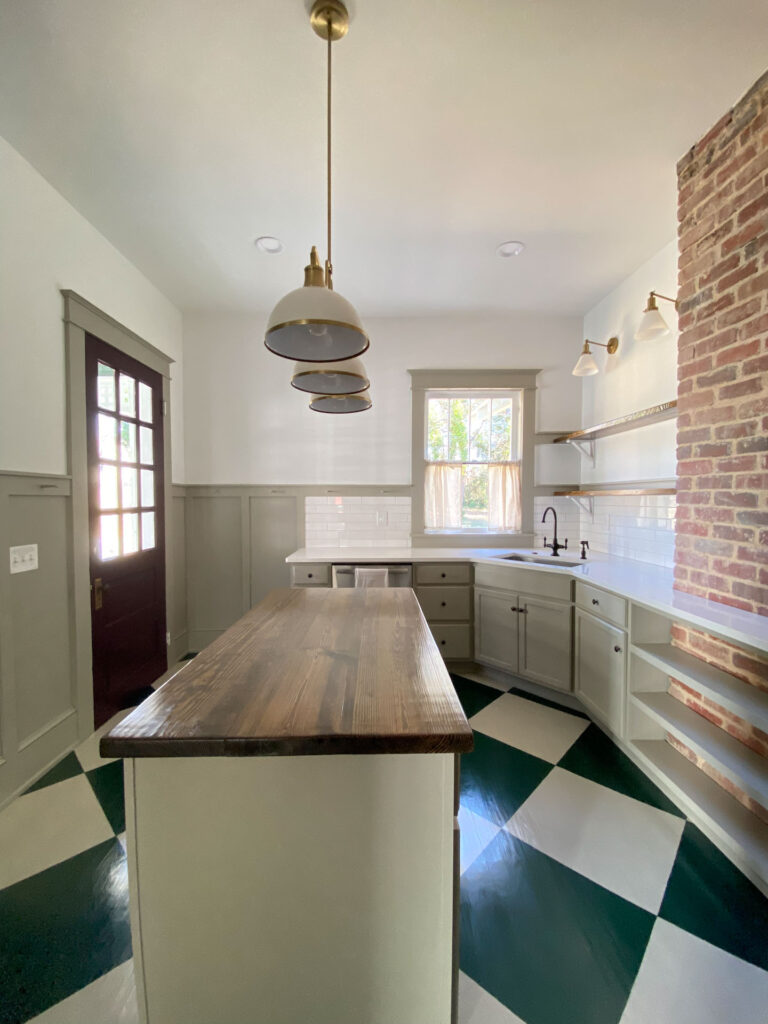
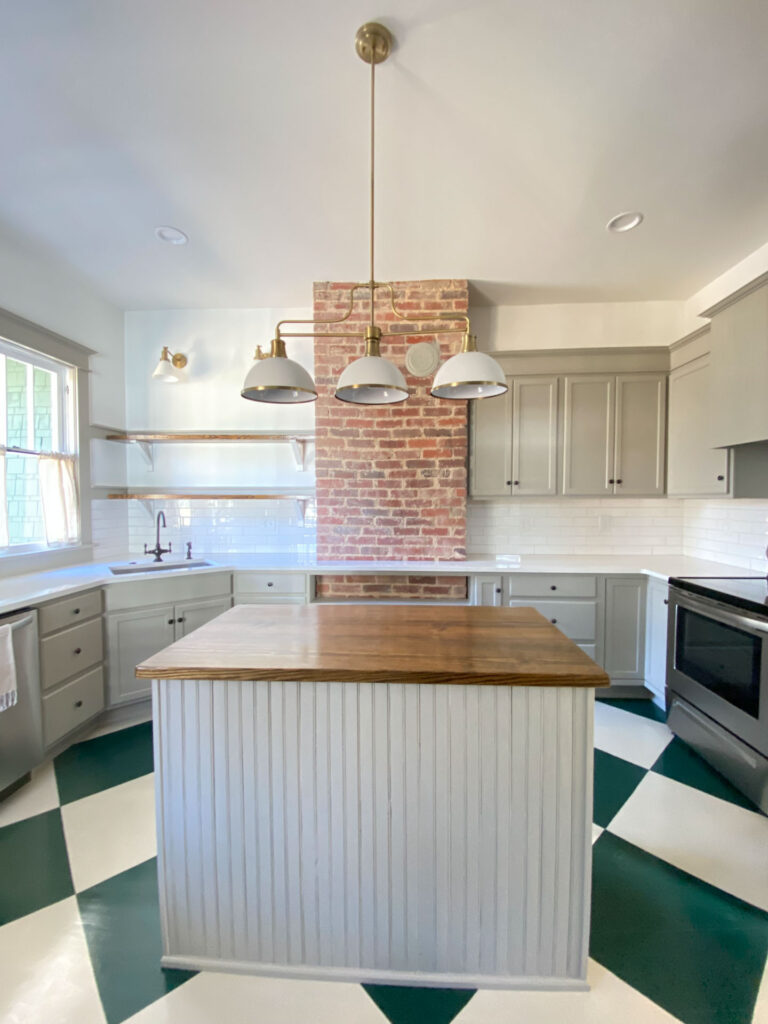
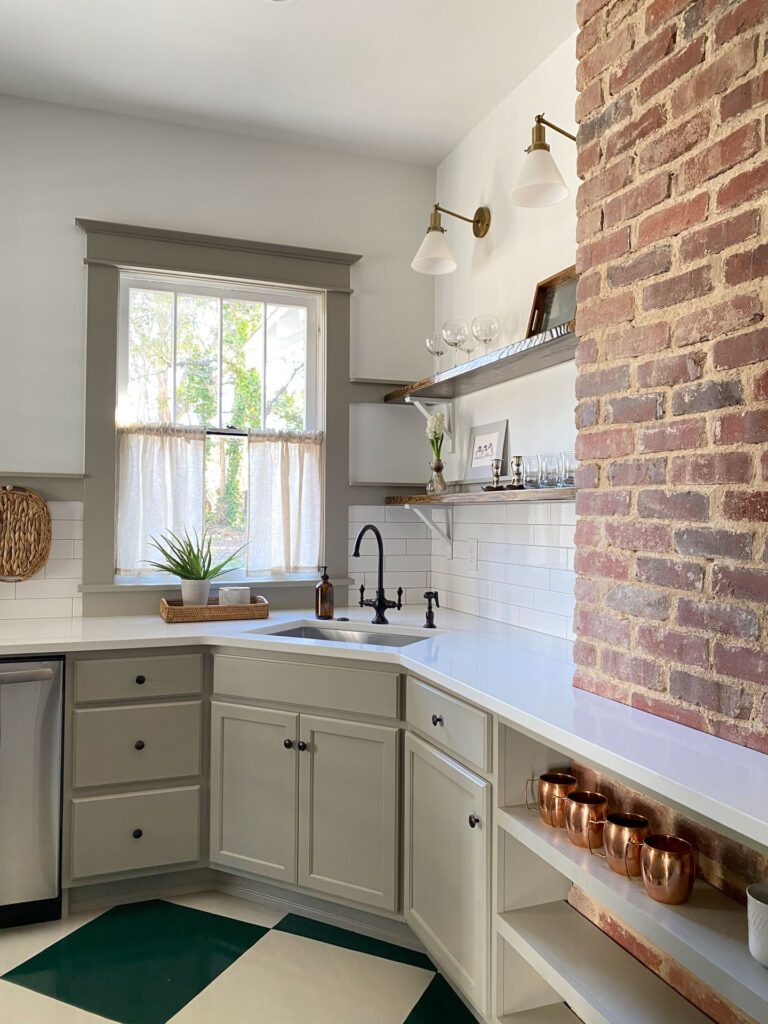
After the electrical and plumbing rough-ins were completed we added drywall and then new pine flooring in the kitchen. I also cleaned up the exposed brick since it was going to be a focal point in the new kitchen.
The DIY Kitchen Cabinets
Using Stock Cabinets
With the drywall hung and the wood floors installed it was time for the kitchen cabinetry. For the first time in my career, the cabinet guys I had lined up for this job canceled at the last minute. With no time to get on another cabinet contractor’s schedule, I talked with my carpenter about DIY’ing the cabinets. I was able to find stock cabinets at a reasonable price so I worked on the configuration based on what options were available and placed my order.
Now, I will admit that when I say these cabinets were DIY I do realize I had a pretty talented carpenter who knew what he was doing. I’m not 100% sure I could have done them myself at such a high level of quality. Regardless, we worked together on the design, installation, and customization to make them have a custom look at a bargain price.
The Details to Make it Look Custom
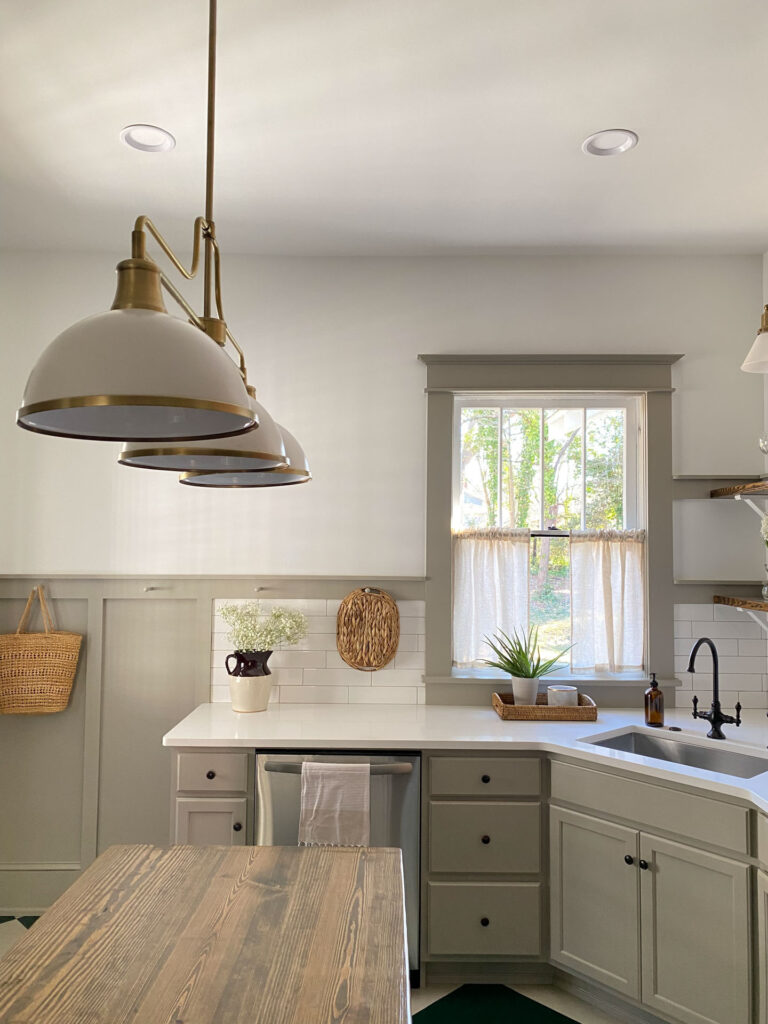
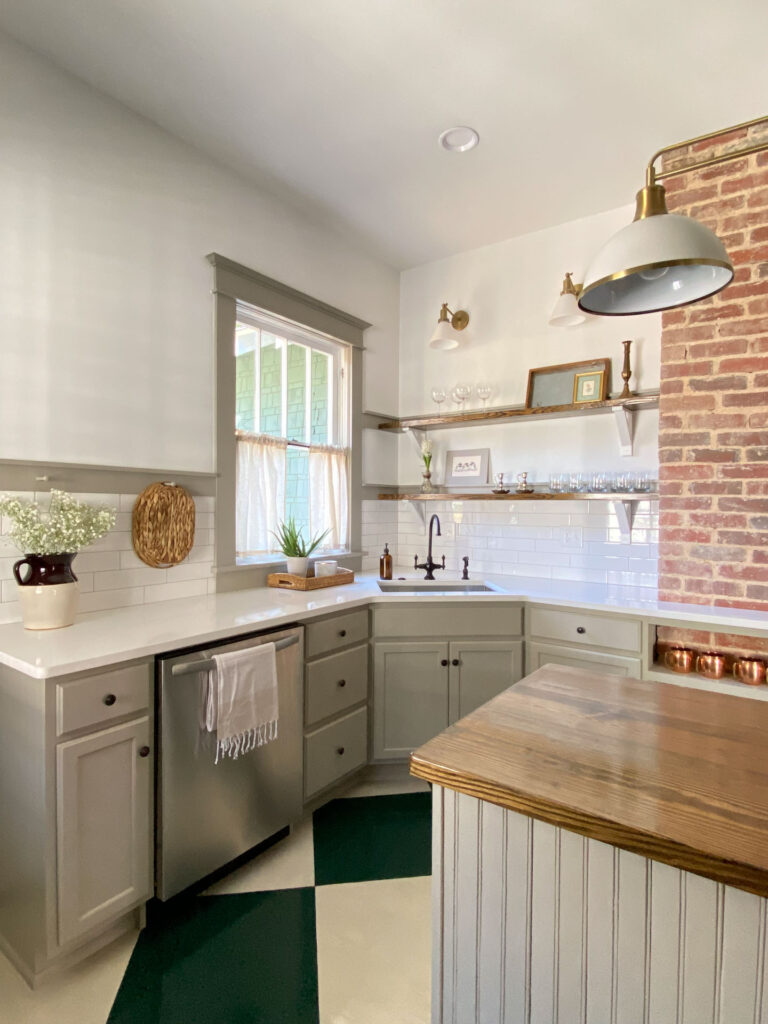
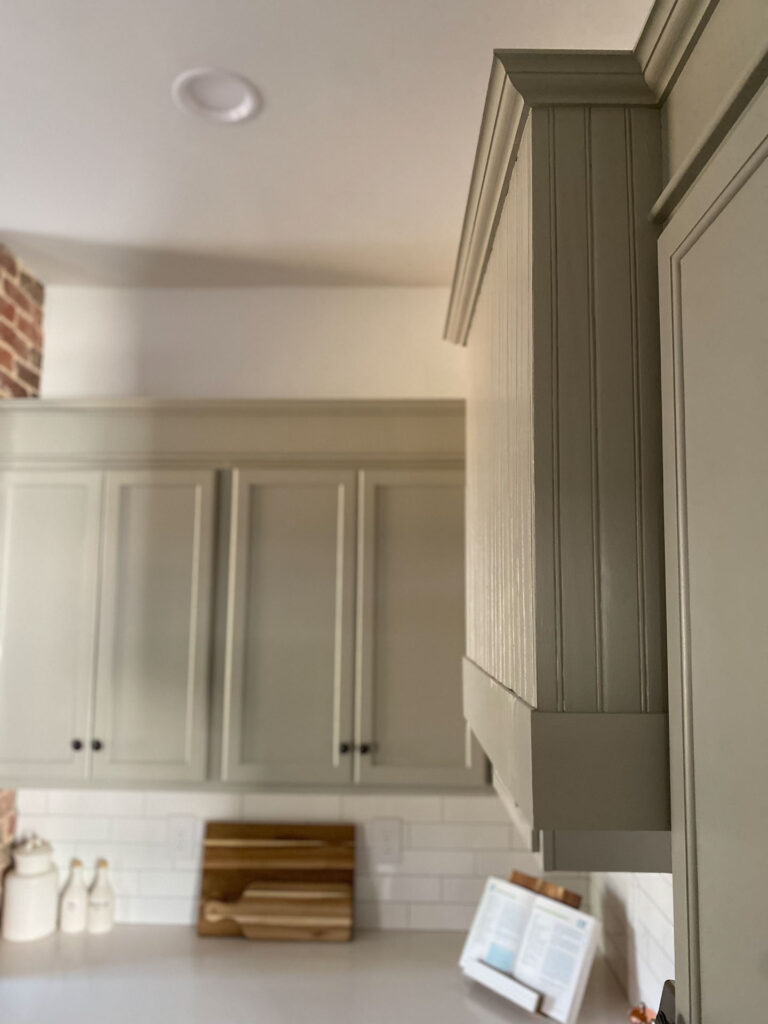
One of the ways we made the stock cabinets look custom was to add trim along the top. This look was comprised of three pieces to add height and crown molding along the very top. I also had him build a small bookshelf around the exposed brick so that the countertops could be continuous. It also added a little extra space to display items.
Painting the Kitchen Cabinets
With the cabinets installed and trimmed out, it then was my time to paint them. I started with a coat of primer and then used Sherwin Williams Infinity Paint in satin. While I did start off by trying to paint the cabinet fronts, I quickly shifted to using a brush and small foam roller instead.
Here are the supplies I used to paint the stock cabinets myself:
Zinsser Bulls Eye Primer
Sherwin Williams Infinity Paint
Purdy Brushes (I prefer the small angled brush)
Small Foam Rollers
PAINT COLOR: Cabinets: SW7045 Intellectual Gray
While it did take two coats of paint, I was shocked at how well and smooth the first coat went on. The paint is pricey but the quality is definitely worth it if you’re painting your own cabinets.
Repurposing the Salvage Beadboard
One of my favorite things to do in any historic home we work on is to save and preserve as many original or old house details as possible. When we can’t, I like to save materials to reuse elsewhere. And that’s exactly what we did in the kitchen. When we had to tear down what was left of the back addition, I had the guys save as much of the beadboard as possible.
I was able to reuse it in the kitchen both on the hood my carpenter built me and along the back side of the island.
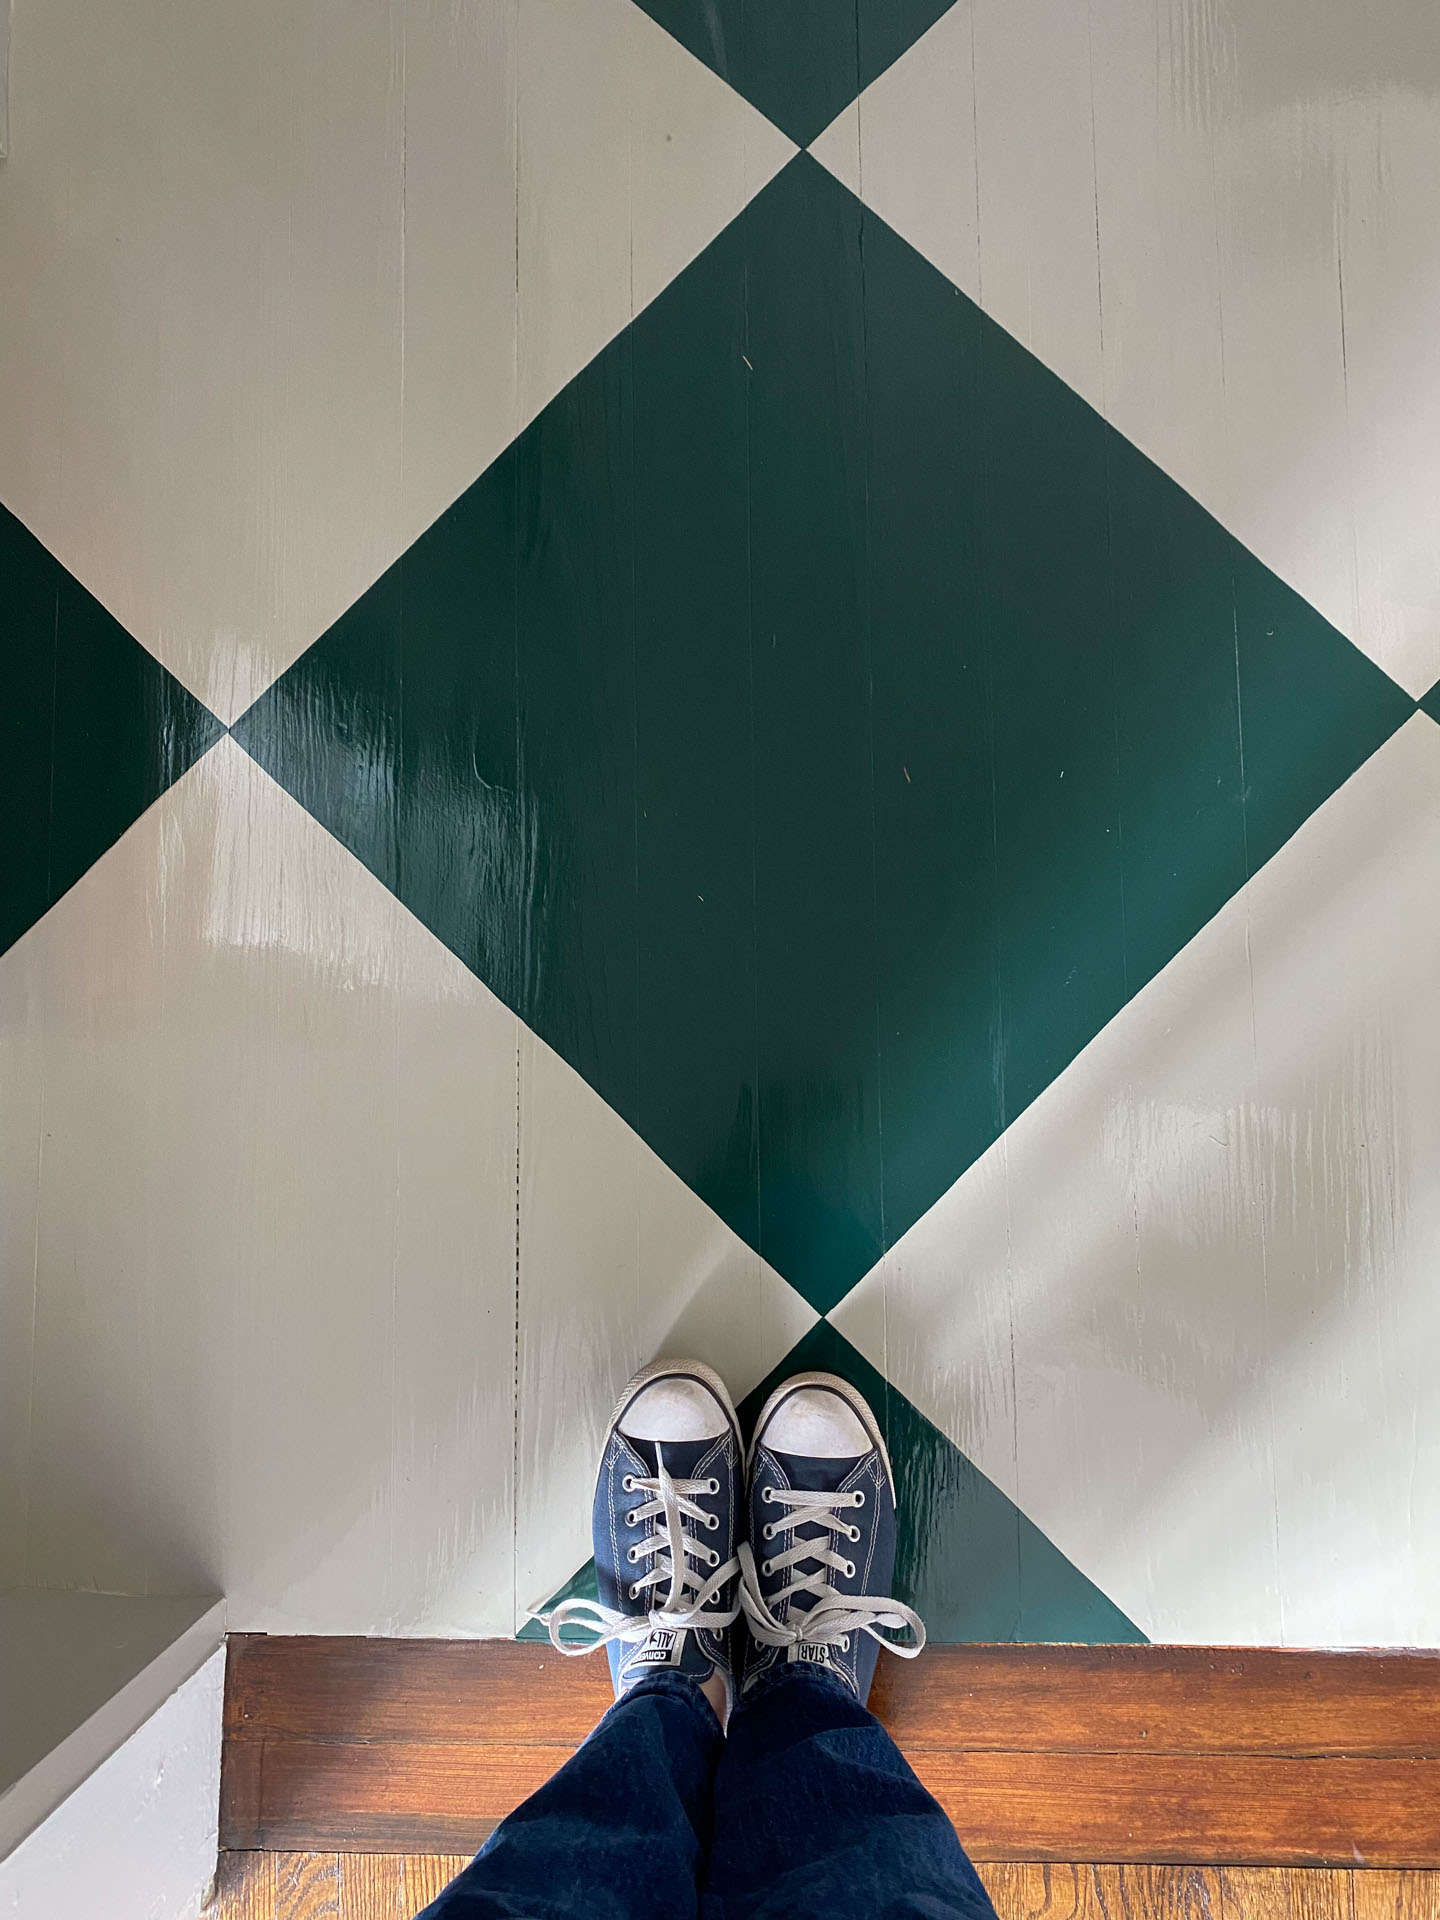
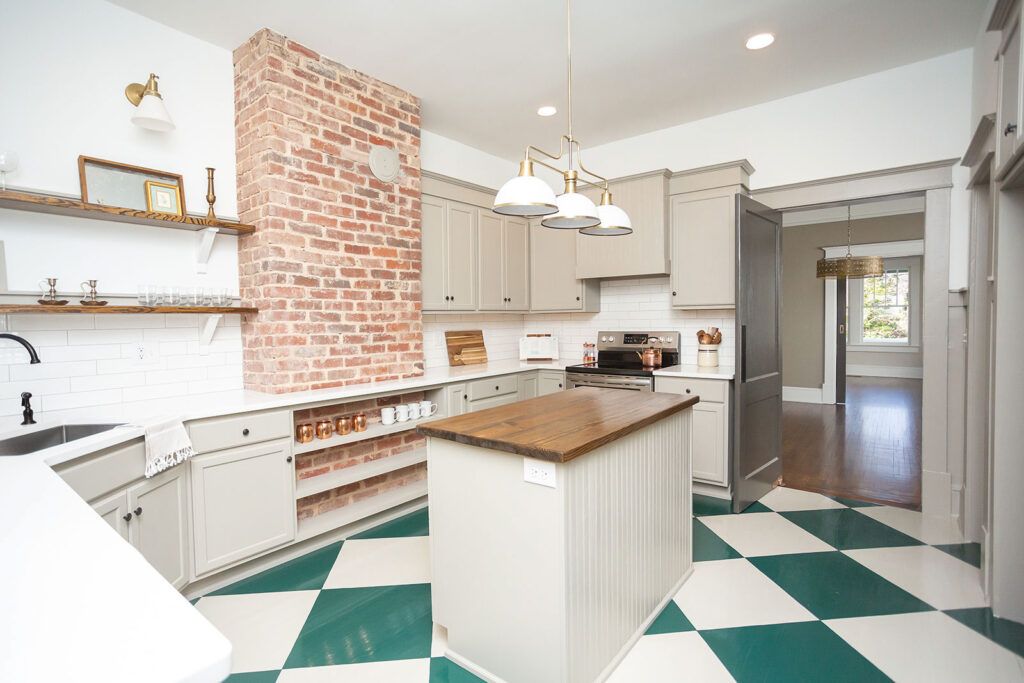
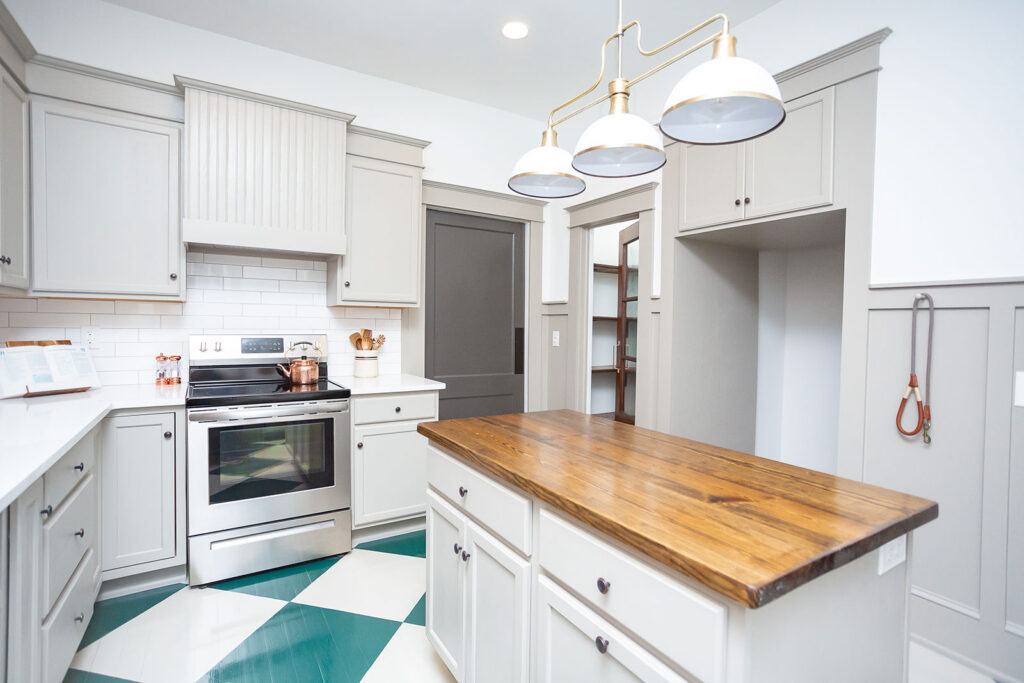
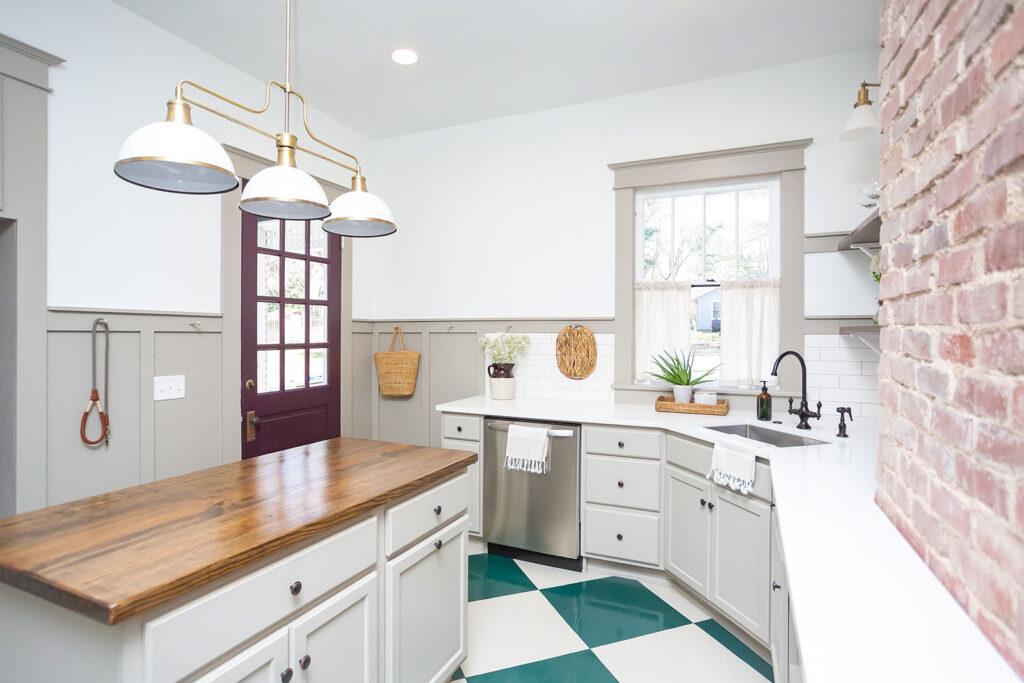
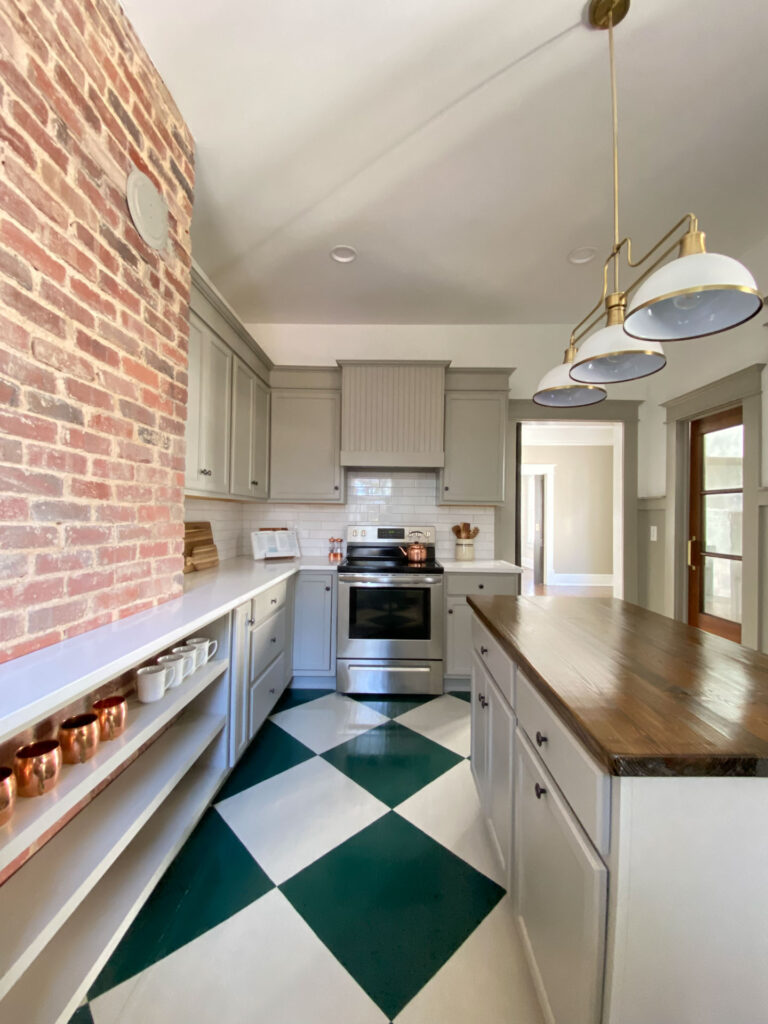
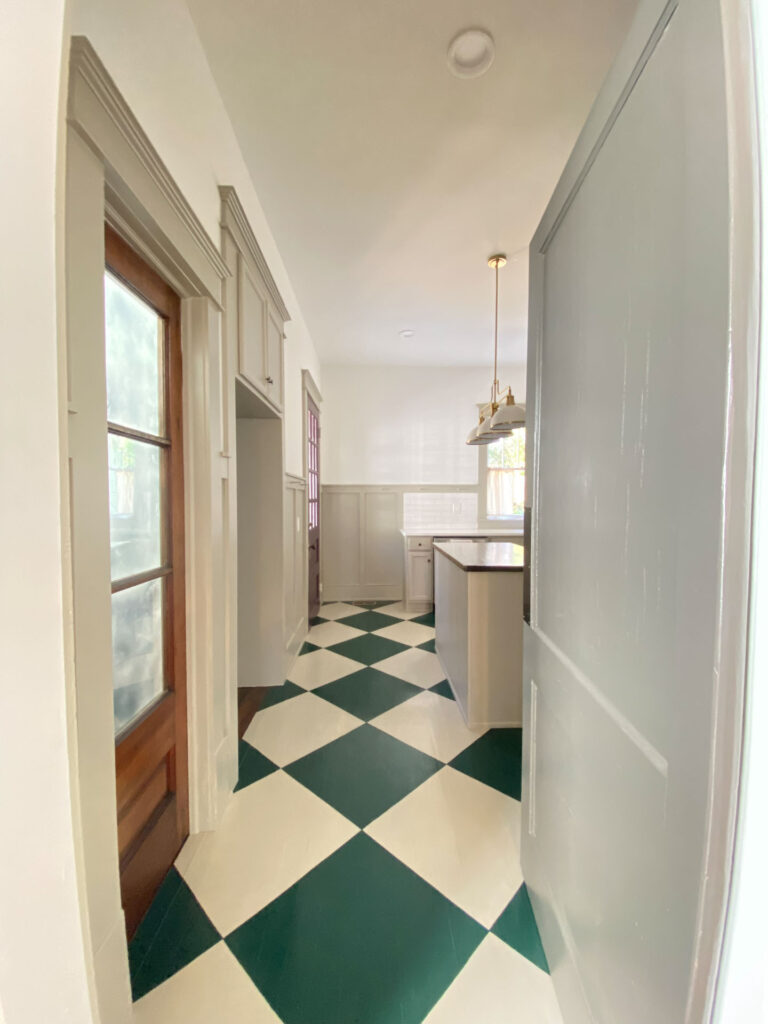
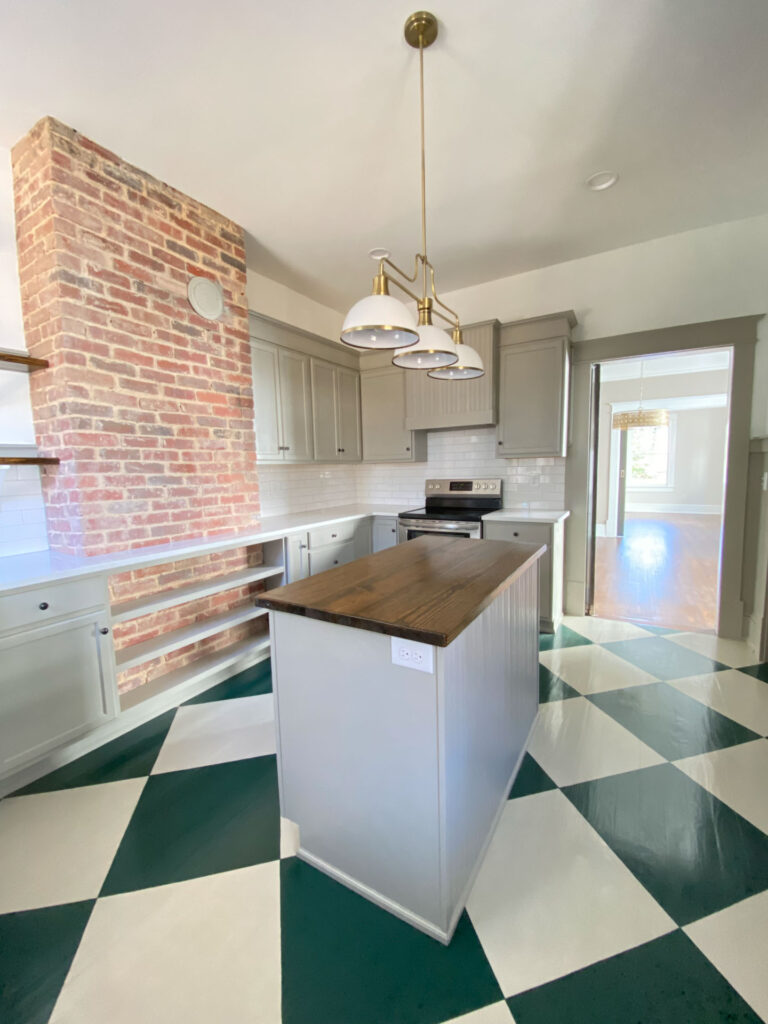
The Checkerboard Floors
The last major part of the kitchen transformation came by way of the checkerboard floors. As much as I wish I had a detailed, step-by-step plan for you, I don’t. Let’s just say I winged it. When the floor guys refinished the rest of the house I had them go ahead and sand these floors to a smooth finish.
Next I primed them and then got out my tape measure and pencil. Once I decided on the size of the squares I marked it on the floors with a pencil and then I started painting. Painting by hand that is. I skipped using tape and just went for it. And thankfully, my hand was stead enough for it to work.
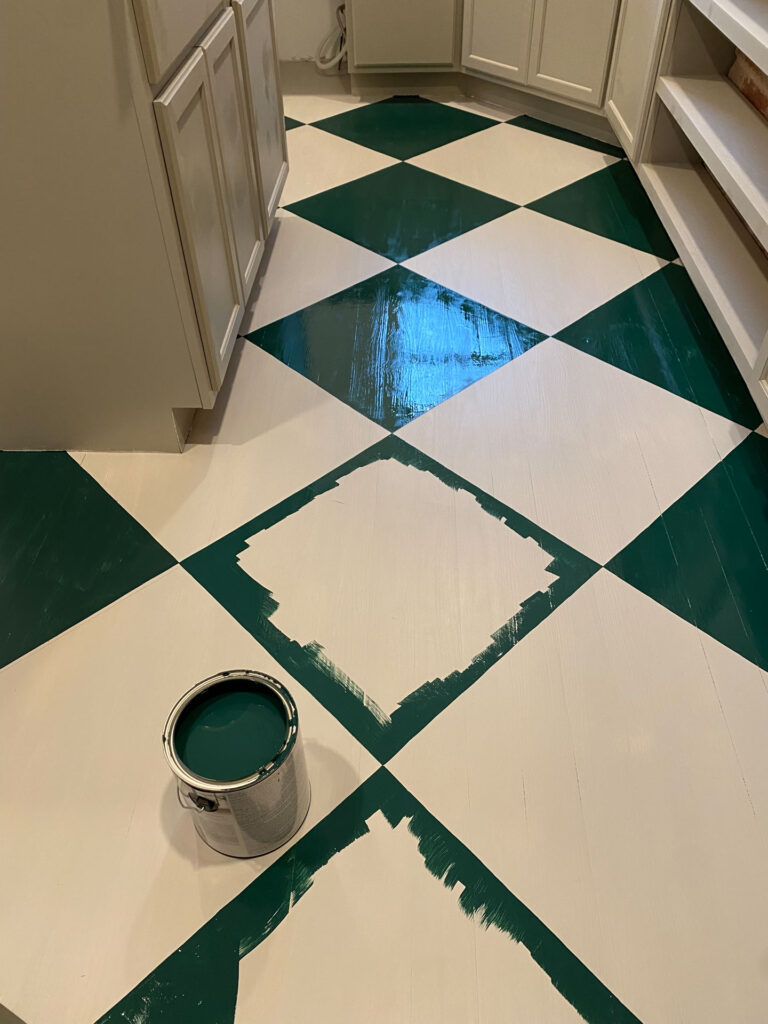
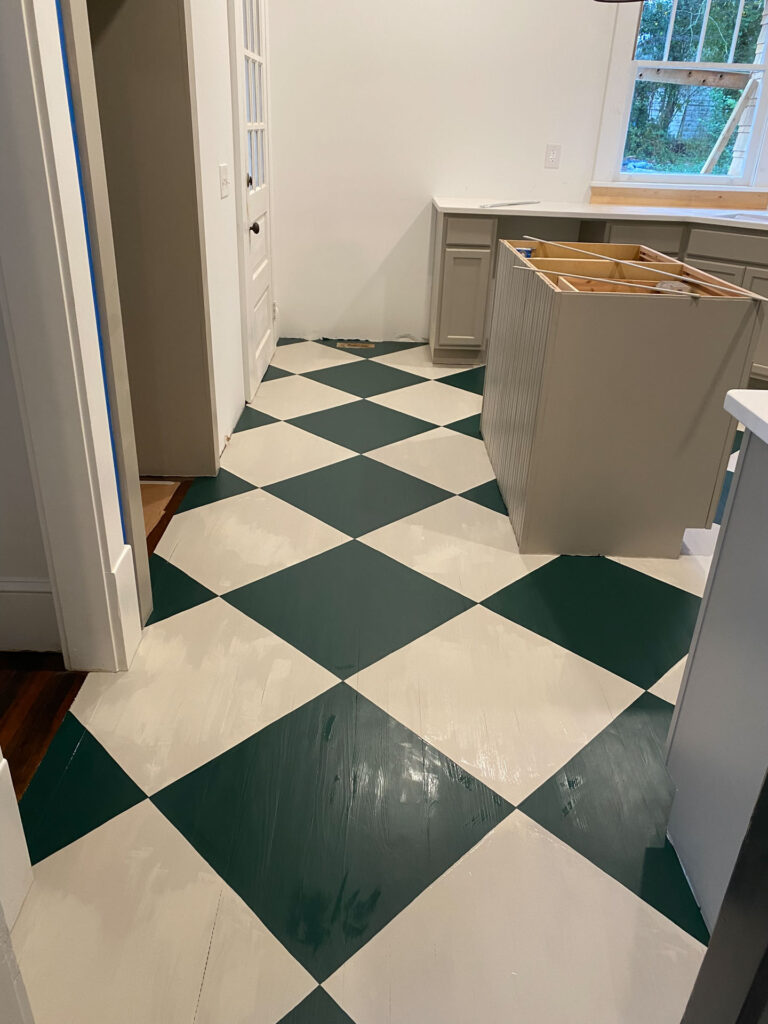
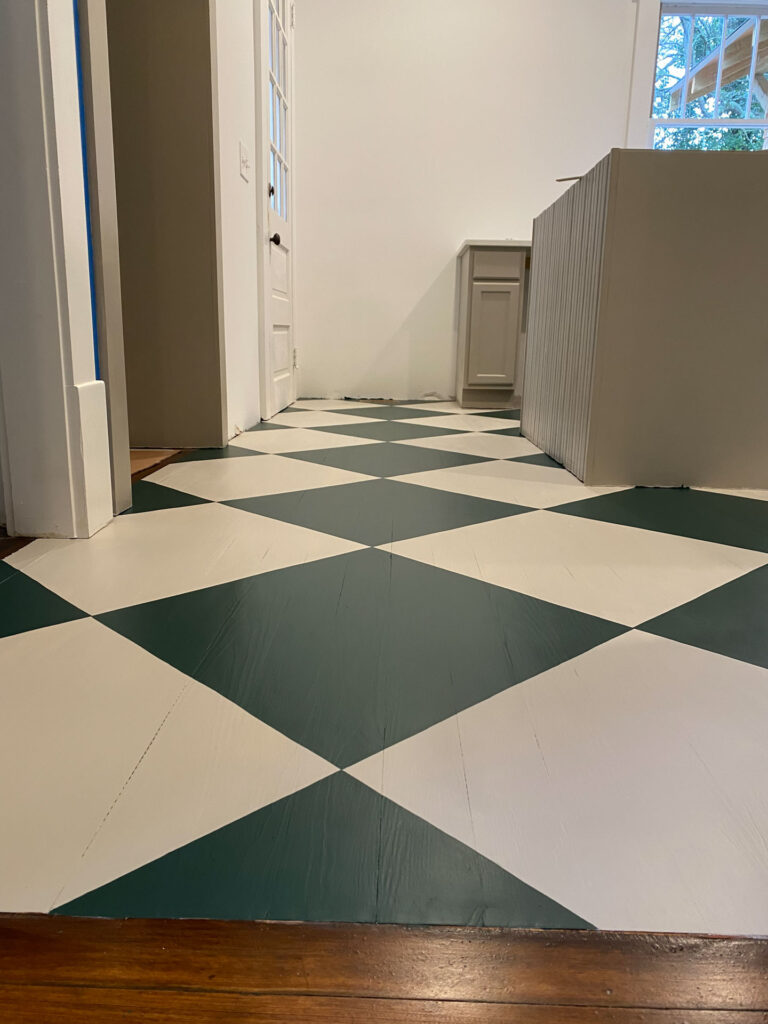
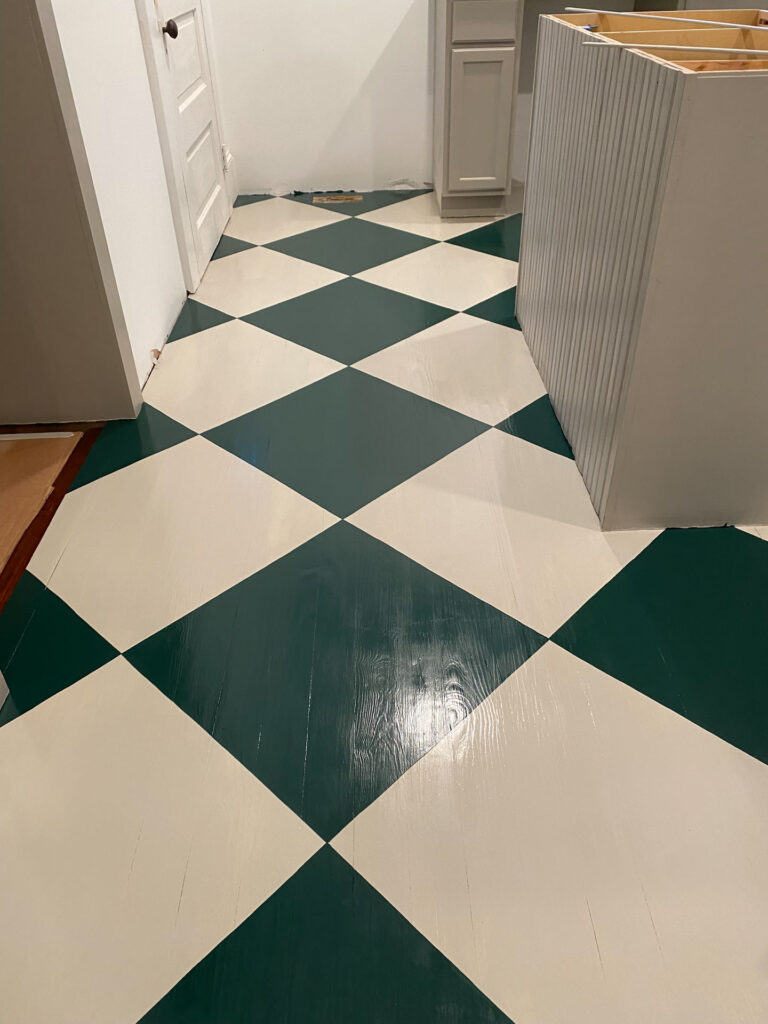
Both colors were Valspar Porch Paint in Satin I did the lighter color first followed by the dark green. While I did have to do some touch-ups to straighten out some of the lines, overall it went pretty smooth. I did two coats for each color and then added two coats of polyurethane for protection. I personally loved the way it turned out!
PAINT COLORS:
HGSW Coriander & Olive and SW Amazing Gray
The Finishing Touches
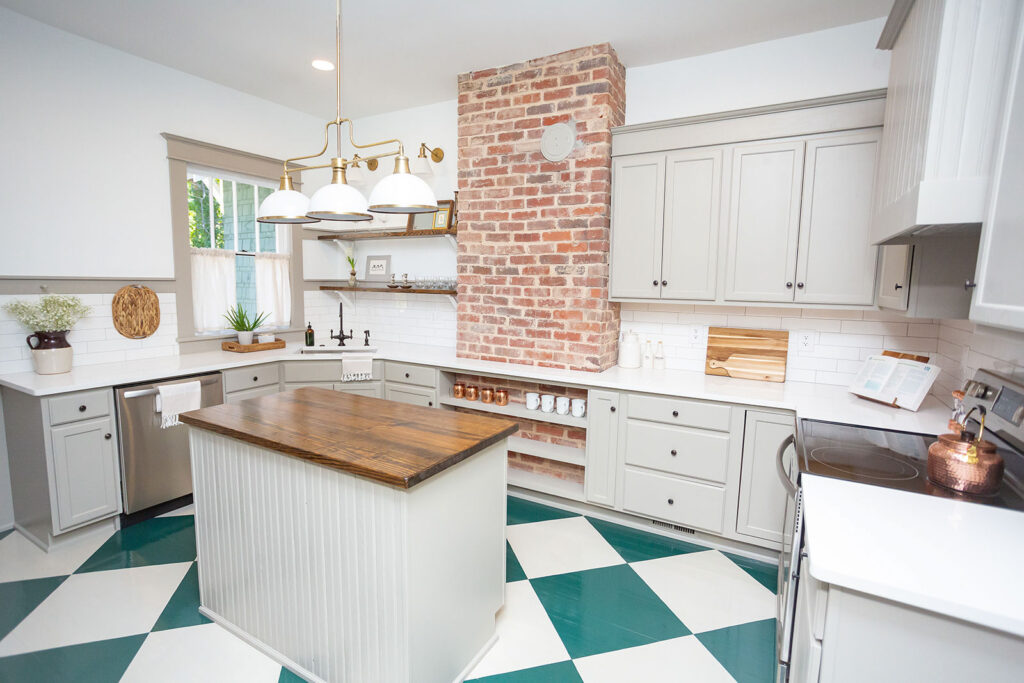
The last few finishing touches came down to fixtures, shelving, and the countertops. We added a quartz countertop in White Porcelain along the wall cabinets and I made a cedar countertop for the island.
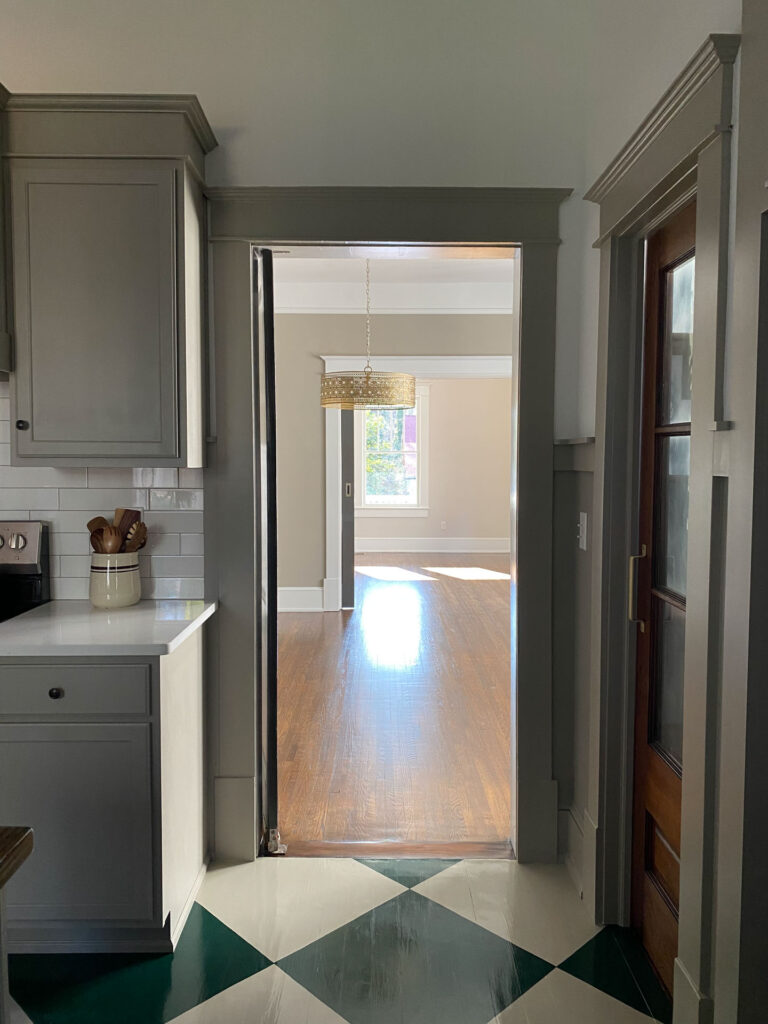
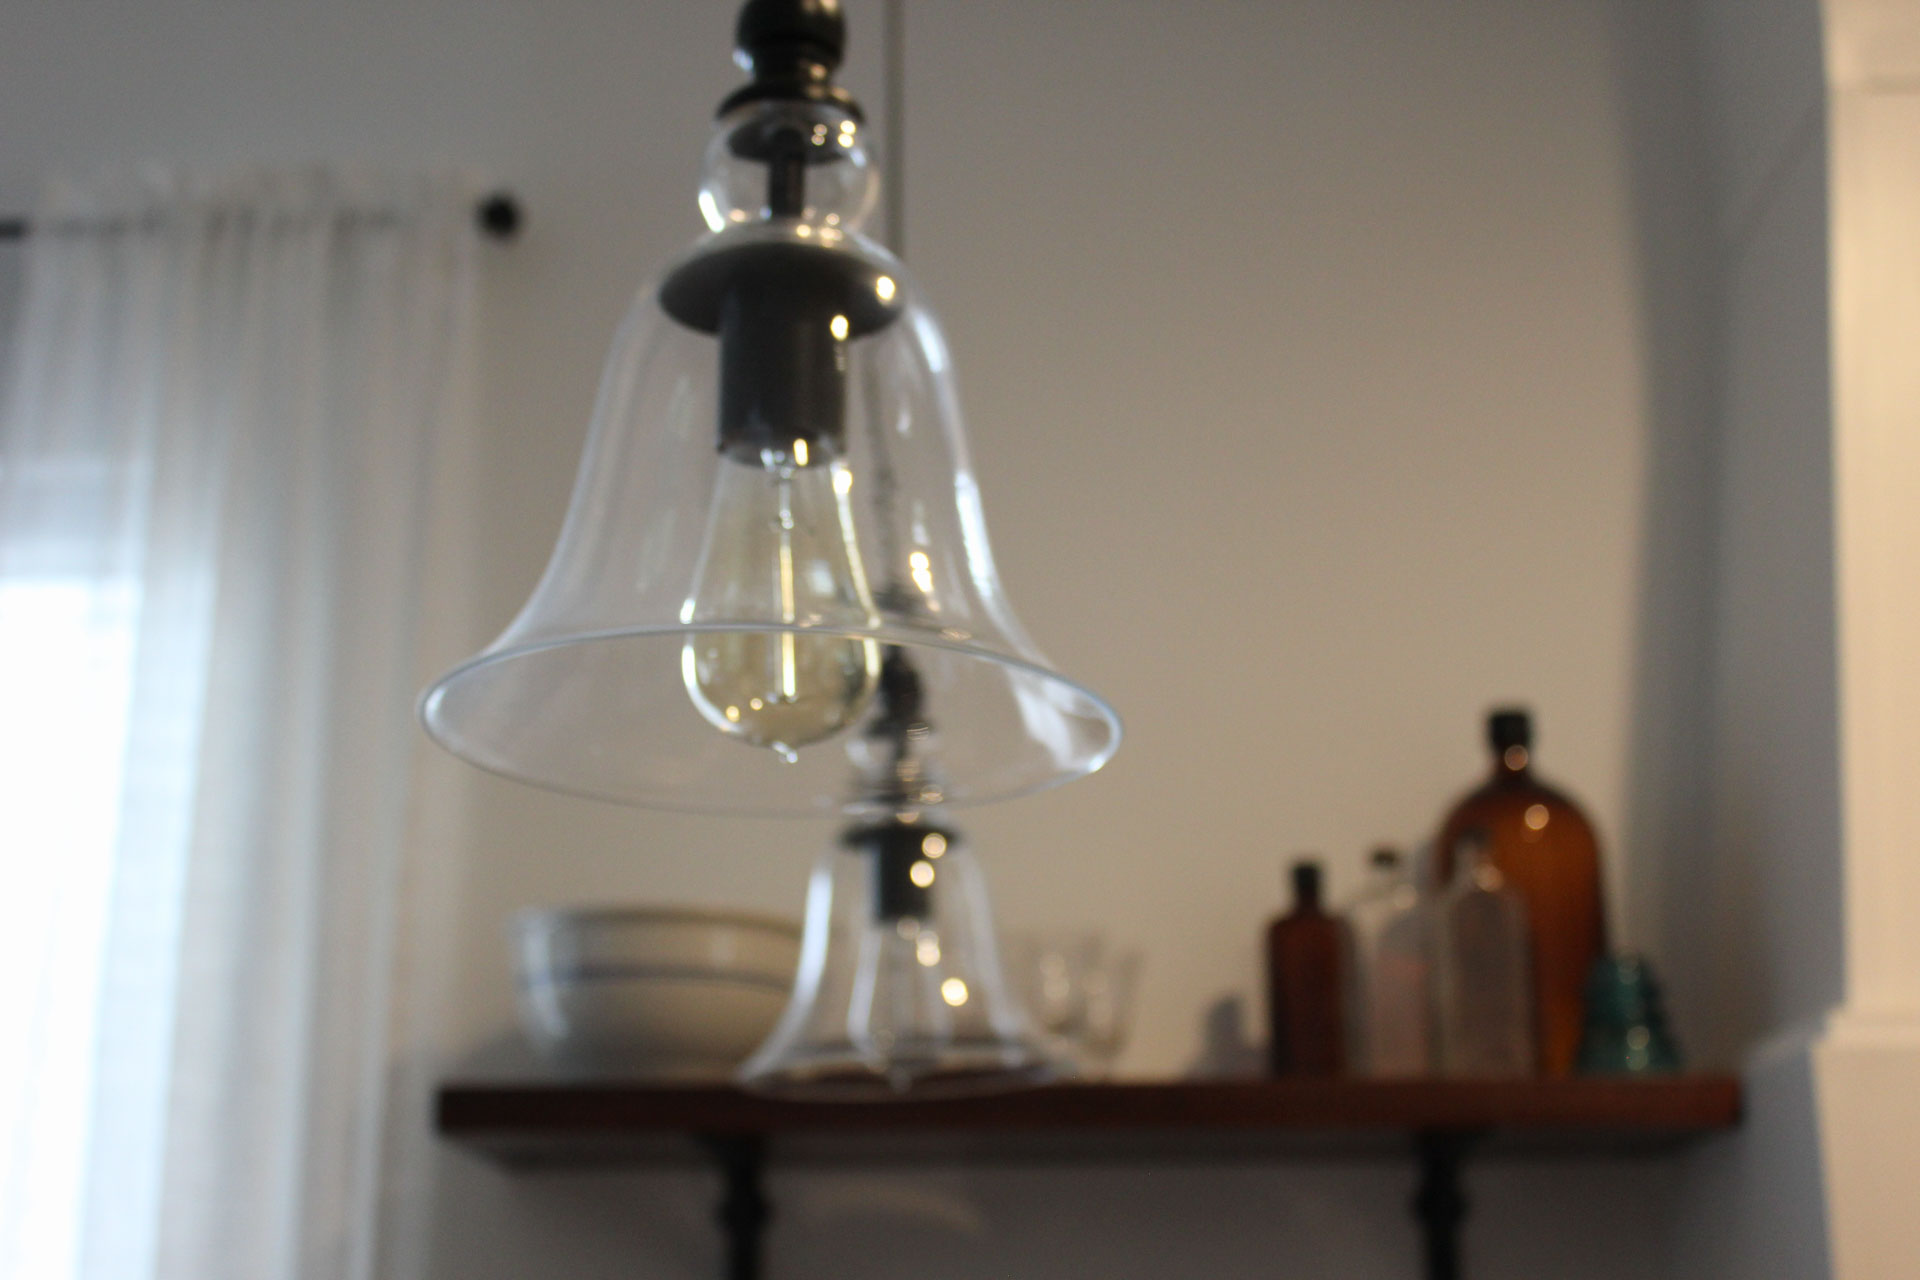
To the right of the kitchen sink, we added some wood shelves with a subway tile backsplash. And of course we added some beautiful lighting to finish the space. I also added board and batten along the back door wall and painted it along with all of the door and window trim in the same color of paint as the cabinets for contrast against the white walls.
KITCHEN SOURCES:
Wall Sconces
3-Light Pendant
Kitchen Faucet
Undermount Sink
Oil-Rubbed Bronze Cabinet Knobs
The After – Kitchen Transformation
Once all of the finishing touches were wrapped up, the kitchen transformation was complete and the space turned out beautiful. This new kitchen is loaded with old house charm and attention to detail everywhere you look.


For all of the sources for Peronneau Place click here and if you need help reworking your kitchen floor plan, be sure to click on the link below to find out how we can work together.


+ Show / Hide Comments
Share to: