Guest Bedroom Renovation: Week Two
Hey friends! Hope you’re enjoying the spring weather and get a chance to be outside. Or at least for those of you here in South Carolina. I sure have, so much so that I’ve neglected getting started on my guest bedroom renovation. In case you’re a new visitor, head over to last week’s blog post to catch up or head to the One Room Challenge website for all of the details.
One Room Challenge: Week Two
Okay now that we’re on the same page, I did want to give you a little background as to what this space was when I bought the house and what it will become. Formerly the dining room of the house, we flip-flopped the house lay-out to make better use of the overall space.
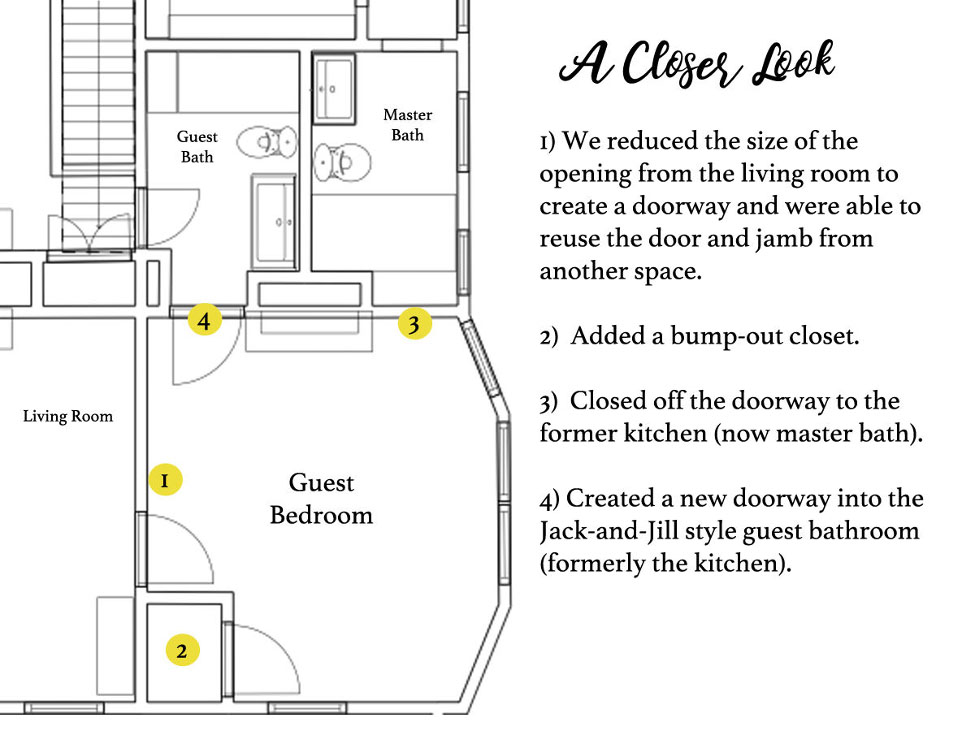
In order to transform the former Dining Room into a Guest Bedroom, we made the following modifications:
- We took the wide cased opening between the living room and then dining room and scaled it down to make a proper sized opening for the bedroom door.
- We created a bump-out closet since all bedrooms require closets.
- We closed off the doorway that led to the (then) kitchen (now master bathroom).
- Opened up a new doorway leading to the new guest bathroom.
Here’s the Reworked Floor Plan:
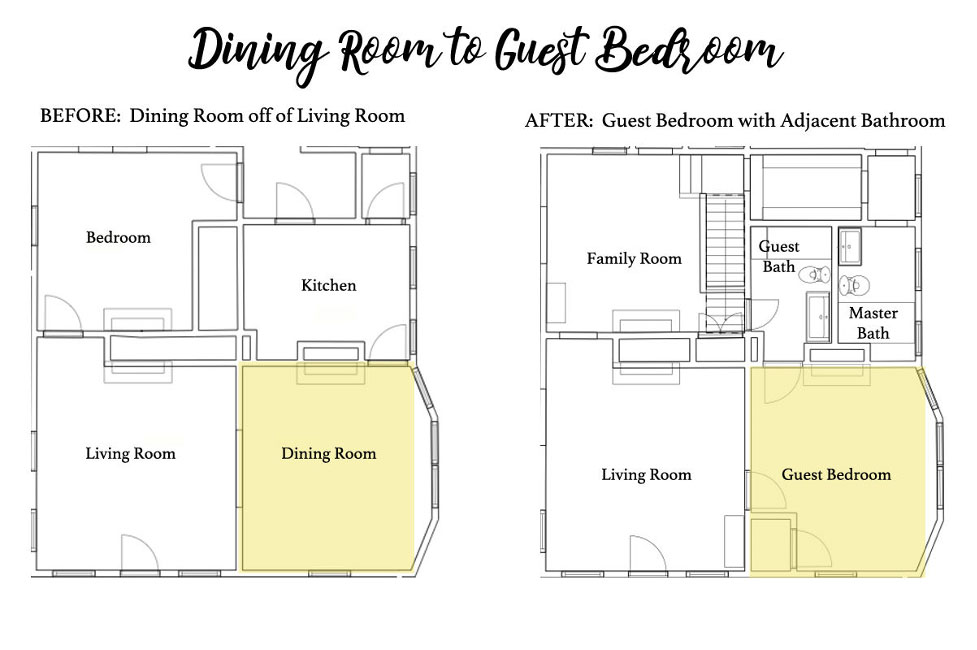
The Before
During the larger transformation of the entire house, all of these framing and lay-out changes were taken care. We had also already tackled the electrical, plumbing, drywall, and so on. So at this point the room is technically ready to go with the exception of making it beautiful.
Here’s what it looks like today:
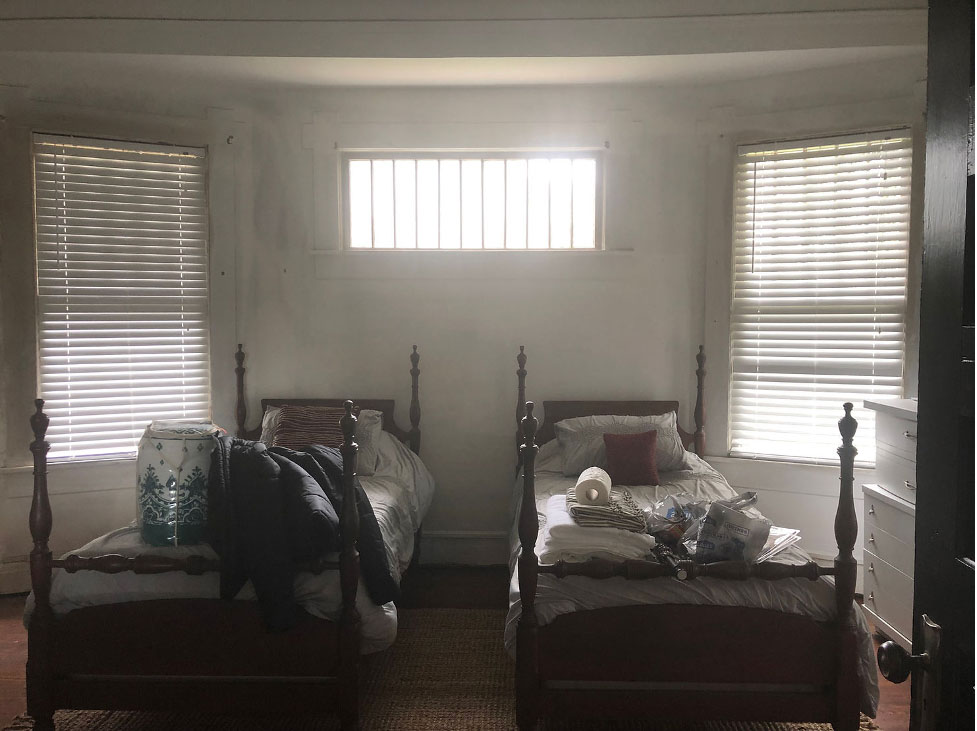
We’ll be using these two beds because I LOVE them but I’m still unsure on the bedding. You can’t actually see the bedding because of all of the junk because this room has become a catch-all.
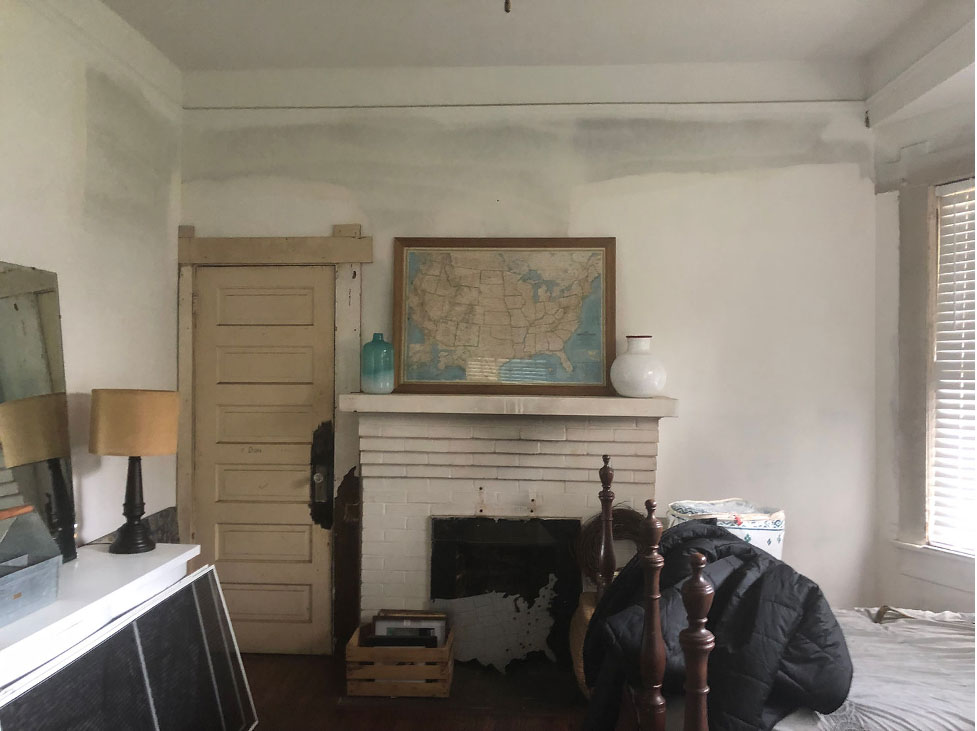
This view shows the new door leading to the guest bathroom and to the right was the former doorway leading to the (former) kitchen.
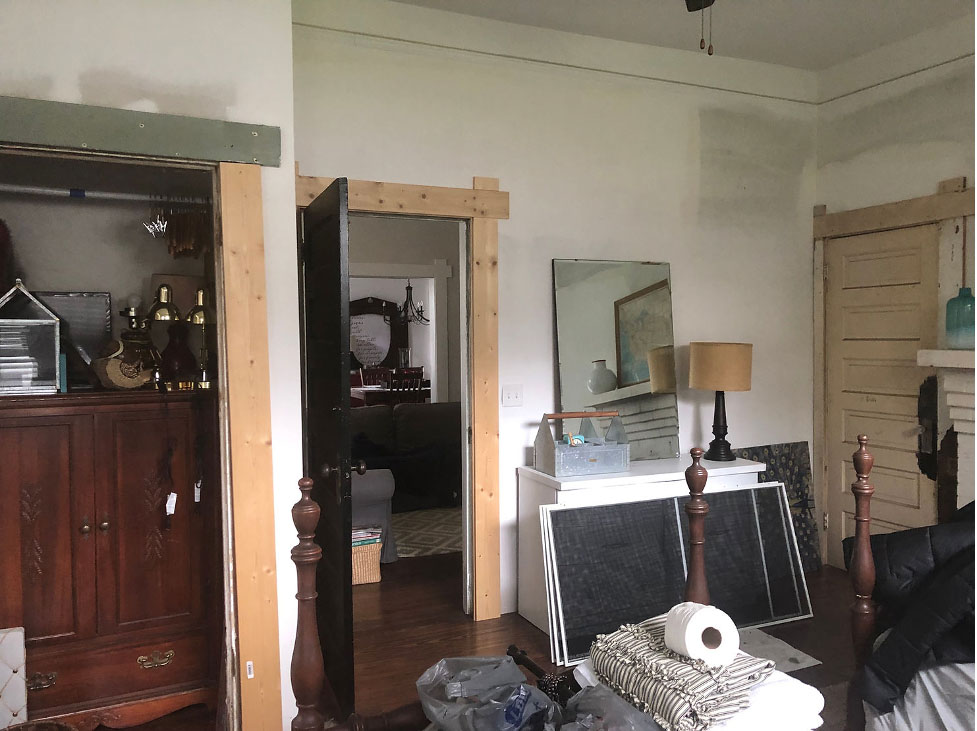
Here you can see where we scaled down the doorway size and added a bump-out closet. All of the trim is in place and just needs to be painted and the closet door needs to be hung still.
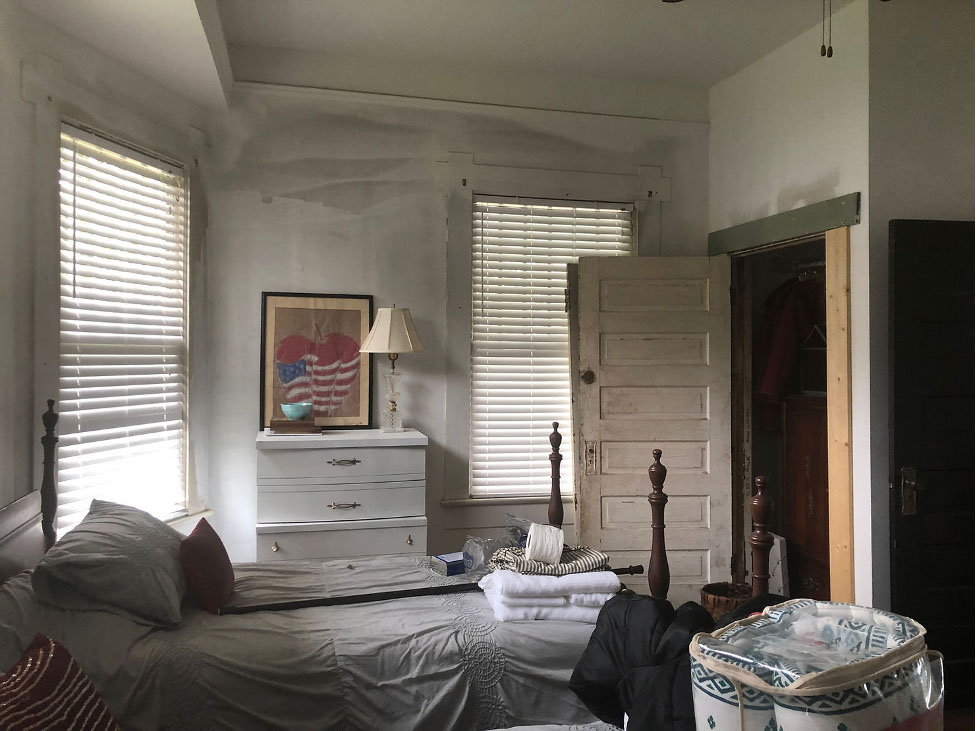
Just another view of all of the junk I currently have piled up in this room. I will also be reusing the dresser and vanity as they belonged to my Papa and I painted them a fresh coat of white.
The bump-out wall where the beds will be anchored on will have a pretty wallpaper and the rest of the walls will receive a fresh coat of white paint too. I love a white backdrop to showcase the things I love most and also want to created a peaceful and tranquil space for guests.
Check back next week and hopefully we’ll make a little more progress! Until then be sure to check out all of the other talented individuals participating in this spring’s One Room Challenge.

+ Show / Hide Comments
Share to: